How Should Hiking Boots Fit?
If you click and purchase with one of our links, we earn a commission. Thanks.
Stomping through the forest trails on a rigorous hike while taking in the scenery gets more breathtaking with each step. But are your feet having as much fun as you? Just because your feet do most of the work on hiking excursions doesn’t necessarily mean getting blisters and sores on your heels.
If you want to make the best out of your nature trails, mountaineering adventures, and hiking trips, it’s essential to have the right footwear. Having the right pair of hiking boots will allow you to scale rocky terrains and enjoy the surroundings with a smile! On the other hand, an ill-fitting boot will leave you wincing in pain with every step. So it’s vital that you pick the right pair and one that fits and offers excellent padding and protection.
Types Of Hiking Boots
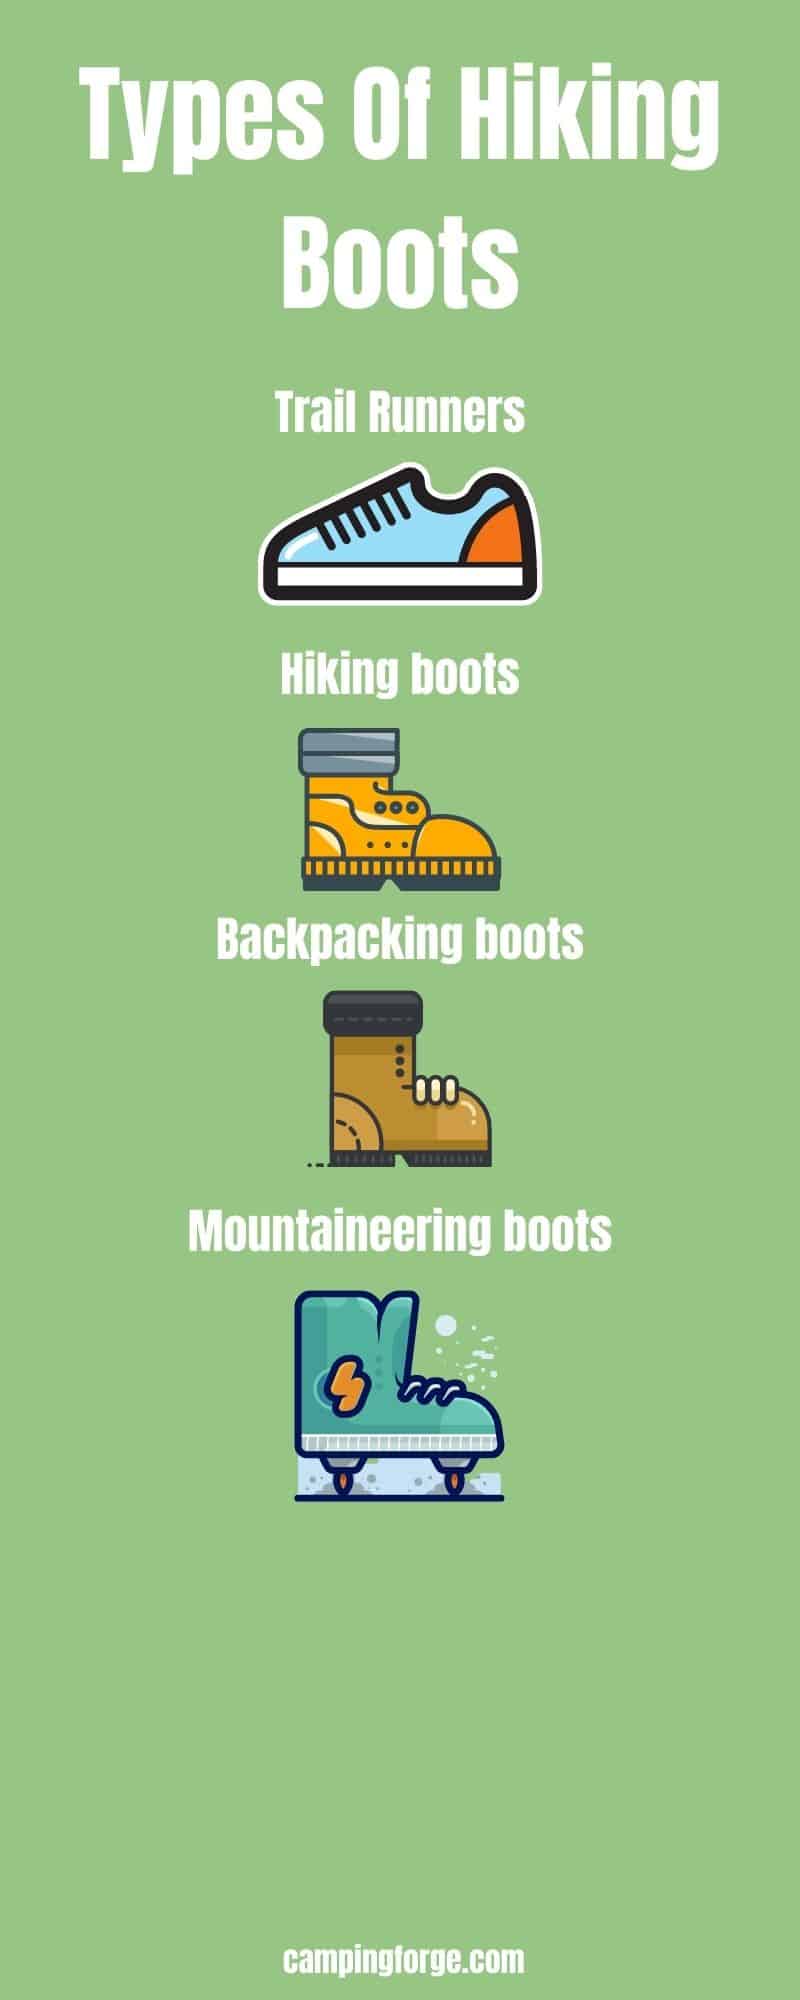
Typically, different types of hiking footwear are accompanied to be a varying set of features.
Light hiking boots: They are low-cut and resemble running shoes. Their midsoles are soft and flexible, which makes them great for hiking and traveling during the day.
Hiking boots: If you want boots for day hikes that involve carrying light loads or backpacking trips, then this is the right shoe. They are either mid- or high-cut and flex easily, so it takes little time to break into them.
Backpacking boots: These hiking boots are intended for multiday trips to the backcountry that require you to carry loads of different weights. Their midsoles are stiffer to offer more sturdiness and durability. They are ideal for on-trail and off-trail travel.
Mountaineering boots: These boots are heavy, have stiff midsoles, and accept crampons, enabling them to be well-suited for heavy loads and facilitate glacier travel. They are durable, tough, and supportive.
A Glance At The Basic Construction Of Hiking Footwear
The anatomy of the boot is as essential as the material used for construction. Low-quality construction can lead to splits, rips, and leaks, all of which hurt your feet. So it’s crucial you understand the basic construction of hiking footwear to help you pick boots that are right for you.
Upper: Typically, the upper part of the boot is made from various materials like full-grain leather, nubuck leather, or synthetics.
The boot is padded on the inside for comfort and has waterproof linings. The upper part determines the boot’s fit and insulation.
Mid-sole: The mid-sole provides cushioning, absorbs shock, and partially dictates the boot's stiffness.
In some hiking boots, the mid-sole is hidden under the outer-sole. Bootmakers usually use EVA or Polyurethane to make the mid-sole.
Outer-sole: The outer-sole is the part that gets into contact with the ground.
So it’s made from a rubber compound that is tough and grippy. Outer-soles made from a hard compound are more durable but offer less grip, while those made from a softer compound are less durable but are more grippy. Treads or lugs are added to the outer-sole to give the boot more grip across various surfaces. Heavy-duty boots tend to have deeper lugs and a more profound tread pattern.
Innersole: This is the removable insert that pads your feet's soles.
The innersole enables you to adjust and customize the fit and sizing of your boot. On top of this, it provides more cushioning and support.
Shank or Internal support: In-between the outer-sole and the mid-sole, there is a stiffened 'sheet' or 'shank' whose purpose is to provide the boot with additional load-bearing stiffness.
Shanks are more common in heavy-duty boots. Besides providing the boot with additional stiffness, shanks protect the foot from bruising.
Laces: Lastly, the boot's laces.
Laces play a significant role in securing the boots on your feet and ensuring their proper functioning. Hiking first-timers tend to lace their boots loosely, causing slipping and rubbing inside the boot.
How To Choose The Right Hiking Boots
Pre-Shopping Preparation.
If you want to select the right hiking boots, visit the shoe store at around noon or late afternoon since feet tend to expand a little as the day progresses. Carry any orthotics or inserts that you use.
Observe Your Bare Foot's Characteristics
Apart from your sockless foot length and width, observe its volume and arch. Typically, if your foot’s bones and veins are visible, the chances are you have a low-volume foot. If your feet are less bony with some roundness, you have a high-volume foot. Your foot’s arch is high or medium if you can slip your finger under it. You have a flat foot if you can’t slide a finger under the arch. Your observations should be the basis of your hiking footwear selection.
Try-On Three Different Pairs
Work with the store’s salesperson to select three pairs that seem to suit you. If the selected boots don’t work for you, request another round of pairs until you have a couple of ideal pairs.
Spend Some Time In Each Pair
Take some time in each boot and observe the following situations:
- As you walk uphill, what’s the position of your heel? Does it stay in place?
- As you walk downhill, do your feet slide back and forth, and do your toes feel congested inside the boots?
- Do your toes touch the edge of the toe-box?
These observations will help you determine if the boot has the right volume, length, width, and ultimately if they’re the right hiking boots. If your forefoot is getting pinched or you feel an odd bump, then you don’t have the right boots.
If everything about the boots feels right, take them home and wear them for some hours. If they still feel right, you have made the right choice.
Fit & Sizing: The Most Important Factors - How Much Room, Exactly Should You Have In Hiking boots?
The most critical factor during boot selection is how the boot fits. For a boot to have the perfect fit and sizing, it should:
- Length: The boots should be long enough to give your toes ample space to wiggle easily and freely.
- Width: The boots should not compress your feet from side to side, nor should they allow them to slide around inside footwear.
- Volume: The boot’s interior should be big enough to fit the “bulk” of your feet securely.
How Should Hiking Boots Fit?
Below are hacks to make sure your hiking boots fit:
- Know your size. If you don’t already know your size, measure your foot’s length, width, and arch length. Additionally, have a specialist at the store assess your foot’s volume. Pull the insoles out and stand on them to double-check. The space between the end of the insole and your longest toe should be as big as a thumb’s width.
- Avoid fitting boots in the morning. Feet swell a little as the day progresses, so trying on boots later in the day when your feet at their largest will prevent you from buying boots that do not fit. *Bring your orthotics along because they affect the boot’s fit.
- Wear your thickest pair of socks. When fitting your boots, it’s essential to try them on with the thickest pair of socks you have or the socks you would typically wear while hiking. Wearing familiar socks help you to assess the fit and feel of your new boots quicker.
- Spend some time in the boots. Try different hiking simulations like strolling around the store or ascending and descending a flight of stairs. Look for an inclined surface or steep slope and walk on it.
- Share any fit and sizing issues with your footwear specialist: If you have a bunion, let your footwear specialist know about it. You should not feel any uncomfortable tightness or pressure points due to seams and bumps. If you lace your boots firmly, you shouldn’t feel any space above the top of your foot.
- Use a different lacing technique: Your boot’s fit and sizing are affected by how you lace them.
- Consider investing in aftermarket insoles because they enhance support, comfort, or fit.
- Before you embark on your trip or hike with your new boots, ensure you break into them to avoid getting sore feet while hiking.
Different Ways To Lace Your Hiking Shoes To Ensure A Perfect And Comfortable Fit
There are various ways you can lace your boots to offer a comfortable and perfect fit.
- Surgeon’s Knot: This is a versatile and straightforward method of lacing that can prevent your heel from excessive slipping as you hike.
- Window Lacing: This lacing method helps alleviate the top of your foot from pressure.
- Toe-Relief Lacing: Toe-Relief Lacing helps relieve pressure in the toes by creating a stopgap in the toe-box.
- For better ankle mobility: Lace the boots from the bottom heading to the top, then loop back down the boots around the eyelets and hook into the eyelets below. Pass the laces over themselves and tie a firm bow when they bite.
- For better heel tension: Lace your boots from the toes as usual, but before the ankle section, pass the laces over themselves and inter-wind the laces until they hold firmly. Usually, three loops are enough.
This video from REI will show you 3 ways to lace your hiking boots.
Breaking In Your New Hiking Footwear - How Long Does It Take To Break In Hiking Boots?
What fits and feels comfortable at the store or the first time after trying the boots still needs time to break in before you hit the trails.
Ideally, breaking in your new hiking footwear can take several days. You can start by walking around the house in them for several days. Before your trip or hike, wear them as much as you can to get your feet accustomed to them.
You can simulate the hike by walking around the neighborhood wearing hiking gear, including a weighted pack. The goal of all this is to familiarize your feet with the boots and the expected load.
This approach can help minimize the possibility of getting any sore spots during an actual hike.
A poorly-fitting pair of boots cannot be rectified by changing the lacing, and no amount of break-in can fix a pair that doesn’t fit right in the first place.
Should You Size Up Or Down For Boots?
When selecting boots for hiking, it’s always a good idea to size up. Never size down! The general consensus is to go a half-size up. Your feet should only be loose around the toe section. For instance, if your shoe size is 8, you should size up and go with a size 8.5. It’s easier to fit boots that are slightly bigger than to fit hiking shoes of your exact size.
If you fall in between sizes, always go with the bigger size because your feet are likely to swell during your hike.
Boot Care Basics
Hiking boots stand to have a longer lifespan if they’re correctly maintained. If you dry the boots rapidly or in heat and fail to nourish its leather, cracks and splits will start to appear. Take care of your hiking boots, and they will return the favor.
Here are a few boot care tips:
- Clean them thoroughly to clear all mud and debris.
- Nourish the boots when they look dry.
- Avoid drying your boots rapidly or near a heater because the boot’s material shrinks and starts to crack.
- If you stuff the boots with paper to accelerate drying, avoid overstuffing as it may misshape the boot.
- Waterproof your boots frequently with silicone or wax treatments to soften the leather. This will make your boots more comfortable.
When you’re standing at the crest of a hill enjoying the scenery on your next trail, take a moment to give a thumbs up to your feet. They’ve trekked on rough terrains, stomped on dirt trails, and waded through the mud for you. So it’s only fair you treat them right by outfitting them with hiking boots that fit and offer the right protection so you can make the most of your hiking excursions.