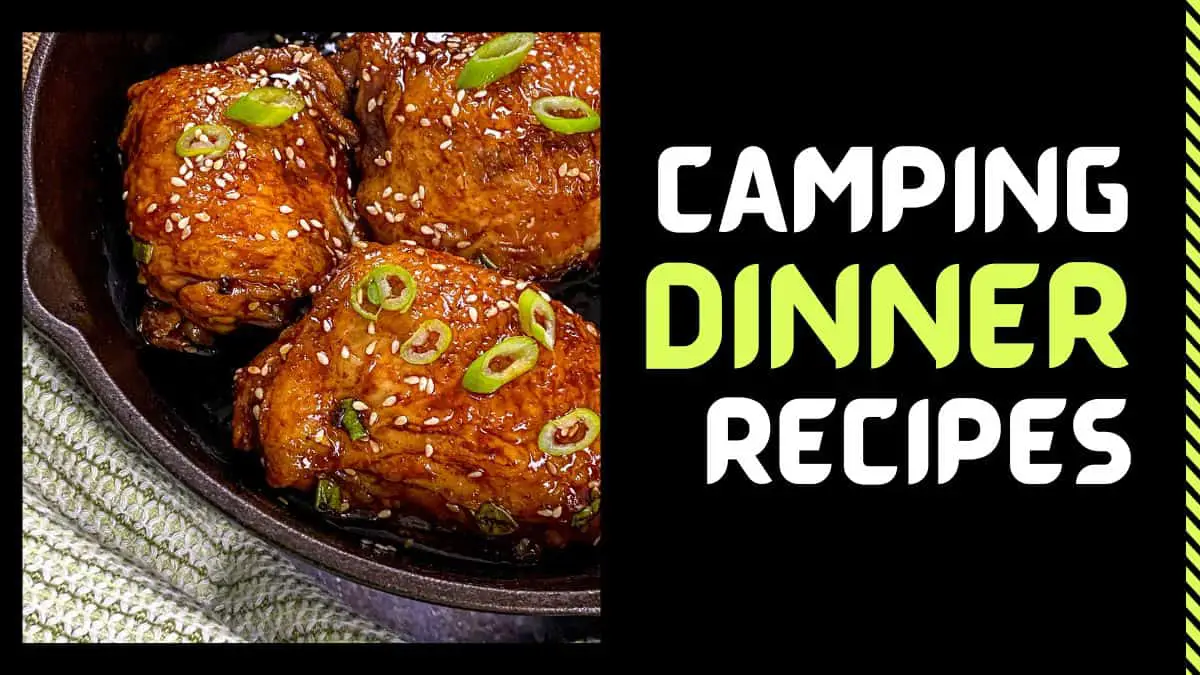
105 Easy Camping Meals For Families

Table of Contents
- Camping Dinners
- Camping Soups
- Camping Sides
- Camping Salads
- Camping Breakfasts
- Camping Desserts
- One Pot Camping Meals
- Foil Wrapped Meals
One Pot Meals
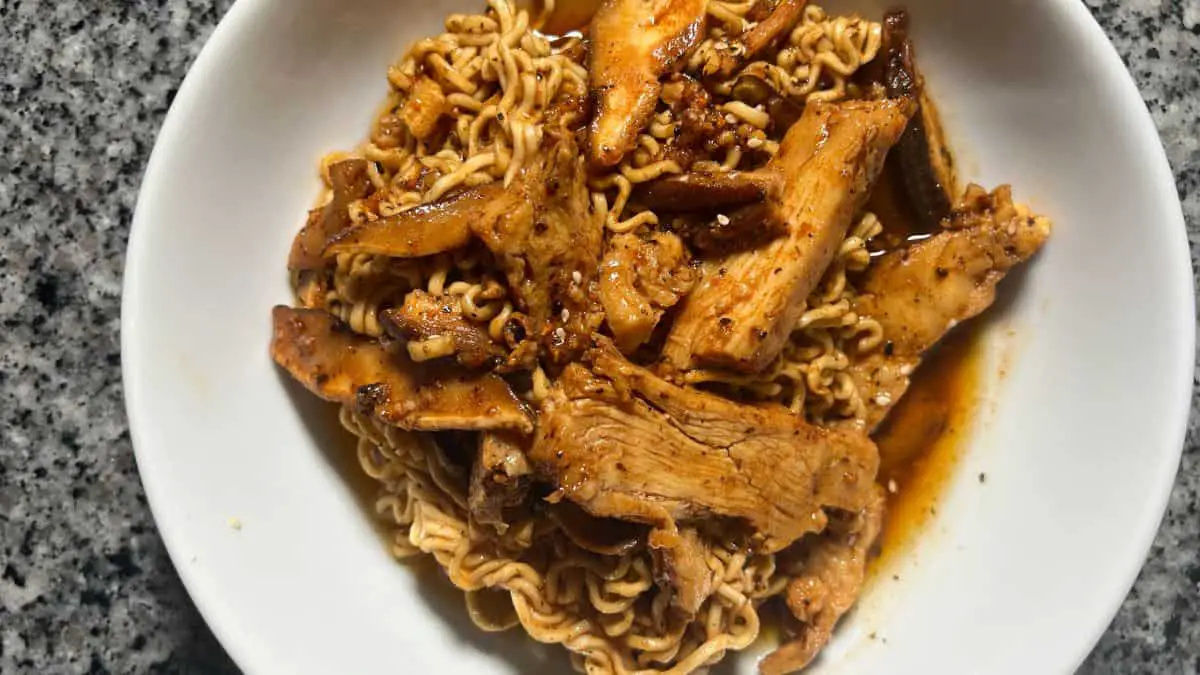
- Instant Ramen Carbonara
- Bacon, Beef, and Beans Dutch Oven Casserole Recipe
- BBQ Canned Tuna Recipe
- Slow Cooker Dutch Oven Shredded Mexican Chicken
- Roasted Italian Sausages with Tomatoes and White Beans
- Campfire Chicken & Rice with Zesty Peanut Drizzle
- Walking Tacos
- Chili Pie
- Campfire Egg in an Orange Peel
- Sloppy Joes
Foil Wrapped Meals
- Campfire Cowgirl Supper in Foil
- Foil-Wrapped Hot Dogs
- BBQ Canned Tuna Recipe
- Campfire Tuna Ramen Noodle Foil Packet Recipe
- Campfire Egg in an Orange Peel
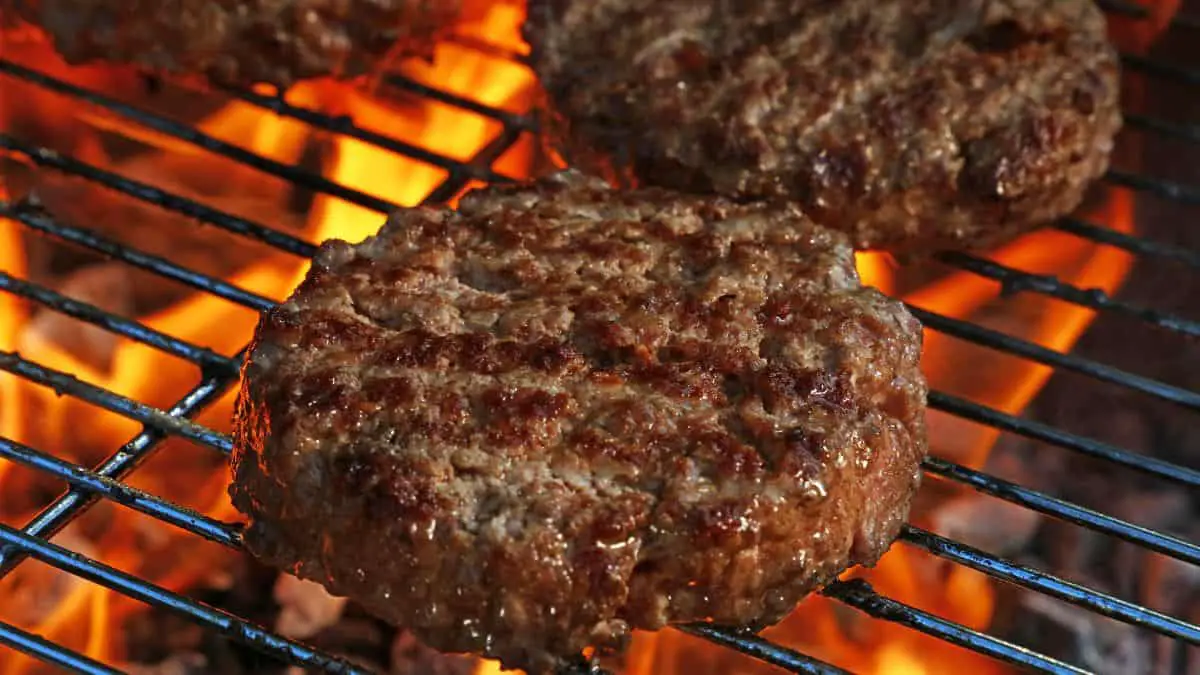
Basic Camp Stove Hamburger Recipe
Equipment:
- Portable camping gas stove
- Non-stick frying pan or cast iron skillet
- Spatula
- Plate
Ingredients:
- Ground beef patties (4-6 ounces per patty)
- Salt, to taste
- Ground black pepper, to taste
- Hamburger buns
- Optional toppings: sliced cheese, lettuce, tomato, onion, pickles
- Condiments: ketchup, mustard, mayonnaise
Instructions:
- Prepare the Stove:
- Set up your camping gas stove on a stable, level surface and ignite the burner according to the manufacturer’s instructions. Adjust the flame to a medium-high setting.
- Season the Patties:
- Season the ground beef patties generously with salt and pepper on both sides.
- Cook the Patties:
- Place your pan on the stove and let it heat up for a minute or two.
- Carefully place the seasoned beef patties in the pan. The patties should sizzle on contact.
- Cook the patties for about 3-4 minutes on one side. You’re looking for a good sear that will lock in the juices.
- Using your spatula, flip the patties over and cook for another 3-4 minutes for medium-rare to medium. If you prefer well-done, cook for an additional minute or two.
- Add Cheese (Optional):
- If you like cheeseburgers, place a slice of cheese on each patty about a minute before they’re done cooking. This will give it time to melt.
- Toast the Buns (Optional):
- If you prefer toasted buns, remove the cooked patties and place the buns, cut side down, into the pan for about 30 seconds to 1 minute, or until lightly toasted.
- Assemble the Burgers:
- Place the cooked beef patties on the bottom halves of your buns. Add your favorite toppings and condiments.
- Serve:
- Cap with the top halves of the buns, and your basic camp stove hamburgers are ready to enjoy!
Notes:
- The cooking time will vary depending on the thickness of your patties and the desired level of doneness.
- Always make sure that the beef is cooked to a safe temperature of 160°F (71°C) to prevent foodborne illness.
- Be sure to have a plate ready to rest the cooked patties on if you’re toasting your buns or prepping your toppings.
- For extra flavor, consider adding a dash of Worcestershire sauce or garlic powder to your beef before cooking.
Enjoy your outdoor adventure with this simple, satisfying meal that’s easy to cook on a camping gas stove!
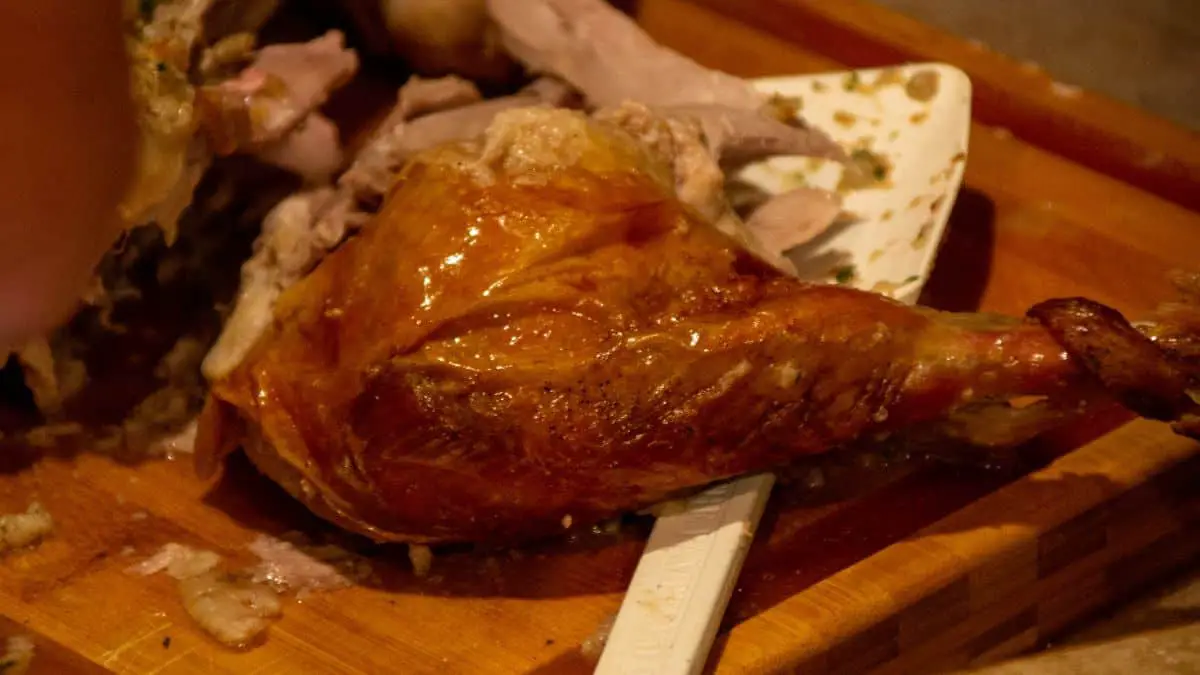
Campfire Trashcan Turkey
Equipment:
- 20-gallon metal garbage can, new and cleaned
- Wooden pole (1-inch diameter, 3-foot length)
- Heavy-duty aluminum foil
- 20 pounds of charcoal
- String or twine
Ingredients:
- 1 whole turkey (approximately 15 pounds)
Additional:
- Side dishes of your choice (e.g., “Cowgirl Supper” or others)
Instructions:
- Prepare the Turkey:
- Rinse the turkey thoroughly and ensure giblets and neck are removed.
- Use twine to tie the wings back against the body.
- Prepare the Cooking Area:
- Drive the wooden pole into the ground securely. Create a slight slope toward the pole if possible, to collect juices.
- Cover the ground around the pole with a flat layer of foil. Wrap the pole itself in foil to prevent it from burning.
- Fashion a foil ball and place it atop the pole to prevent the turkey from sliding down.
- Mount the Turkey:
- Position the turkey onto the pole with the legs pointing down.
- Set Up the Trashcan:
- Invert the garbage can over the turkey, ensuring the bird is centered.
- Press the can into the ground or sand to seal it and prevent heat from escaping.
- Ignite the Charcoal:
- Light the 20 pounds of charcoal until it’s hot and ready for cooking.
- Distribute the Charcoal:
- Carefully place the hot charcoal on top of the garbage can and around its base, using all of the charcoal to create an oven effect.
- Cooking Time:
- Allow the turkey to cook for 2 hours. Time the preparation of your side dishes accordingly.
- Wait Patiently:
- Resist the urge to check the turkey frequently. Opening the “oven” releases heat and can lead to longer cooking times.
- Check for Doneness:
- After 2 hours, carefully remove the can and use a meat thermometer to check the turkey’s internal temperature, which should reach at least 165°F (74°C) to be safe for consumption according to USDA guidelines.
Notes:
- It’s crucial to have foil on the ground not just for catching drippings but also as a safety precaution to keep the charcoal from being extinguished.
- The slope towards the pole helps collect juices, which can be used for gravy or to ensure they do not put out the charcoal.
- Do not add stuffing or additional moisture to the turkey before cooking, as the method relies on the bird cooking in its own juices and the heat from the charcoal.
Enjoy a unique, flavorful turkey with a hint of smokiness from your campfire cooking adventure!
Campfire Stuffed Hot Dogs

Equipment:
- Aluminum foil
Ingredients:
- 8 hot dogs, chopped
- 1 small onion, chopped
- 8 ounces chili (canned or homemade)
- 3 tablespoons barbecue sauce
- 12 hot dog buns, centers removed to create a pocket
Instructions:
- Prepare the Campfire:
- Start your campfire and allow it to burn down to hot coals for even cooking.
- Combine the Filling:
- In a mixing bowl, combine the chopped hot dogs with the chopped onion, chili, and barbecue sauce. Stir until all ingredients are well mixed.
- Prep the Buns and Stuff:
- Lay out a sheet of aluminum foil for each hot dog bun.
- Open the gutted buns and spoon a generous amount of the hot dog and chili mixture into each one.
- Wrap the Stuffed Buns:
- Carefully close up the buns to encase the filling.
- Wrap each stuffed bun tightly in aluminum foil, ensuring the foil covers all sides to avoid any leaks.
- Cook on the Coals:
- Place the foil-wrapped stuffed buns directly on the hot coals of your campfire.
- Let them cook for approximately 15 minutes, depending on how hot your coals are.
- Check for Doneness:
- Carefully check on the stuffed hot dogs by removing one from the coals with tongs and partially opening the foil. Be careful of steam and hot filling.
- Serve and Enjoy:
- Once they are heated through to your liking, remove the stuffed hot dogs from the coals.
- Allow them to cool for a brief moment, then carefully unwrap the foil and serve.
Notes:
- Adjust cooking times based on the intensity of your coals; it may be shorter or longer than 15 minutes.
- You can personalize the stuffing by adding cheese, different sauces, or other preferred toppings before wrapping.
- Always handle the hot foil packets with protective gloves or tongs to prevent burns.
This campfire treat combines the classic flavors of a chili dog with the fun of a stuffed sandwich, all heated to perfection in the glow of your campfire. Enjoy this simple and delicious meal under the stars!
Instant Ramen Carbonara
Equipment:
- Pot or deep skillet
- Stove or heat source
- Stirring utensil (fork or spoon)
- Bowl (optional)
Ingredients:
- 1 packet Instant Ramen noodles
- 2 1/2 tablespoons of vegetable oil
- 1/2 cup beef or bacon jerky, chopped into small pieces
- 1/4 cup powdered eggs
- 1/4 cup powdered milk
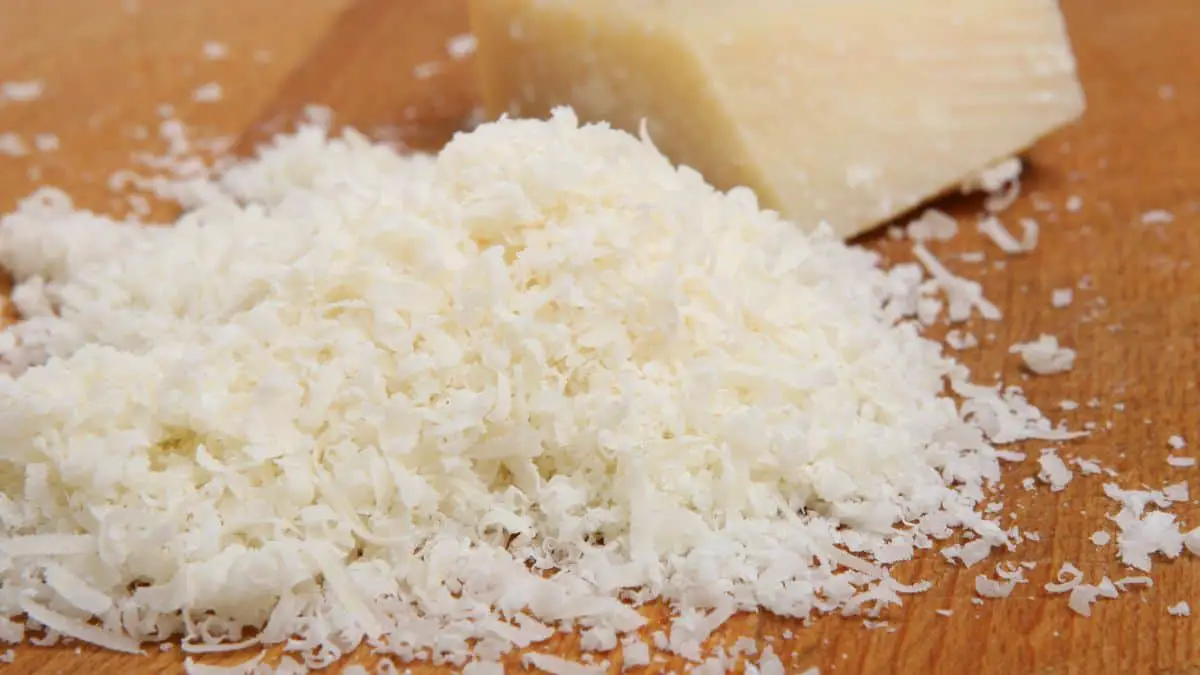
- 1/4 cup grated parmesan cheese (like Kraft)
- Salt, to taste
- Pepper, to taste
Instructions:
- Prepare the Ingredients:
- If the jerky is very tough, consider soaking it in warm water for a few minutes to soften.
- In a separate bowl, mix powdered eggs with a little water to reach the consistency of beaten eggs.
- Do the same with powdered milk, mixing it with water according to package instructions to create a liquid milk.
- Cook the Jerky:
- Heat the vegetable oil in the pot or skillet over medium heat.
- Add the chopped jerky to the pot and sauté until it’s slightly crisped and warmed through, about 3-5 minutes.
- Prepare the Ramen:
- Add the instant ramen noodles to the pot, along with the amount of water specified on the ramen package.
- Cook the noodles according to the package instructions, usually 2-3 minutes, until they are soft.
- Make the Carbonara Sauce:
- Reduce the heat to low. Quickly stir in the reconstituted powdered eggs and milk into the pot with the noodles.
- Keep stirring over low heat until the mixture starts to thicken, forming a creamy sauce. This should take about 1-2 minutes. Be careful not to scramble the eggs.
- Finish the Dish:
- Remove the pot from the heat and stir in the grated parmesan cheese until it’s well incorporated and melts into the sauce.
- Season with salt and pepper to taste.
- Serve the Ramen Carbonara:
- Serve hot, directly from the pot or transferred into a bowl.
Notes:
- Adjust the consistency of the carbonara sauce by adding more powdered milk mixture if too thick or more parmesan if too thin.
- For an authentic carbonara feel, you may reserve a bit of the jerky to sprinkle on top as a garnish.
- Consume immediately, as the sauce may continue to thicken upon standing.
Enjoy your camp-style take on a classic Italian dish with the ease of instant ingredients!
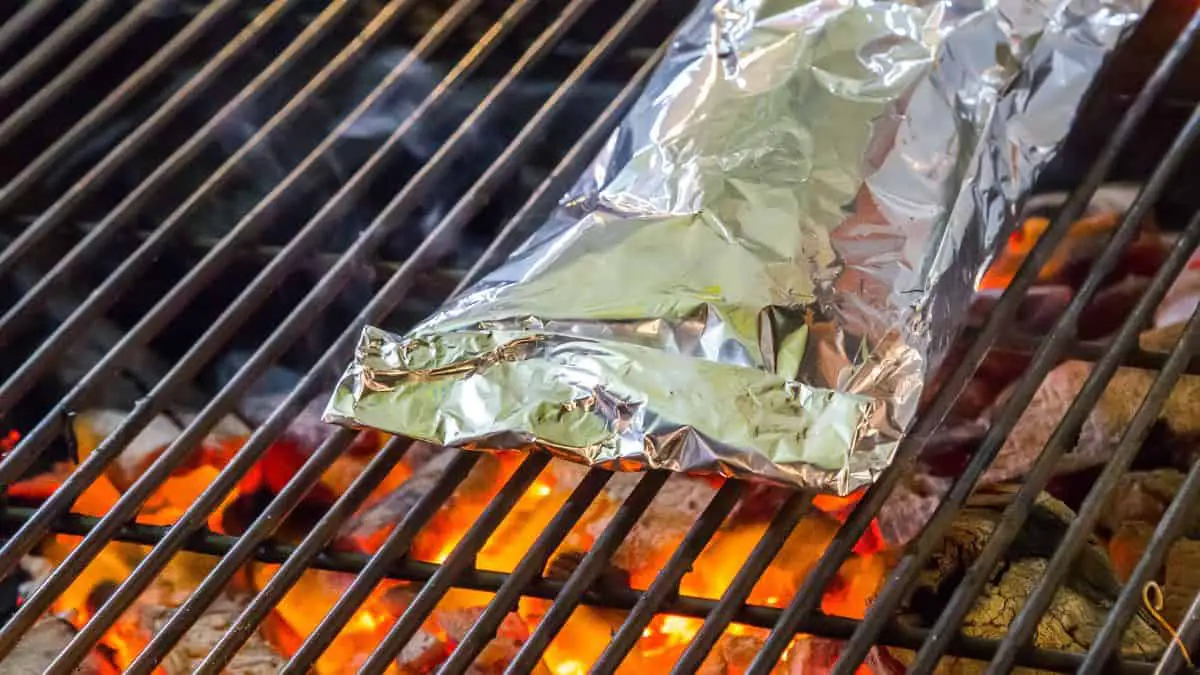
Campfire Cowgirl Supper in Foil
Equipment:
- Aluminum foil
Ingredients:
- Meat, cubed (choose your preferred type, e.g., beef, chicken, pork)
- Vegetables, cubed (potatoes, carrots, bell peppers, onions, etc.)
- Salt, to taste
- Pepper, to taste
- Vegetable oil
- Your favorite seasonings (garlic powder, onion powder, paprika, etc.)
Instructions:
- Prepare the Foil:
- Cut large sheets of aluminum foil, enough to fold over and seal the ingredients.
- Assemble the Suppers:
- On each sheet of aluminum foil, place a single serving of the cubed meat and your choice of cubed vegetables.
- Season the Ingredients:
- Drizzle vegetable oil over the meat and vegetables to prevent sticking and to add moisture.
- Season with salt, pepper, and any other favorite seasonings to taste.
- Wrap the Foil Packets:
- Carefully bring the edges of the foil together above the food, folding them to create a seal.
- Fold in the sides to completely enclose the ingredients, ensuring there is space for heat circulation inside.
- Cook on Campfire Coals:
- Place the foil packets directly on the hot campfire coals.
- Let them cook for about 25-30 minutes, depending on the size of the meat and vegetable pieces.
- Check for Doneness:
- Carefully open one of the foil packets to check if the meat and vegetables are cooked through. Be cautious of steam.
- Serve and Enjoy:
- Once cooked to your satisfaction, remove the packets from the coals using tongs or a spatula.
- Allow to cool for a few minutes, then open the foil, being careful of the steam, and enjoy your Cowgirl Supper.
Notes:
- Make sure the foil is sealed well to keep the steam inside, as it helps in cooking the meat and vegetables.
- Turn the packets halfway through the cooking time to ensure even cooking on both sides.
- Always check the largest pieces of meat and vegetables for doneness as they will take the longest to cook.
This campfire classic is easy to customize with your favorite ingredients and is a hearty, satisfying meal after a day of outdoor adventures.
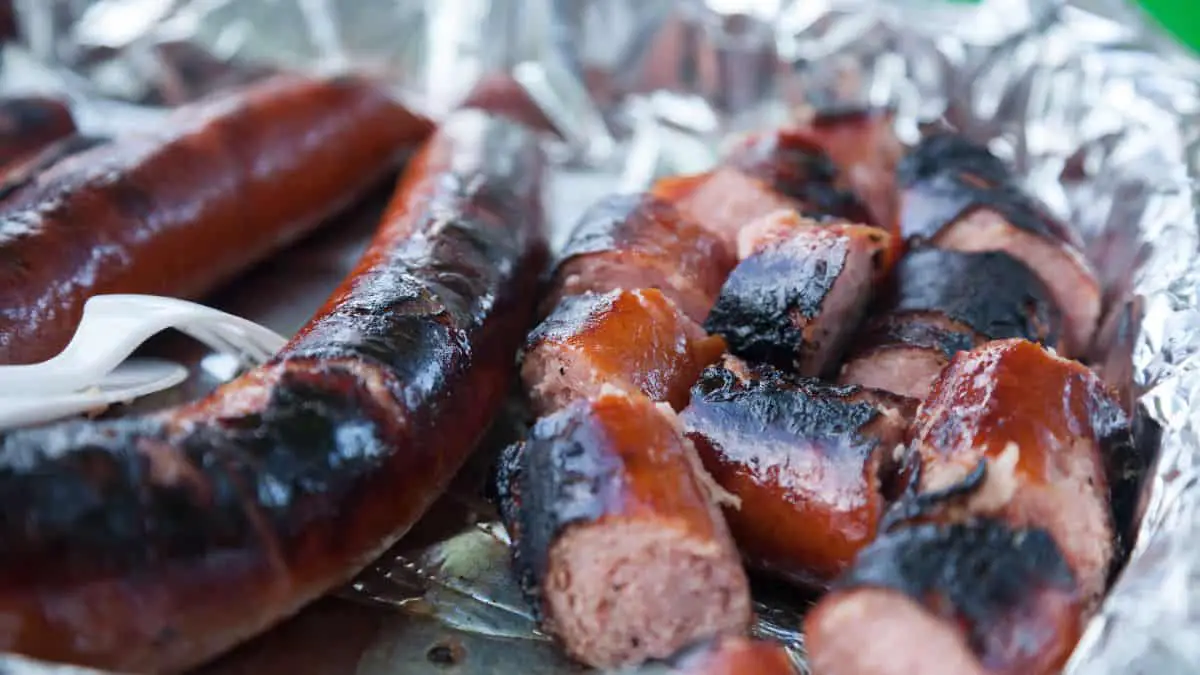
Foil-Wrapped Hot Dogs
Equipment:
- Aluminum foil
- Tongs
- Campfire or grill
Ingredients:
- Hot dogs
- Ketchup
- Mustard
- Onion, finely chopped
Instructions:
- Prepare the Foil:
- Cut a long piece of aluminum foil, enough to wrap the hot dog with extra room for the toppings and to seal the edges.
- Assemble the Hot Dog:
- Place the hot dog in the center of the foil sheet.
- Top the hot dog with ketchup, mustard, and chopped onion, according to your taste preferences. You can also add any other desired toppings at this step.
- Wrap the Hot Dog:
- Bring up the sides of the foil over the hot dog, then fold the edges together to seal the hot dog inside. Make sure to seal the edges well so the toppings don’t leak out during cooking.
- Cook the Hot Dog:
- Place the foil-wrapped hot dog on the campfire or grill. Cook for about 5-10 minutes, turning the packet occasionally with tongs to ensure even cooking.
- Serve:
- Carefully open the foil packet, being cautious of the steam. Check to make sure the hot dog is heated through.
- Enjoy your foil-wrapped hot dog right from the foil for an easy and fun campfire meal.
Notes:
- Adjust the cooking time based on the intensity of your campfire or grill.
- Always supervise the cooking process to prevent burning.
- For a complete meal, you can add pre-cooked or quick-cooking vegetables to the foil packet along with the hot dog.
This method not only makes for a tasty hot dog with your favorite condiments but also minimizes cleanup, making it a perfect camping meal!
Bacon, Beef, and Beans Dutch Oven Casserole Recipe
Equipment:
- Skillet
- Dutch oven
Ingredients:
- 3/4 pound bacon
- 3/4 pound ground beef
- 20 ounces canned baked beans
- 1/2 cup steak sauce or barbecue sauce
- 1 can of biscuits (refrigerated)
Instructions:
- Prepare the Campfire:
- Get your campfire going and wait until you have a bed of hot coals.
- Cook the Bacon:
- Place the skillet over the coals and cook the bacon until it’s crispy.
- Once done, transfer the bacon to a plate, leaving the bacon fat in the skillet.
- Brown the Ground Beef:
- Add the ground beef to the skillet with the remaining bacon fat.
- Cook the beef until it’s fully browned, stirring occasionally.
- Chop the Bacon:
- While the beef is cooking, chop the cooked bacon into bite-sized pieces.
- Combine Ingredients:
- To the skillet with the browned ground beef, add the chopped bacon and canned baked beans.
- Stir in the steak sauce or barbecue sauce until everything is well combined.
- Continue to heat the mixture until the baked beans start to simmer.
- Prepare the Dutch Oven:
- Line the bottom of your Dutch oven with the biscuits, creating an even layer.
- Assemble the Casserole:
- Once the bean mixture is hot and bubbling, carefully pour it over the biscuits in the Dutch oven.
- Bake the Casserole:
- Place your Dutch oven in the hot coals and shovel some coals on top of the lid.
- Bake for about 10-15 minutes, or until the biscuits are golden and cooked through.
Serving Suggestions:
- Serve the casserole hot, straight from the Dutch oven for a hearty and satisfying meal.
Notes:
- Watch the coals closely; too much heat can burn the bottom of the biscuits.
- You can customize the casserole by adding your favorite cheese on top or mixing in some vegetables with the beans.
- Always be careful when handling the Dutch oven as it gets extremely hot.
Enjoy your outdoor feast with this one-pot wonder that’s sure to satisfy the hungriest of campers after a day of adventure!
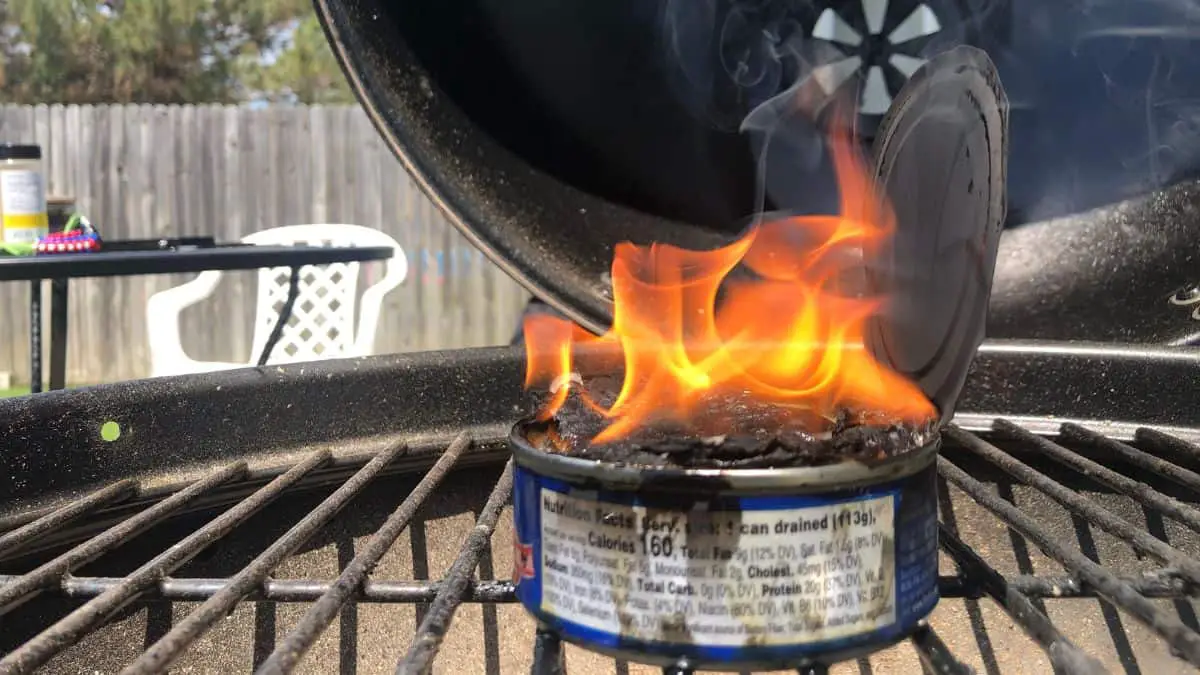
BBQ Canned Tuna Recipe
Equipment:
- Can of tuna (in oil)
- Unscented toilet paper roll
- A lighter or matches
Ingredients:
- 1 can of tuna in oil (do not drain)
- Salt, to taste
- Pepper, to taste
- Lemon juice (optional)
Instructions:
- Prepare the Tuna:
- Open the can of tuna, leaving the oil inside.
- Season the tuna with salt, pepper, and a squeeze of lemon juice to your liking.
- Stir the seasoning into the tuna directly in the can.
- Prep the Toilet Paper Wick:
- Take a few squares of unscented toilet paper and twist it to form a makeshift wick.
- Soak the Wick:
- Submerge the toilet paper wick into the oil of the tuna can, ensuring it gets fully soaked.
- Ignite the Wick:
- Use the lighter or matches to carefully light the toilet paper wick.
- Cook the Tuna:
- Allow the flame from the wick to burn and heat the tuna through.
- Let it burn until the toilet paper is blackened. This should impart a smoky BBQ flavor to the tuna.
- Extinguish the Flame:
- Safely smother the flame by covering the can or snuffing it out.
- Final Touches:
- Once the flame is out, carefully remove the remnants of the burnt toilet paper.
- Gently knock off any ashes that may have settled on the tuna.
Safety Notes:
- Ensure you are in a well-ventilated outdoor area away from flammable materials.
- Keep a water source or fire extinguisher close by in case of emergencies.
- Handle the can with care as it will be hot after burning.
Enjoy your uniquely cooked BBQ-flavored canned tuna, perhaps with a side of crackers or bread for a simple yet adventurous meal!
Classic Campsite Tuna Salad

Equipment:
- Bowl
- Fork or spoon for mixing
- Can opener
- Cutting board (optional)
- Knife (optional)
Ingredients:
- 1 can of tuna, drained
- 2 tablespoons mayonnaise (or to taste)
- 1 teaspoon mustard (optional)
- Salt, to taste
- Pepper, to taste
- 1 small onion, finely chopped (optional)
- 1 stalk of celery, finely chopped (optional)
- 1 small dill pickle, finely chopped (optional)
- Lemon juice (a squeeze for freshness)
Instructions:
- Prepare the Ingredients:
- If including onion, celery, or pickle, finely chop these ingredients on the cutting board.
- Mix the Tuna Salad:
- In your bowl, combine the drained tuna and mayonnaise. Stir with a fork or spoon until well mixed.
- Add the mustard, if using, and mix into the tuna and mayo.
- Season the mixture with salt and pepper to taste.
- Incorporate the chopped onion, celery, and pickle into the tuna salad if desired.
- Squeeze a little lemon juice into the salad and stir once more for a fresh zing.
Serving Suggestions:
- Serve on sandwich bread or with crackers.
- Stuff it into hollowed-out tomatoes or avocados for a low-carb option.
- Enjoy it atop a bed of fresh greens for a salad meal.
Notes:
- This tuna salad can be easily customized with your favorite add-ins, like hard-boiled eggs, capers, or fresh herbs.
- For a healthier version, substitute mayonnaise with Greek yogurt or a mashed avocado.
- Make sure to keep the salad cool in a portable cooler or refrigerator until you’re ready to eat, especially if you’re outdoors for an extended period.
Chili Garlic Instant Ramen Noodles
Equipment:
- Pot for boiling water
- Pan for heating oil
- Large heat-proof bowl
- Fork or tongs for mixing
- Can opener (if using canned chicken)
Ingredients:
- 1 packet instant ramen noodles
- 4 garlic cloves, minced
- 1/3 cup vegetable oil
- 3 tablespoons chili flakes
- 2 tablespoons soy sauce
- 1 tablespoon white vinegar
- 1 can of chicken (optional)
Instructions:
- Prepare the Ramen:
- Bring a pot of water to a boil for the ramen noodles.
- Heat the Oil:
- While the water is heating, warm the vegetable oil in a separate pan until hot but not smoking.
- Combine the Seasonings:
- In your large heat-proof bowl, mix together the minced garlic, chili flakes, soy sauce, and white vinegar. If you’re using canned chicken, open the can, drain it, and add the chicken to the bowl.
- Pour the Hot Oil:
- Once the oil is sufficiently hot, carefully pour it over the mixture in the bowl. The hot oil will sizzle and cook the garlic, releasing all the flavors.
- Cook the Ramen:
- Add the instant ramen noodles to the boiling water and cook according to package instructions, typically for about 3 minutes.
- Drain the Noodles:
- Once the noodles are cooked, drain them well.
- Combine Noodles with Chili Mix:
- Add the drained noodles to the bowl with the chili and garlic mixture. Toss everything together until the noodles are evenly coated with the chili oil mixture.
Serving Suggestions:
- Serve the noodles hot, garnished with additional chili flakes or green onions if desired.
- For added texture, sprinkle some toasted sesame seeds on top before serving.
Notes:
- Be very careful when pouring hot oil, as it can splatter and cause burns.
- Adjust the amount of chili flakes to suit your preferred level of heat.
- Always have a kitchen fire extinguisher on hand when cooking with hot oil as a safety precaution.
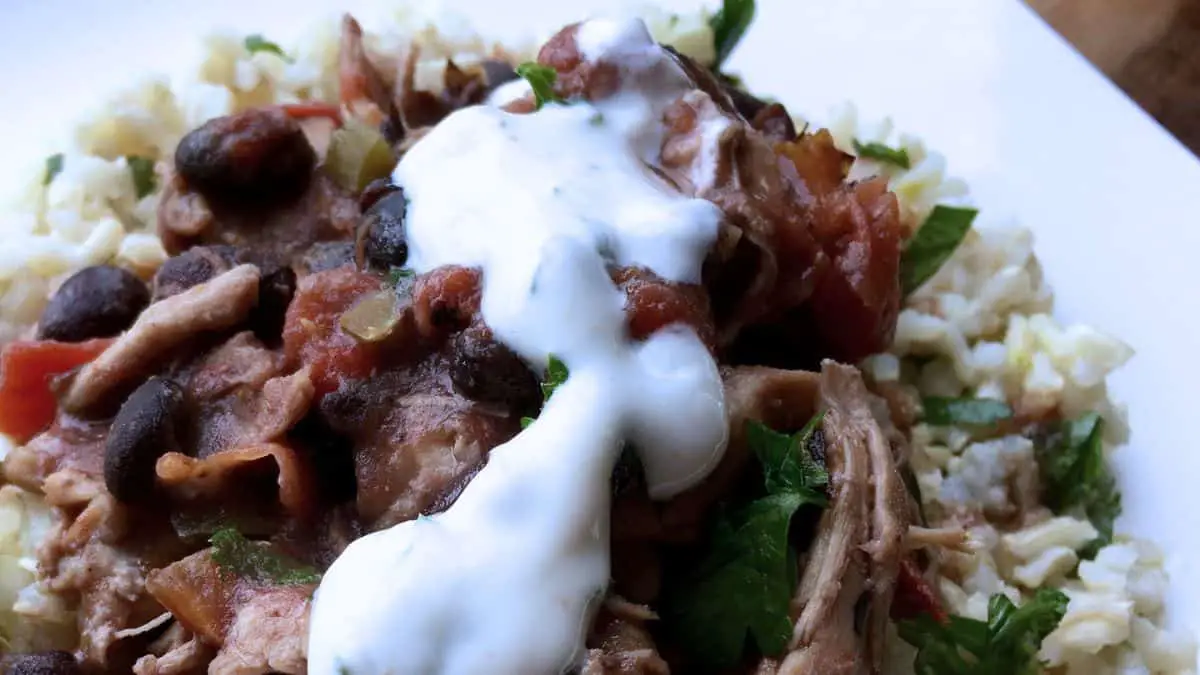
Slow Cooker Dutch Oven Shredded Mexican Chicken
Preparation Time: 10 minutes
Cooking Time: 3-4 hours on high or 6-8 hours on low
Servings: 6-8
Ingredients:
- 2 lbs. boneless, skinless chicken thighs
- 2 cans (10 oz. each) Rotel fire-roasted diced tomatoes & green chilies, undrained
- 2 cans (15 oz. each) black beans, rinsed and drained
- 3-4 cloves garlic, minced
- 1 small jalapeno pepper, finely diced
- 1½ tablespoons hickory-flavored liquid smoke
- 2 teaspoons ground cumin
- 1 tablespoon chili powder
- 1 teaspoon smoked paprika
- 2 teaspoons dried oregano
- 1 teaspoon cayenne pepper
- Salt and black pepper, to taste
- 2 limes, quartered
- ¼ cup fresh cilantro, chopped
Instructions:
- Layer Ingredients:
- Place chicken thighs at the bottom of a 5 or 6-quart slow cooker crock. Add the diced tomatoes, black beans, minced garlic, diced jalapeno, liquid smoke, cumin, chili powder, smoked paprika, oregano, and cayenne pepper. Season with salt and pepper.
- Cook:
- Stir the mixture to ensure the chicken is well coated and submerged. Cover the slow cooker with the lid. Set to cook on high for 3-4 hours or on low for 6-8 hours.
- Shred Chicken:
- About 30 minutes before the end of cooking time, remove the lid and shred the chicken using two forks, mixing it with the other ingredients in the cooker. Replace the lid and continue cooking for the remaining time to allow the chicken to soak up the flavors.
- Finish with Freshness:
- After cooking, open the lid and squeeze in the juice of the fresh limes. Add the chopped cilantro and stir to incorporate. Adjust seasoning with additional salt and black pepper if needed.
- Serve:
- Serve the shredded Mexican chicken over a bed of plain brown rice or cilantro-lime rice, with additional lime wedges on the side.
Note:
- This dish pairs wonderfully with a side of cilantro-lime rice and a drizzle of cilantro-lime sauce, should you wish to enhance the flavor profile further.
- Store any leftovers in the fridge for up to 3 days or freeze for longer storage. It’s perfect for tacos, burritos, or salads for a quick meal later on.
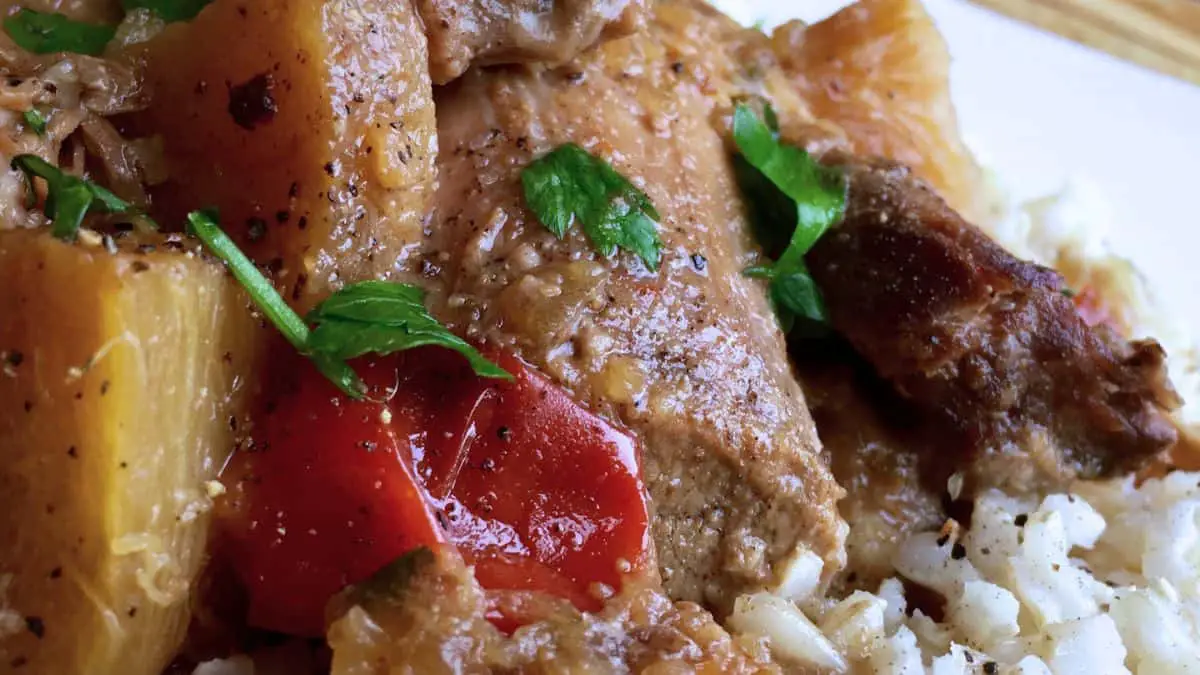
Campfire Spicy Pineapple Pork Butt Roast
Prep Time: 15 minutes
Cook Time: 3-4 hours (high) or 6-8 hours (low) over campfire
Serves: 4-6
Important Tip:
- Trim the fat from the pork butt roast to minimize flare-ups and excess grease during campfire cooking.
Ingredients:
- 1 small yellow onion, diced
- 16 oz. fresh pineapple, cut into 1” chunks
- ¼ cup gluten-free soy sauce (substitute with coconut aminos if preferred)
- 2 tsp rice wine vinegar
- 1 tbsp honey
- 1 tbsp sesame oil
- 2-3 garlic cloves, minced
- 2 tsp Chinese five-spice powder
- 1 medium red bell pepper, cut into 1” chunks
- 1 medium jalapeno pepper, finely diced
- 2 tbsp creamy natural peanut butter
- Salt and black pepper, to taste
- ¼ cup fresh pineapple juice
- 3 tbsp fresh cilantro, chopped
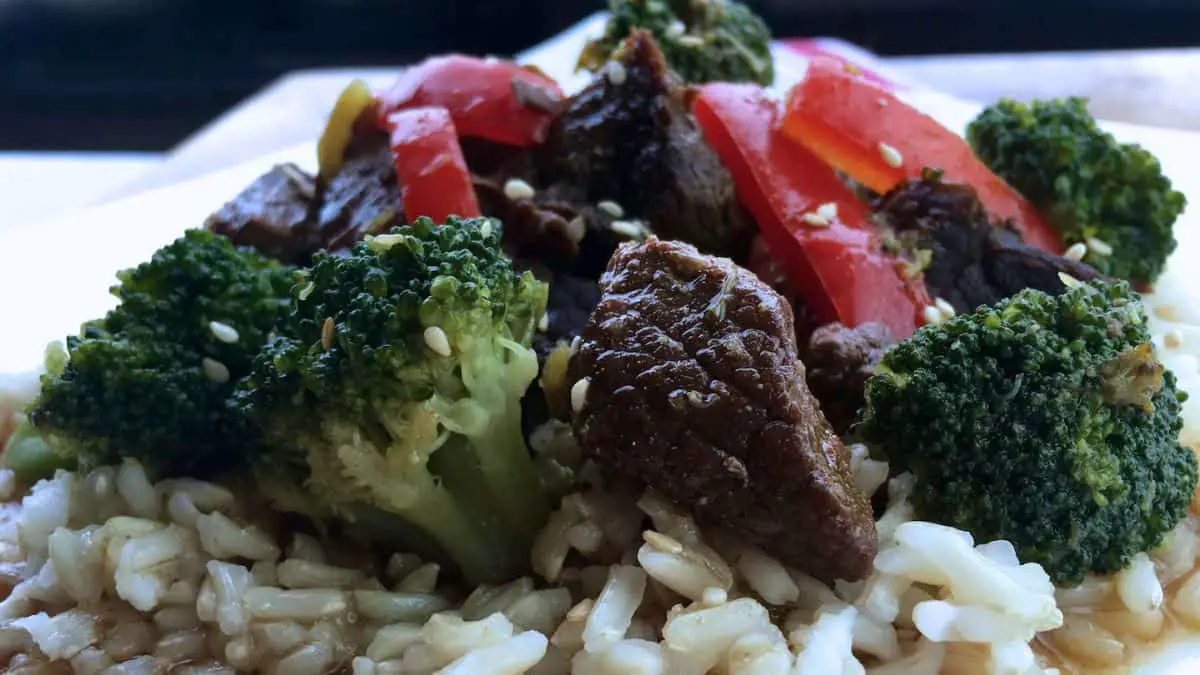
Campfire Dutch Oven Beef and Broccoli
Prep Time: 10 minutes
Cook Time: 60-90 minutes over campfire
Serves: 4-6
Ingredients:
- 1½ lbs. beef stew meat, cut into chunks
- 1½ cups beef stock
- 3-4 cloves garlic, finely minced
- ½ cup gluten-free soy sauce
- 1 Tbsp honey
- 2 Tbsp toasted sesame oil
- Salt and black pepper, to taste
- 2 Tbsp arrowroot
- 1 14-oz. bag frozen broccoli florets
- 1 red bell pepper, cut into short, thin strips
- 3 cups brown rice, cooked
- 1 Tbsp toasted sesame seeds (optional)
Campfire Instructions:
- Preheat Dutch Oven:
- Place the Dutch oven over the campfire to preheat.
- Prepare Sauce:
- In a bowl, whisk together beef stock, minced garlic, soy sauce, honey, and sesame oil. Season with salt and black pepper.
- Cook Beef:
- Place the beef chunks in the Dutch oven. Pour the sauce mixture over the beef. Cover and cook for about 60-90 minutes, stirring occasionally, until the beef is almost tender.
- Thicken Sauce:
- Mix arrowroot with ¼ cup of liquid from the Dutch oven to create a slurry. Pour the slurry into the Dutch oven, stirring well.
- Add Vegetables:
- Add the frozen broccoli and red bell pepper to the Dutch oven about 15-20 minutes before the cooking time is up, depending on how tender you want the vegetables.
- Serve:
- Serve the beef and broccoli over cooked brown rice. Garnish with toasted sesame seeds if desired.
Slow Cooker Instructions:
- Add Beef to Slow Cooker:
- Place beef stew meat into the slow cooker crock.
- Mix Sauce Ingredients:
- In a bowl, combine beef stock, garlic, soy sauce, honey, and sesame oil. Season with salt and pepper, then pour over the beef in the slow cooker.
- Cook Beef:
- Cover and cook on high for 3-4 hours or on low for 6-7 hours.
- Thicken Sauce:
- Near the end of the cooking time, create a slurry with arrowroot and some of the slow cooker liquid. Stir into the crock.
- Add Vegetables:
- Stir in the broccoli and red bell pepper 15-20 minutes before the end of the cooking time.
- Finish Cooking:
- Replace the lid and allow the vegetables to cook to your preferred tenderness.
- Serve:
- Serve the beef and broccoli over cooked brown rice, garnished with toasted sesame seeds if using.
Enjoy your flavorful beef and broccoli, a perfect outdoor meal by the campfire or a comforting dish made conveniently in a slow cooker!
Instructions:
- Prep the Campfire:
- Get your campfire going to a steady, hot burn. You’ll need a grill grate to place over the fire for even cooking.
- Prepare the Ingredients:
- In a Dutch oven, mix together the onion, pineapple chunks, soy sauce, vinegar, honey, sesame oil, garlic, five-spice powder, bell pepper, jalapeno, and peanut butter.
- Sear the Pork:
- Season the pork butt with salt and pepper. Over a separate skillet or directly on the grill grate, sear the pork on both sides using a heavy-duty cast-iron skillet. This should take a couple of minutes per side.
- Combine and Cook:
- Place the seared pork on top of the mixture in the Dutch oven. Pour the pineapple juice over it. Place the lid on the Dutch oven.
- Cook Over Campfire:
- Place the Dutch oven on the grill grate over your campfire. You can also place it directly onto hot coals, but make sure to rotate it every 30 minutes for even cooking. You may need to adjust the time depending on the intensity of your campfire. If you go with a low and slow approach this could take at least 6 hours or up to 8 hours. If you apply lots of coals directly onto the Dutch oven, it could be done in as little as 3 hours.
- Finish with Cilantro:
- Once the pork is tender and cooked through, stir in the fresh cilantro.
- Serve:
- Carefully remove the Dutch oven from the fire using heat-resistant gloves. Serve the pork directly from the Dutch oven, complementing it with additional sides like cooked rice or a fresh salad.
Bonus - Slow Cooker If you wish to use a slow cooker then cook on high for 3-4 hours or low for 6-8 hours.
Enjoy this campfire rendition of spicy pineapple pork butt roast, perfect for an adventurous outdoor feast!
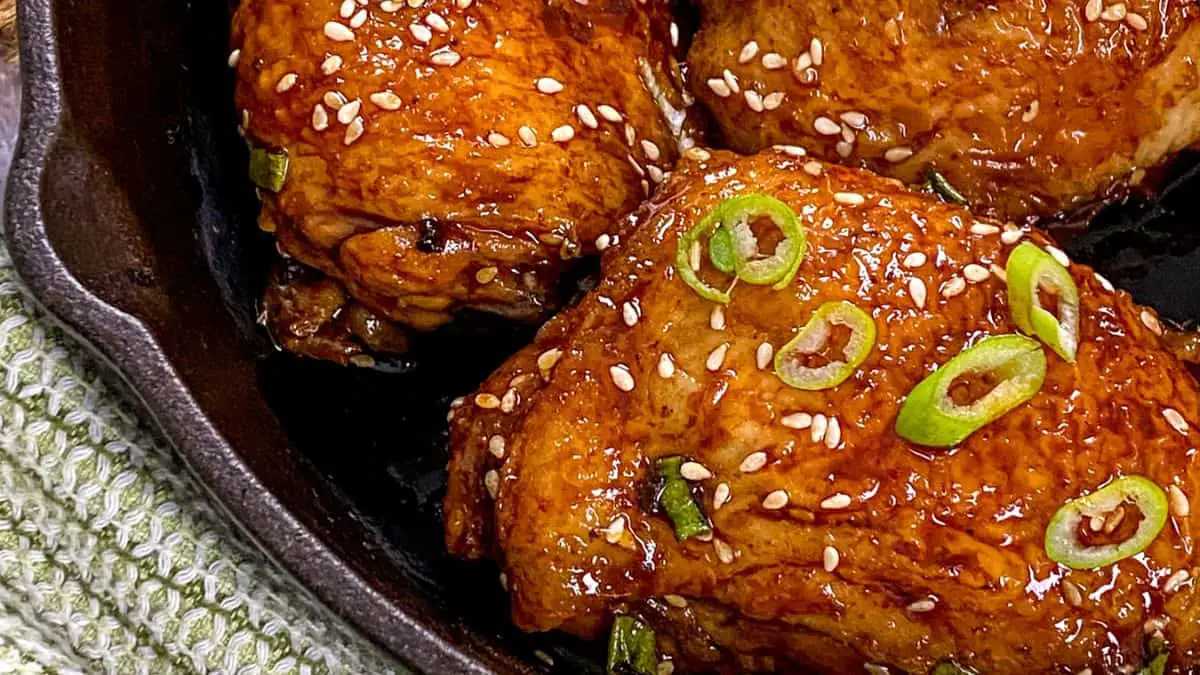
Campfire and Camping Gas Stove Honey Garlic Chicken Thighs
Ingredients:
- ¼ cup tamari or coconut aminos
- ½ cup chicken broth, preferably organic
- 2 tablespoons sesame oil, plus extra for skillet if needed
- 1 tablespoon Sriracha sauce
- 1/3 cup honey, preferably local
- 4-5 large cloves garlic, finely chopped
- 2 teaspoons fresh ginger, finely minced
- 2 tablespoons fresh lime juice
- 6 bone-in, skin-on chicken thighs
- Sea salt and black pepper, to taste
- 1 large green onion, sliced (green part only)
- 1 tablespoon white sesame seeds
Campfire Instructions:
- Start the Fire:
- Build your campfire and let it burn down to a consistent medium heat suitable for cooking.
- Prepare the Glaze:
- In a medium bowl, whisk together tamari, chicken broth, sesame oil, Sriracha, honey, chopped garlic, minced ginger, and lime juice. Set the glaze aside.
- Season the Chicken:
- Generously season the chicken thighs with sea salt and black pepper on both sides.
- Heat the Skillet:
- Place your cast iron skillet over the campfire grate or hold it over the fire using a long handle. If the skillet isn’t well-seasoned, add some sesame oil.
- Sear the Chicken:
- Sear the chicken thighs skin-side down first, cooking until they can be easily moved, about 4-5 minutes. Flip the chicken and continue to sear on the other side.
- Add the Glaze:
- Pour the prepared glaze over the chicken thighs. Spoon the glaze over the chicken continuously as it cooks for another 4-5 minutes.
- Simmer:
- Cover the skillet with a lid or aluminum foil, and reduce the heat by moving the skillet to a cooler part of the campfire. Let it simmer for 15-20 minutes or until an instant-read thermometer reads 160°F.
- Rest and Garnish:
- Once the chicken is cooked, remove from heat and let it rest for 5 minutes. Brush more glaze onto the chicken, then sprinkle with sliced green onions and sesame seeds.
- Serve:
- Serve hot with a side of your choice, drizzled with the remaining pan sauce.
Camping Gas Stove Instructions:
- Prepare the Glaze:
- Mix tamari, chicken broth, sesame oil, Sriracha, honey, garlic, ginger, and lime juice in a bowl as above.
- Heat the Skillet:
- Place the cast iron skillet on the camping gas stove over medium heat. Add sesame oil if your skillet needs it.
- Cook the Chicken:
- Sear and cook the chicken as per the campfire instructions, adjusting the flame to mimic the medium and medium-low heat as needed.
- Simmer:
- After adding the glaze, cover with a lid, lower the flame, and let the chicken cook through.
- Garnish and Serve:
- Allow the chicken to rest, garnish, and serve as detailed in the campfire method.
Enjoy your Honey Garlic Chicken Thighs with the rich, sweet and spicy flavors infused by the campfire or your reliable camping stove!
Camping Shepherd’s Pie

Note: You can replace Worcestershire Sauce with 3 tablespoons of beef broth for a simple adjustment.
Mashed Potato Ingredients:
- 2 lbs. Russet potatoes, peeled and cubed
- 4-5 large cloves garlic, peeled and smashed
- Water, to cover
- Pinch of salt
- ½ cup chicken stock, preferably organic
- ¼ cup heavy cream
- 3 tablespoons unsalted butter
- Sea salt and black pepper, to taste
Remaining Ingredients:
- 1½ lbs. ground beef
- 2 teaspoons fresh rosemary leaves, finely chopped
- 2 tablespoons Worcestershire sauce or 3 tablespoons beef broth
- Sea salt and black pepper, to taste
- ¾ cup frozen corn kernels, thawed
- ¾ cup frozen peas, thawed
- 1¼ cups sliced frozen carrots, thawed
Garnish:
- Smoked paprika
- Fresh chives, chopped
Campfire or Camping Gas Stove Directions:
- Prepare Mashed Potatoes:
- Place cubed potatoes and smashed garlic in a large pot over your campfire grate or camping stove. Add enough water to cover the potatoes by an inch. Bring to a boil and cook until potatoes are fork-tender, about 15 minutes.
- Once cooked, drain the potatoes and return them to the pot. Add chicken stock, heavy cream, and butter, mashing the potatoes until smooth. Season with salt and black pepper. Set aside.
- Cook the Beef Mixture:
- Heat a 10-inch cast iron skillet over medium heat on your campfire or stove. Add the ground beef, chopped rosemary, and Worcestershire sauce (or beef broth). Season with salt and black pepper.
- Cook the mixture, stirring until the beef is completely browned. Drain excess fat if necessary.
- Assemble the Shepherd’s Pie:
- Spread the thawed vegetables (corn, peas, and carrots) over the browned beef.
- Top with the mashed potatoes, spreading into an even layer.
- Sprinkle the top with smoked paprika.
- Cooking the Pie:
- Cover the skillet with foil or a lid. For a campfire, place hot embers on top of the lid to create an oven effect, or if using a stove, lower the heat and cover.
- Cook for approximately 25-30 minutes or until the mixture is heated through and the top starts to brown slightly.
- Garnish and Serve:
- Once cooked, remove from the heat source and let it sit for a few minutes.
- Garnish with fresh chives.
Serve your hearty Shepherd’s Pie straight from the skillet, enjoying a comforting meal under the stars or amidst the serenity of your campsite!
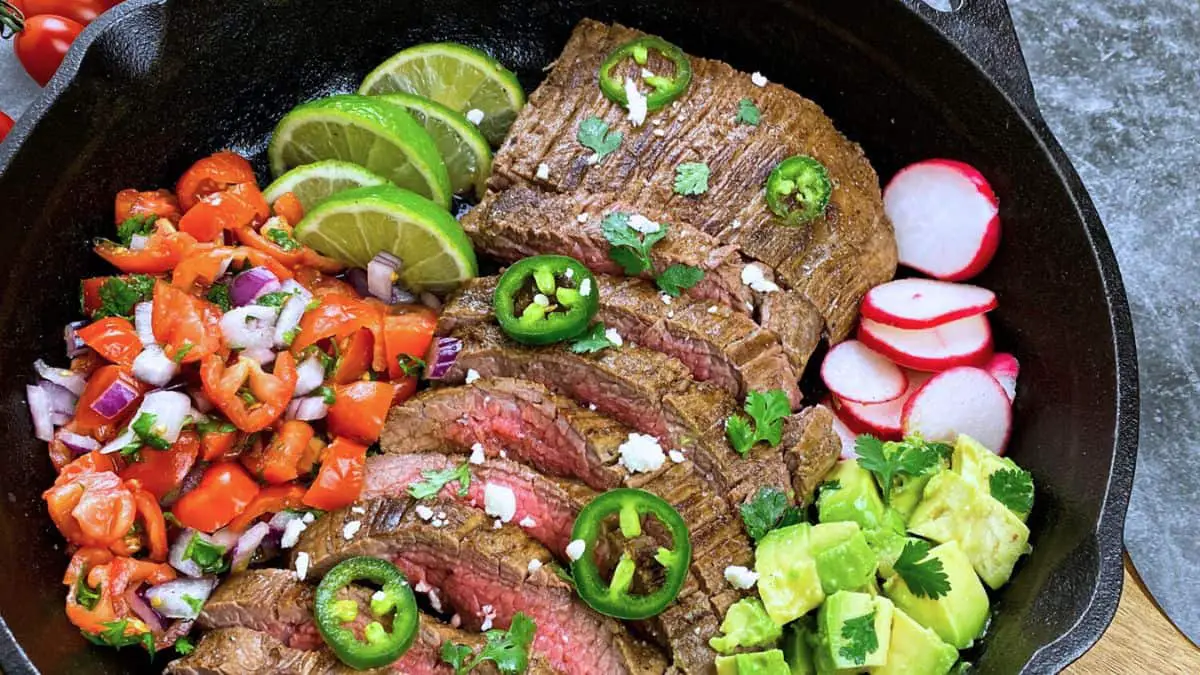
Campfire Carne Asada Marinade and Grilled Steak
Marinade Ingredients:
- 3 tablespoons extra virgin olive oil
- 3 tablespoons fresh orange juice
- 1 teaspoon orange zest, preferably organic
- 2 tablespoons fresh lime juice
- 3 tablespoons tamari or coconut aminos
- 3-4 large cloves fresh garlic, peeled and smashed
- 1 teaspoon chili powder
- ½ teaspoon ground cumin
- 1 teaspoon Mexican oregano
- 2 tablespoons fresh cilantro, roughly chopped
- 1 teaspoon sea salt
- ½ teaspoon black pepper
For the Steak and Serving:
- 1½ lbs. skirt or flank steak
- Cherry tomatoes, red onion, lime juice, avocado, radishes, lime wedges, Cotija cheese, jalapeño, cilantro as described above
- Guacamole, gluten-free tortillas, and/or lettuce wraps (optional)
Directions for Campfire Cooking:
- Prepare the Marinade:
- In a medium bowl, whisk together all marinade ingredients until well combined.
- Marinate the Steak:
- Place the steak in a sealable bag or a container suitable for campfire cooking and pour the marinade over the steak. Seal and ensure the steak is well-coated.
- Allow to marinate at room temperature for 30 minutes if prepping on-site, or refrigerate overnight if preparing ahead. If refrigerated, let it sit out to reach room temperature before grilling, about 20-30 minutes.
- Make the Tomato-Cilantro Mix:
- Combine tomatoes, 1 tablespoon cilantro, red onion, and 2 tablespoons lime juice in a bowl. Season with salt and pepper, mix, and set aside.
- Prepare the Avocado:
- Toss the chopped avocado with the remaining lime juice to prevent browning. Set aside.
- Grill the Steak:
- Over your campfire grill grate or on a camping stove, heat a large cast iron skillet. Once hot, add the steak, discarding the excess marinade.
- Grill for about 3-4 minutes per side, depending on the thickness and your desired doneness. Use a meat thermometer to check for doneness if available.
- Rest and Serve:
- Let the steak rest for 5 minutes after cooking, then slice against the grain.
- Serve the steak with the prepared tomato mixture, avocado, sliced radishes, lime wedges, and garnish with remaining cilantro, sliced jalapeño, and crumbled Cotija cheese.
- Provide guacamole, gluten-free tortillas, or lettuce wraps alongside if desired.
Enjoy your flavorful Carne Asada with fresh accompaniments right by the campfire!
Roasted Italian Sausages with Tomatoes and White Beans

Ingredients:
- 2 tablespoons extra virgin olive oil
- 4 large Italian sausages (approximately 1 lb.)
- ½ medium red onion, cut into wedges
- 5-6 large garlic cloves, whole and unpeeled
- 2 cups cherry or grape tomatoes
- 1 tablespoon Italian seasoning
- Sea salt and black pepper, to taste
- 1 can (15 oz.) white beans, rinsed and drained
- 2 tablespoons red wine vinegar
- 3 tablespoons fresh basil, thinly sliced
Directions:
- Oven Preparation:
- Adjust the top oven rack to the center position.
- Preheat the oven to 400°F (200°C).
- Place a large cast iron skillet inside to warm up.
- Skillet Setup:
- Carefully remove the hot skillet from the oven using oven mitts.
- Add olive oil and swirl to coat the skillet’s bottom.
- Assemble in Skillet:
- Arrange sausages, red onion wedges, whole garlic cloves, and tomatoes in the skillet.
- Season with Italian seasoning, salt, and pepper.
- Roasting:
- Place the skillet back in the oven.
- Roast for 20-25 minutes, then check for doneness. (Tip: If using a large skillet, check the sausages after 20 minutes as cooking times may vary.)
- Add Beans and Vinegar:
- Take the skillet out of the oven.
- Add white beans and red wine vinegar, stirring gently.
- Flip the sausages for even browning.
- Final Roast:
- Return the skillet to the oven.
- Roast for another 10-15 minutes or until the sausages are well browned.
- Finish and Serve:
- Remove the skillet from the oven.
- Extract and discard the skins from the roasted garlic cloves, squeezing the soft garlic back into the skillet.
- Sprinkle with fresh basil and combine.
- Serve immediately and enjoy!
This hearty dish pairs beautifully with crusty bread or a green salad for a satisfying meal that’s easy to prepare before your outdoor adventure or to cook at the campsite.
Campfire Cooking Tips:
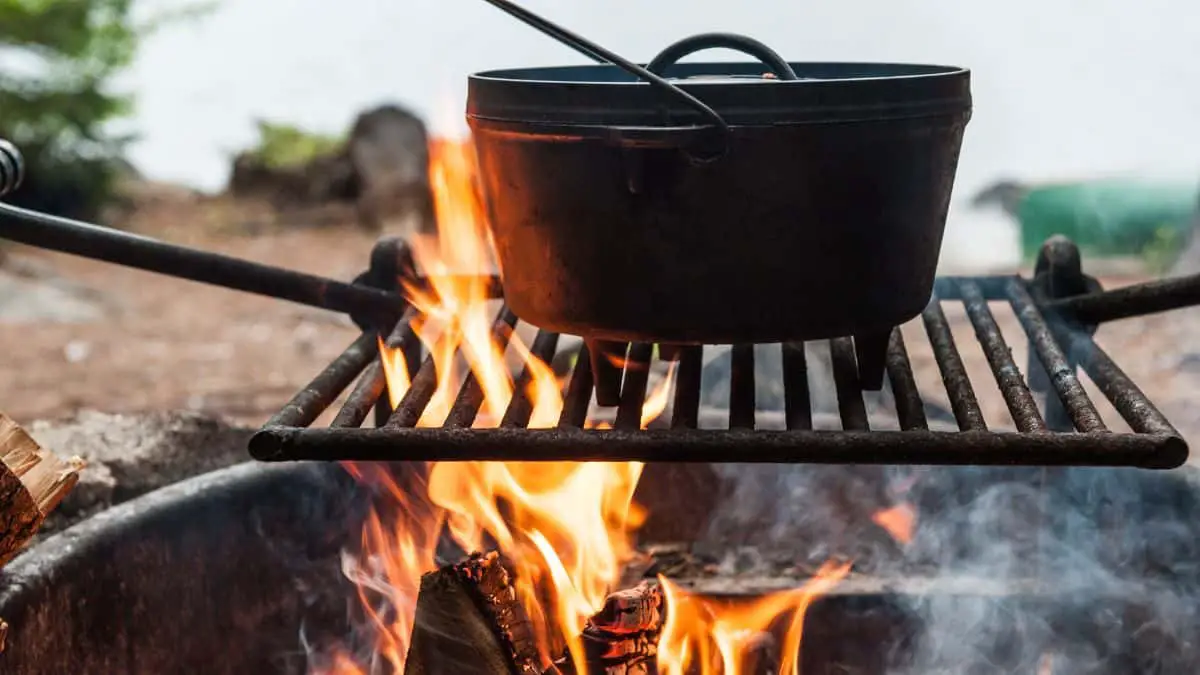
To Bake Using a Dutch Oven Over a Campfire:
- Prepare Your Coals:
- Start your campfire well in advance. You’ll need a good bed of coals to cook over, not open flame. The coals provide a more consistent and controlled heat.
- Dutch Oven Preparation:
- Place the Dutch oven over the coals to preheat for about 10 minutes.
- Oil and Assemble:
- Carefully add the olive oil to the Dutch oven.
- Arrange the sausages, onion wedges, whole garlic cloves, and tomatoes in the pot.
- Season with Italian seasoning, salt, and pepper.
- Baking on Coals:
- Place the lid on the Dutch oven.
- Shovel some coals on top of the lid. The amount of coals is crucial – too few, and the dish will cook too slowly; too many, and it could burn.
- A good rule of thumb is to aim for a 2:1 ratio, with twice as many coals on the lid as underneath for even 400°F (200°C) heat.
- Cook for about 25 minutes, then check. Adjust the coal amount as needed.
- Adding Beans and Vinegar:
- Carefully remove the lid, using a lid lifter or improvised handle, and add the white beans and red wine vinegar, stirring gently.
- Flip the sausages for even browning, replace the lid, and continue cooking for another 15 minutes.
- Finishing Touches:
- Once the sausages are cooked through and the vegetables are tender, sprinkle with fresh basil.
- Serving:
- Serve directly from the Dutch oven, using heat-proof mitts or gloves to handle the pot.
To Reheat at the Campout:
- Pre-Cook at Home:
- Prepare the recipe at home up until the final 15 minutes of cooking.
- Cool and Store:
- Allow the dish to cool, then store it in a suitable container for transport to your campsite.
- Reheating Over the Campfire:
- At the campsite, place the Dutch oven over the coals to reheat the food.
- Stir occasionally to ensure even reheating.
- If the stew seems dry, add a little water or beef broth to rehydrate it.
- Add Final Ingredients:
- Once the dish is heated through, add the fresh basil before serving.
Remember: Cooking over a campfire isn’t an exact science. Factors like wind, humidity, and coal temperature will affect cooking times, so always monitor your meal and adjust as needed.
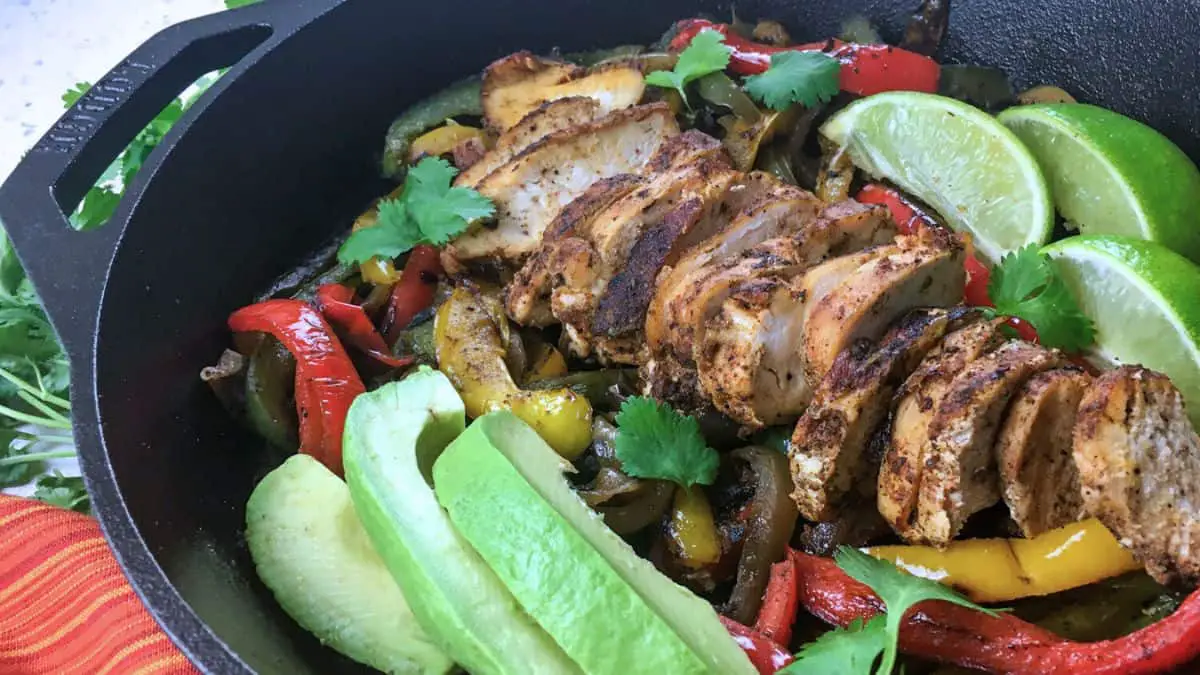
Chicken Fajitas
Tips for Cooking Chicken Fajitas Over a Campfire or on a Gas Stove While Camping:
- Prep Ahead: Marinate the chicken ahead of time and keep it in a cooler. This way, it’s ready to cook when you’re at the campsite.
- Use Heavy Cookware: A heavy-duty cast-iron skillet is perfect for campfire cooking as it retains heat well and distributes it evenly.
- Manage the Fire: If cooking over a campfire, let the flames die down so you’re cooking over embers with a steady heat. Too much flame can char the outside of the chicken before the inside is done.
- Cook Chicken Whole: As per the tip, cooking whole chicken breasts takes longer but results in juicier chicken. Slice after cooking for the best texture.
- Keep Warm: After cooking, wrap the chicken in aluminum foil to keep it warm while you cook the vegetables.
- Watch the Veggies: Veggies can cook quickly over an open flame or stove. Keep them moving in the skillet to avoid burning.
- Utensils and Safety: Have a good pair of tongs for flipping the chicken and stirring the veggies. Always be mindful of safety when cooking over an open flame.
Fajita Marinade Ingredients:
- 2 teaspoons chili powder
- 1 teaspoon ground cumin
- 1 teaspoon smoked paprika
- ½ teaspoon onion powder
- ½ teaspoon garlic powder
- ¼ teaspoon cayenne pepper
- ½ teaspoon dried Mexican oregano
- ½ teaspoon salt
- ¼ teaspoon black pepper
- 3 tablespoons extra virgin olive oil
Remaining Ingredients:
- 1½ pounds boneless, skinless chicken breasts
- ¼ cup extra virgin olive oil, divided
- 1 medium green bell pepper, sliced
- 1 medium red bell pepper, sliced
- 1 medium yellow bell pepper, sliced
- 1 medium white onion, sliced
- 2 large avocados, sliced
- 2 large limes, cut into wedges
- ½ cup fresh cilantro, chopped
Directions:
Absolutely, here are the revised directions for making the Chicken Fajitas with a unique twist:
Directions:
-
Marinade Creation: In a bowl suitable for mixing, whisk together the vibrant array of spices with olive oil until you have a well-blended marinade.
-
Chicken Preparation: Lay the chicken breasts in a non-metallic dish and lovingly coat them with the marinade you just prepared. Ensure each breast is evenly covered. Let the chicken sit enveloped in the marinade for up to an hour at room temperature or place in the refrigerator for an overnight flavor infusion.
-
Sizzling the Chicken: Heat a dollop of olive oil in a sturdy cast-iron skillet until it shimmers, signalling it’s ready for the chicken. Extract the chicken from its marinade bath (discard the leftover liquid) and introduce it to the hot skillet. Sear it undisturbed for several minutes, allowing it to develop a golden crust before flipping. Continue to cook until the chicken feels firm to the touch and is no longer pink in the center.
-
Vegetable Charade: Once the chicken is resting, turn the heat up and let the remaining oil dance in the skillet. Introduce the bell peppers and onion to the skillet’s heat, tossing them frequently. Watch as they adopt a caramelized exterior while maintaining a bite-worthy crunch.
-
The Assembly: Slice the rested chicken into ribbons of succulent meat. Plate the chicken alongside the seared vegetables. Accompany with creamy slices of avocado, wedges of lime for a tangy squeeze, and a sprinkle of cilantro for an herby finish.
Serve these reinvented Chicken Fajitas and bask in the symphony of flavors and textures, wrapped up in the magic of outdoor cooking.
Here’s a uniquely rewritten version of the Dutch Oven Chicken & Rice with Spicy Peanut Sauce recipe with instructions tailored for campfire and camping gas stove preparation:
Campfire Chicken & Rice with Zesty Peanut Drizzle

Zesty Peanut Drizzle Ingredients:
- ½ cup natural peanut butter (smooth or with nutty bits)
- 1½ tablespoons of rice vinegar for a tart twist
- 1 tablespoon of Sriracha for a fiery kick
- 1 tablespoon grated fresh ginger for zest
- 1 tablespoon honey, the essence of local flora
- 2 teaspoons tamari or coconut aminos for umami depth
- 1-3 tablespoons hot water for consistency adjustment
For the Skillet:
- 3 tablespoons olive oil, parted
- 1½ pounds chicken thighs, bone-in and skin gleaming, dabbed dry
- Sea salt and freshly cracked black pepper for seasoning
- 2 tablespoons minced fresh ginger for aromatic heat
- 2-3 garlic cloves, finely minced for a fragrant base
- ½ a white onion, finely diced for sweet sharpness
- 1 cup Basmati rice, rinsed until the water runs clear
- 1 tablespoon tamari or coconut aminos for layered savoriness
- ½ tablespoon Chinese five spice for a warm, spicy note
- 1¼ cups chicken broth for a rich simmer
- ⅓ cup fresh cilantro, roughly chopped for garnish
Campfire and Camping Gas Stove Directions:
-
Begin by blending the peanut butter with rice vinegar, Sriracha, grated ginger, honey, and tamari in a bowl. Introduce hot water by the tablespoon until it reaches your preferred pourability. Reserve this sauce to the side.
-
Over the embers of your campfire or the steady flame of your gas stove, heat two tablespoons of olive oil in a cast iron Dutch oven. Let the chicken thighs sizzle, skin-side down, seasoning them with the sea’s salt and a crackle of pepper. Allow the chicken to bronze beautifully for several minutes, then flip and continue to cook until the underside is sealed with flavor. Place the chicken on a side dish.
-
In the same Dutch oven, pour in the last of your olive oil, followed by ginger, garlic, and onion. Season as before and stir occasionally, cooking until the onion takes on a golden hue.
-
Add the Basmati rice, toasting it as you stir, letting it absorb the flavors in the pot. Pour in tamari, sprinkle the five spice, and then carefully add the chicken broth. Nestle the chicken back into its rice bed.
-
Crank the heat to catch a boil, then instantly dial it back, covering the pot with a lid. Allow the concoction to simmer gently over the fire or stove for a quarter of an hour. Peek under the lid; if the rice begs for more time, grant it a few minutes more until tender. Once done, let the Dutch oven rest away from the heat for a decadent ten minutes.
-
Lift the lid, inviting the aromas to mingle with the open air. Place the chicken on serving dishes, stir the cilantro into the rice, and fluff with a fork. Spoon generous portions of the rice alongside the chicken and cascade the zesty peanut sauce over the top. Delight in each spoonful of this wilderness feast.
Slow Cooker Directions:
-
In a skillet over medium-high heat, warm one tablespoon of olive oil. Season chicken thighs with salt and pepper, then sear them until golden on both sides. This step ensures a rich flavor and texture in the final dish. Transfer the browned chicken to the slow cooker.
-
In the remaining oil in the skillet, sauté ginger, garlic, and onion until fragrant and tender, then transfer them to the slow cooker atop the chicken.
-
Sprinkle the chicken with tamari, five spice powder, and then pour over the chicken broth, ensuring the chicken is snugly nestled in the liquid.
-
Cook on low for 5-6 hours or on high for 2-3 hours. About 30 minutes before the end of cooking, check the chicken. If it’s cooked through (the internal temperature should reach 165°F), gently stir in the Basmati rice, ensuring it’s submerged in the broth. Continue cooking until the rice is fluffy and all liquid has been absorbed.
-
Once cooking is complete, let the slow cooker sit covered for 10 minutes to allow the rice to steam through, ensuring it’s perfectly cooked.
-
Just before serving, garnish with fresh cilantro, lending a burst of color and freshness. Serve each plate with a hearty drizzle of the zesty peanut sauce you’ve prepared, allowing the warm spices and nutty flavors to meld with the succulent chicken and fragrant rice.
Tips for Slow Cooker Success:
-
Layering Flavors: Building the flavor with seared chicken and sautéed aromatics before slow cooking creates a depth of taste that is simply unparalleled.
-
Rice Texture: Adding the rice later in the cooking process ensures it cooks to the perfect texture without becoming mushy.
-
Temperature Check: Always check the chicken’s internal temperature for safety. If adding pre-cooked rice, ensure it is heated through before serving.
-
Rest and Steam: Giving the rice time to steam post-cooking is essential for the perfect finish. Do not skip this step!
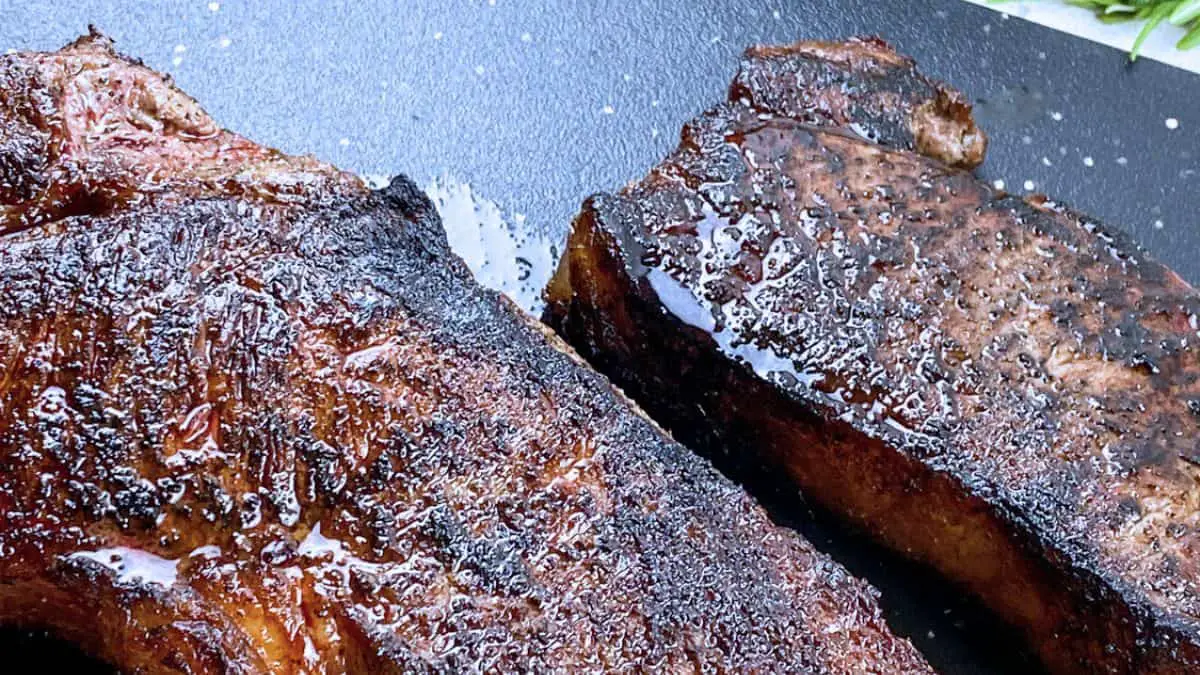
Keto Seared Strip Steak with Sautéed Mushrooms
Cooking Over a Campfire:
-
Begin by generously seasoning both sides of the strip steaks with sea salt and black pepper. Let them rest at room temperature while you prepare the fire.
-
Place a cast iron skillet directly over the campfire, ensuring it’s stable. Allow the skillet to heat up for a few minutes. Drizzle olive oil onto the skillet.
-
Carefully place the seasoned steaks in the skillet. Sear them over the open flame, letting each side cook for 2-3 minutes until they develop a golden-brown crust.
-
After searing, move the skillet to a cooler part of the fire or elevate it slightly above the flames. Top each steak with a pat of butter and let them cook, turning occasionally, for about 8-10 minutes. The goal is to reach an internal temperature of 130°F for medium rare, but adjust according to your preference.
-
While the steaks cook, use another skillet or pan for the mushrooms. Melt the remaining butter and add the sliced mushrooms, rosemary, and garlic powder. Season with salt and pepper to taste. Sauté over the fire, stirring often, until the mushrooms are golden and tender, about 5-6 minutes.
-
Once the steaks are done, place them on a plate and cover loosely with foil. Let them rest for 5 minutes before serving.
-
Serve the steaks with the sautéed mushrooms on top.
Cooking on a Camping Gas Stove:
-
Season the steaks as directed. Preheat your cast iron skillet on the camping stove over medium-high heat, adding olive oil once hot.
-
Sear the steaks in the skillet, cooking each side for 2-3 minutes until browned.
-
Reduce the heat to medium-low and add a tablespoon of butter to each steak. Continue to cook, flipping occasionally, until they reach the desired level of doneness (approximately 8-10 minutes for medium rare).
-
While the steaks are cooking, prepare the mushrooms in another skillet over medium heat. Melt the remaining butter, then add mushrooms, rosemary, and garlic powder. Season as desired and cook until the mushrooms are browned and soft, stirring frequently.
-
Remove the steaks from the heat, cover them loosely with foil, and let them rest for 5 minutes.
-
To serve, cut the steaks into portions as preferred and top them with the sautéed mushrooms.
These directions provide a great way to enjoy a delicious, keto-friendly meal of seared strip steak with sautéed mushrooms, whether you’re cooking over a traditional campfire or using a camping gas stove.
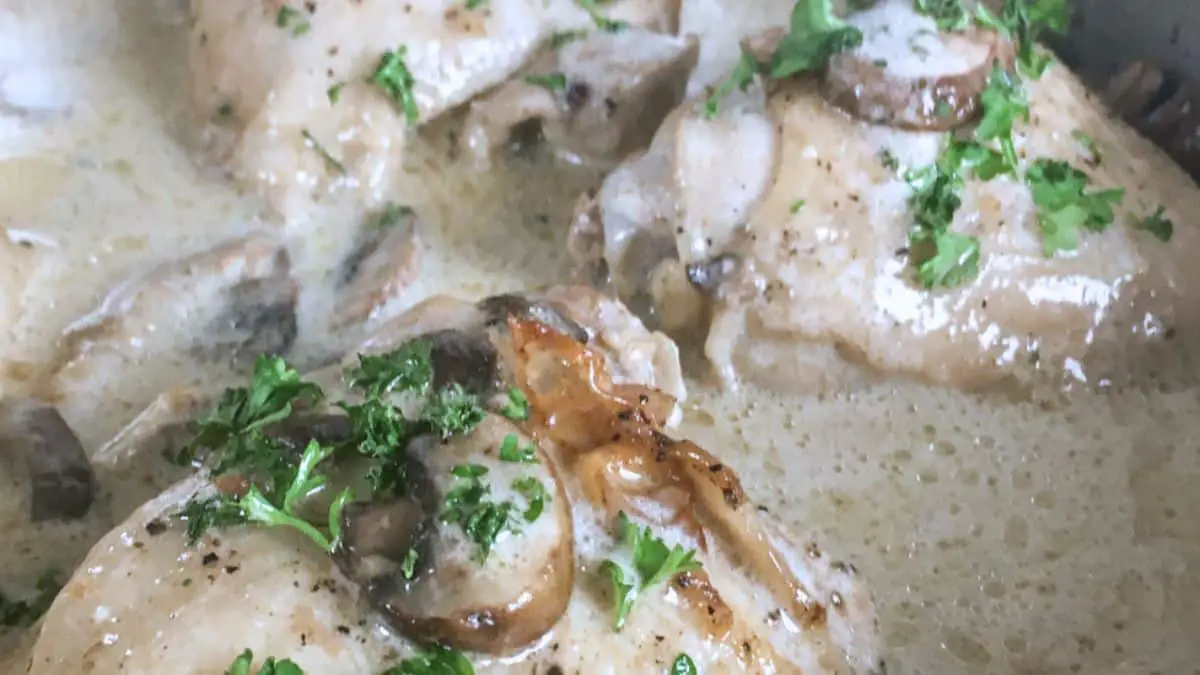
Keto Chicken Thighs with Creamy Mushroom Sauce
Instructions for Cooking Over a Campfire:
-
Melt 2 tablespoons of butter in a large, high-sided skillet over the campfire. Use a grill grate for stability. Season the chicken thighs with garlic powder, salt, and black pepper. Add them to the skillet once the butter is melted and hot.
-
Brown the chicken thighs on each side for 3-4 minutes. They should release easily from the skillet when they’re ready. Transfer them to a plate and set aside.
-
Add the remaining tablespoon of butter to the skillet. Then, sauté the sliced Portobello mushrooms, stirring occasionally, until they take on color and start to release liquid, about 4-5 minutes.
-
Pour in the chicken broth, scraping up the browned bits from the bottom of the skillet. Return the chicken thighs and any collected juices to the skillet.
-
Lower the heat by moving the skillet to a cooler part of the campfire, and cover the skillet. Let it simmer until the chicken is fully cooked, about 25-30 minutes. Then, remove the skillet from the heat and place the chicken on a plate, covering to keep warm.
-
Temper the heavy cream by mixing in a bit of the hot liquid from the skillet, then add it to the skillet. Add cream cheese and stir until it melts completely into the sauce. Adjust seasoning to taste.
-
Serve the chicken topped with the creamy mushroom sauce and garnished with fresh parsley.
Instructions for Cooking on a Camping Gas Stove:
-
Melt 2 tablespoons of butter in the skillet over medium heat on the gas stove. Season and add the chicken thighs to the skillet, browning them on each side for 3-4 minutes.
-
Transfer the chicken to a plate and add the remaining butter to the skillet. Sauté the mushrooms until they start to brown and release moisture, about 4-5 minutes.
-
Stir in the chicken broth, scraping up any brown bits. Return the chicken and juices back to the skillet.
-
Reduce the heat to medium-low, cover, and simmer until the chicken is thoroughly cooked, around 25-30 minutes. Remove the skillet from heat and transfer the chicken to a plate, covering to keep warm.
-
Prepare the creamy sauce by tempering the heavy cream, then adding it to the skillet along with the cream cheese. Stir until the cream cheese is fully incorporated and the sauce is smooth. Adjust seasoning as necessary.
-
Top each chicken thigh with the creamy mushroom sauce and a sprinkle of fresh parsley.
These instructions provide a versatile approach for cooking delicious Keto Chicken Thighs with Creamy Mushroom Sauce, whether you’re enjoying a campfire meal outdoors or cooking on a gas stove while camping.
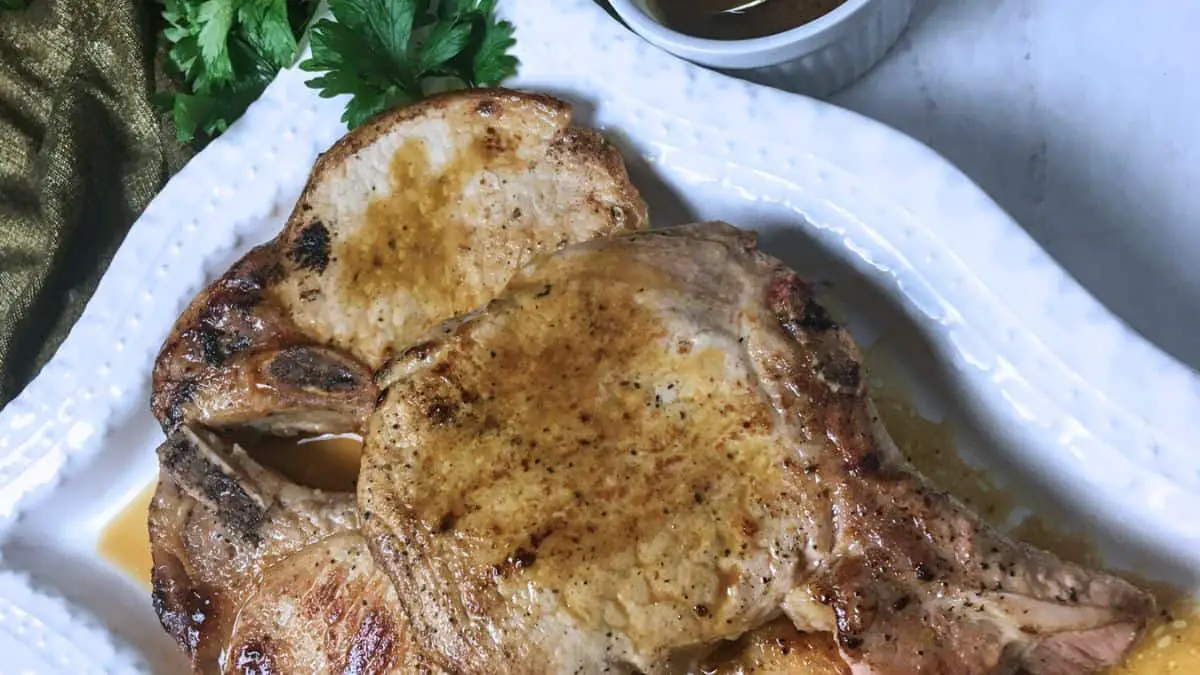
Keto Bone-In Pork Chops with Rich Pan Sauce
Instructions for Cooking Over a Campfire:
-
Heat olive oil in a large, heavy-duty skillet over a campfire grill grate. Ensure the heat is medium. Add minced shallot and cook, stirring occasionally, until softened and slightly colored, about 3-4 minutes.
-
Season the pork chops with garlic powder, salt, and black pepper. Place the chops in the skillet, browning each side for about 3-4 minutes.
-
Transfer the pork chops to a plate. Pour chicken broth into the skillet, using a spatula to gently scrape up the browned bits. Return the chops to the skillet. Lower the heat by moving the skillet to a cooler part of the grill grate. Cover and cook until the pork is cooked through, about 8-10 minutes.
-
Move the chops to a serving plate and cover them to keep warm. Add butter to the skillet, whisking it into the pan sauce. Let it cook until the sauce thickens slightly, approximately 2-3 minutes.
-
Season the sauce if needed and spoon it over the pork chops. Garnish with chopped parsley and serve with your preferred sides.
Instructions for Cooking on a Camping Gas Stove:
-
In a large skillet, heat olive oil over medium heat on the gas stove. Add shallot, cooking until it softens and gains some color, about 3-4 minutes.
-
Season pork chops with garlic powder, salt, and black pepper. Cook in the skillet, browning them for 3-4 minutes on each side.
-
Remove the chops to a plate. Add chicken broth to the skillet, scraping the brown bits from the bottom. Return the chops to the skillet, reduce the heat to medium-low, cover, and cook until done, about 8-10 minutes.
-
Transfer the chops to a serving plate. Add butter to the skillet, whisking into the sauce until it thickens slightly, for about 2-3 minutes.
-
Taste and adjust the seasoning of the sauce. Spoon it over the chops and garnish with fresh parsley.
Whether cooking over an open campfire or on a gas stove while camping, these instructions ensure you can enjoy a delicious meal of Keto Bone-In Pork Chops with a rich pan sauce, perfect for an outdoor adventure.
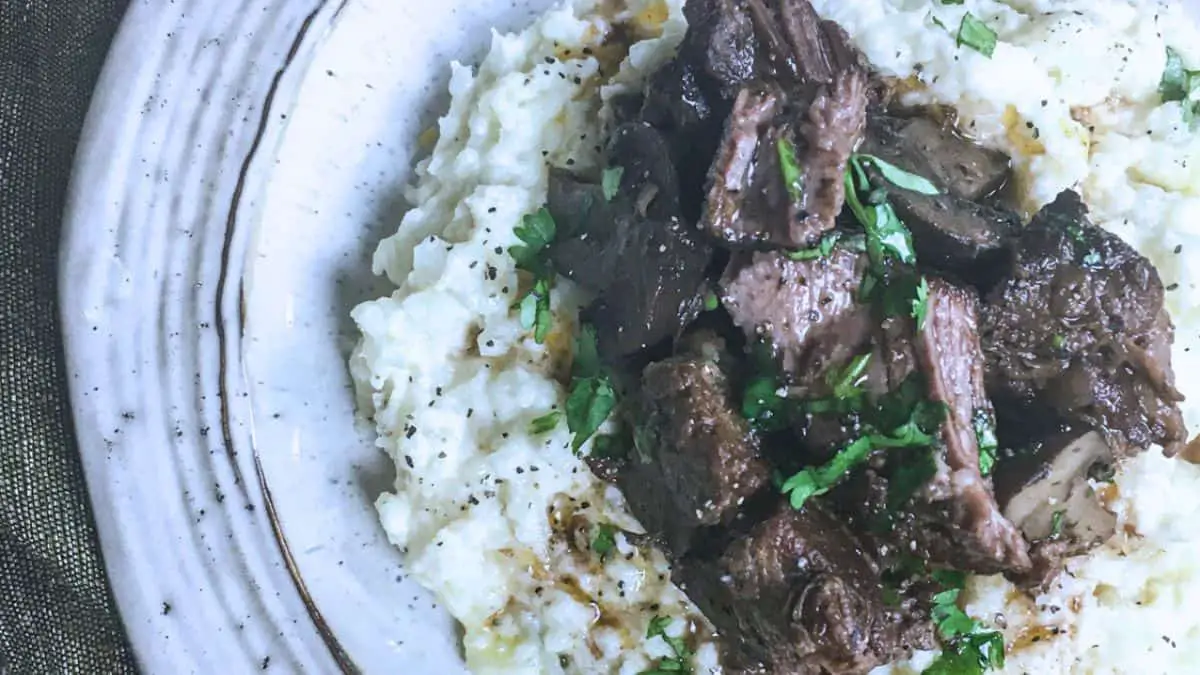
Keto Chuck Roast with Portobello Mushrooms and Rich Pan Sauce
Ingredients:
- 1 tsp garlic powder
- 1 Tbsp Italian seasoning
- 1 Tbsp cocoa powder
- 1 tsp sea salt
- ½ tsp black pepper
- 3 lbs chuck roast
- 3 Tbsp extra virgin olive oil, divided
- 8 oz Portobello mushrooms, sliced
- 4 cups beef broth
- 1 Tbsp tomato paste
- 2 bay leaves
- 2 Tbsp fresh parsley, chopped
Instructions:
-
Combine the dry seasonings: Mix garlic powder, Italian seasoning, cocoa powder, salt, and black pepper in a bowl. Rub the mixture thoroughly on all sides of the chuck roast. Let it sit.
-
Over a campfire or camping gas stove, place a large Dutch oven or heavy pot over medium heat. Add two tablespoons of olive oil. Once hot, brown the chuck roast on all sides, about 3-4 minutes per side.
-
Remove the roast and set it aside. Add the remaining oil and sauté the Portobello mushrooms in the pot until they start to soften and color, roughly 4-5 minutes.
-
Deglaze the pot by pouring in beef broth. Scrape the bottom to incorporate the flavorful bits. Stir in tomato paste and add bay leaves. Return the roast to the pot, cover with a lid or tightly with foil.
-
For campfire cooking: Place the Dutch oven on a grill grate over a moderately hot campfire. Simmer for about 3-3½ hours, or until the roast is tender. Regularly check and adjust the pot’s position for even cooking and maintain a steady heat.
-
For gas stove cooking: Keep the heat at low and let it simmer for 3-3½ hours, or until the meat easily falls apart.
-
-
Remove from heat. Discard the bay leaves. Transfer the chuck roast and mushrooms to a platter, keeping them warm.
-
Increase the heat to medium-high (either over the campfire or on the gas stove) and bring the remaining liquid to a boil. Reduce to medium and simmer until the sauce thickens slightly.
-
To serve: Spoon some of the thickened sauce and mushrooms over the beef. Garnish with fresh parsley and serve with your favorite keto-friendly sides like creamy mashed cauliflower or roasted radishes.
This rich and flavorful keto chuck roast can be easily prepared at your campsite or pre-made for a camping adventure, offering a hearty and satisfying meal in the great outdoors.
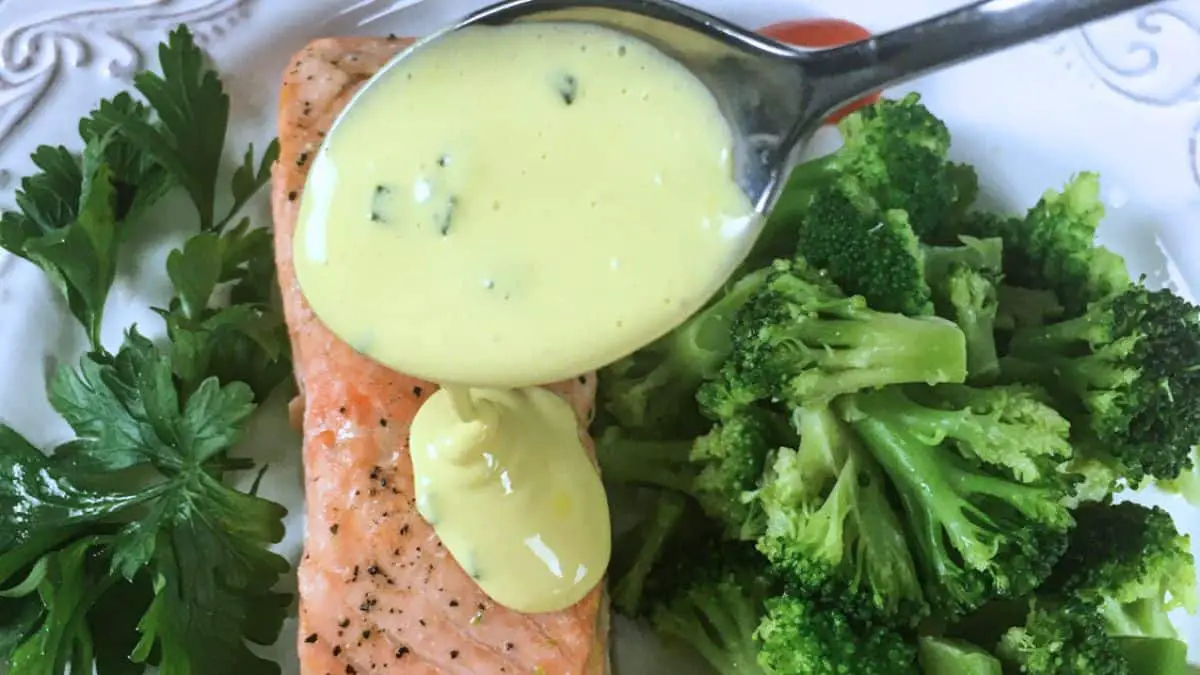
Keto Oven-Roasted Salmon with Easy Blender Hollandaise Sauce
Ingredients:
- 4 6-oz. salmon fillets
- 1 Tbsp extra virgin olive oil
- Sea salt and black pepper, to taste
For the Easy Blender Hollandaise Sauce:
- 3 egg yolks
- 1½ Tbsp lemon juice
- 1/8 tsp salt
- 1/8 tsp cayenne pepper
- 6 Tbsp unsalted butter
- 2 Tbsp fresh chives, chopped
Instructions:
-
Preheat your oven or campfire cooking setup to 400°F. For the oven, line a baking sheet with parchment paper or a Silpat mat. For campfire cooking, prepare a flat, fire-safe surface or use a grill grate.
-
Place the salmon fillets on your prepared surface (baking sheet or campfire cookware), and brush each with olive oil. Season with sea salt and black pepper.
- In an oven: Roast the salmon in the preheated oven for 12-15 minutes, or until the salmon flakes easily with a fork. Be careful not to overcook.
- Over a campfire: Place the fillets on a grill grate or in a skillet over the fire, cooking for about 6-7 minutes per side, depending on the thickness.
-
While the salmon is cooking, make the hollandaise sauce. Add egg yolks, lemon juice, salt, and cayenne pepper to a blender. Melt the butter until bubbling in a small saucepan over your campfire or stove, or in a microwave.
-
Begin blending the egg mixture. Slowly drizzle in the hot, melted butter while the blender is running. The sauce should become smooth and creamy. If too thick, add a bit of warm water and blend briefly again.
-
Taste and adjust the hollandaise sauce by adding more lemon juice, salt, or cayenne pepper as needed. Keep the sauce warm by setting the container in lukewarm water, being cautious to prevent the eggs from cooking further.
-
Once the salmon is cooked, remove it from the heat. Serve immediately with your preferred keto-friendly sides, such as roasted asparagus or broccoli. Drizzle each salmon fillet with the warm hollandaise sauce and sprinkle with fresh chives. Enjoy your delicious, keto-friendly meal whether you’re at home or enjoying the outdoors!
Cheesy Garlic Parmesan Chicken & Potatoes Recipe
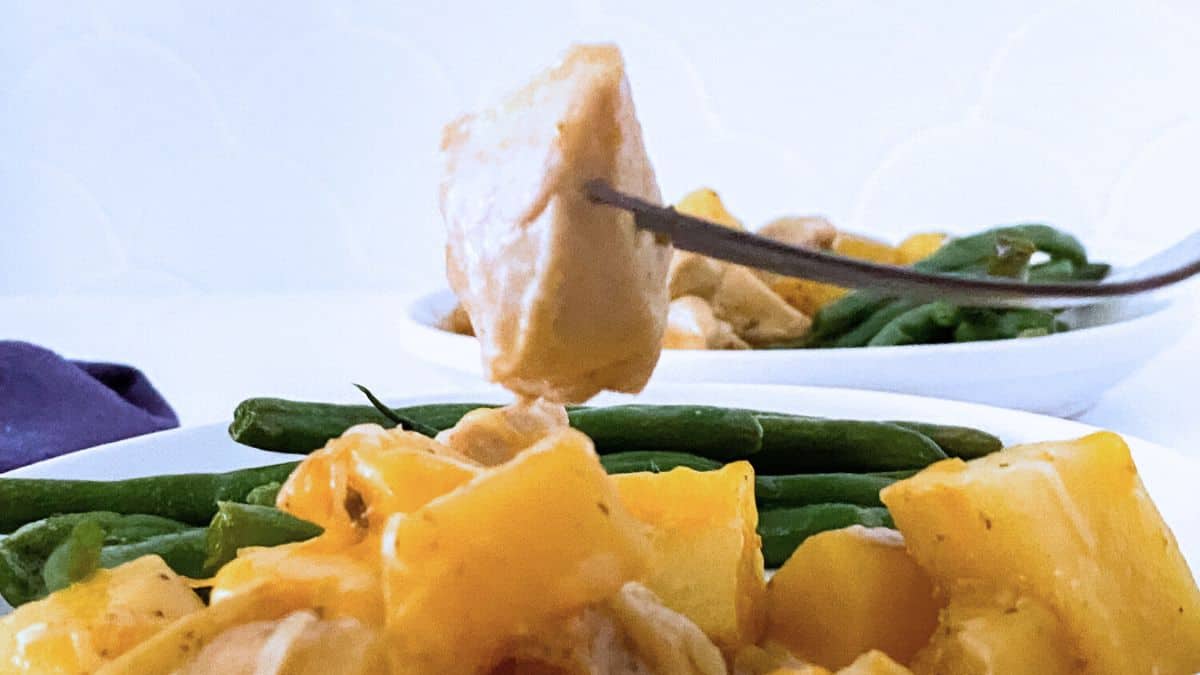
Ingredients:
- 1 large chicken breast, cubed
- 5 medium-sized gold potatoes
- 2 tbsp olive oil
- 1 tsp salt
- 1 tsp black pepper
- 1 tsp garlic powder
- 1 tsp Italian seasoning
- 1 tsp paprika
- ¼ cup Buffalo Wild Wings Garlic Parmesan Sauce (or homemade equivalent)
- 1 cup shredded cheese (of your choice)
Instructions:
For Slow Cooker:
- Prepare the Slow Cooker:
- Spray the inside of your slow cooker with nonstick spray, or drizzle with olive oil. This prevents sticking and makes cleanup easier.
- Prepare Potatoes and Chicken:
- Wash, then cube the potatoes. Place them in the slow cooker.
- Drizzle olive oil over the potatoes, then season with salt, black pepper, garlic powder, Italian seasoning, and paprika. Toss to ensure even coating.
- Cube the chicken breast and layer it over the potatoes. Season the chicken with additional salt and pepper, and any other preferred seasonings.
- Add Sauce and Cook:
- Pour the garlic parmesan sauce over the chicken and potatoes.
- Cook on HIGH for 2.5 to 3 hours (or on LOW for 5.5 to 6 hours), until the potatoes are tender.
- Final Touches:
- Stir the mixture well, then top with shredded cheese.
- Cover and let it sit for 5-10 minutes until the cheese is melted and gooey.
For Dutch Oven Campfire:
- Prepare the Dutch Oven:
- Place the Dutch oven over the campfire, ensuring it’s in a stable position but not directly in the flames.
- Cooking Process:
- Follow the same preparation method for the potatoes and chicken, layering them in the Dutch oven.
- Cover and cook for about 1-1.5 hours, stirring occasionally, until the potatoes are soft and the chicken is cooked through.
- Final Steps:
- After the potatoes and chicken are cooked, stir in the garlic parmesan sauce and top with shredded cheese.
- Cover the Dutch oven and allow the cheese to melt for a few minutes.
Serve and Enjoy: Whether prepared in a slow cooker or over a campfire, this cheesy garlic parmesan chicken and potatoes dish is a hearty and comforting meal. Serve hot, relishing the perfect blend of savory and cheesy flavors.
Salisbury Steak
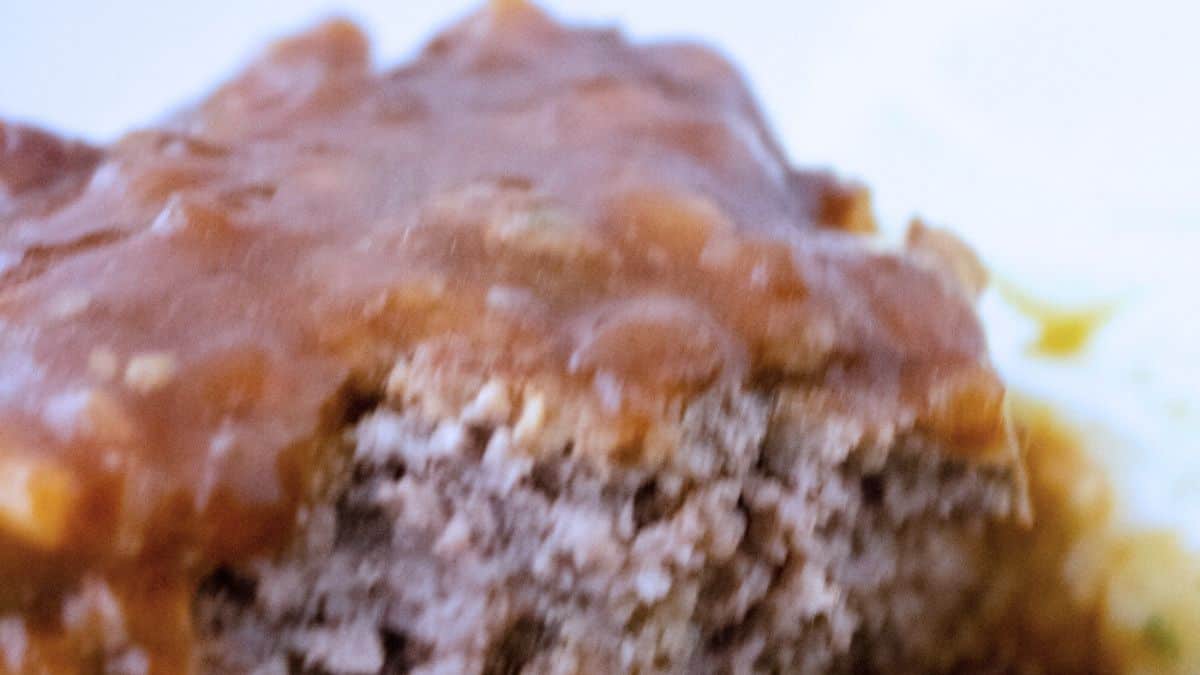
Ingredients:
- 1 egg, beaten
- 1 can (10.5 ounces) condensed French onion soup, divided
- 1/2 cup dry Italian bread crumbs
- 1 teaspoon kosher salt
- 1 teaspoon pepper
- 1.5 pounds ground beef
- 1 tablespoon all-purpose flour
- 1/4 cup water
- 1/4 cup ketchup
- 1 teaspoon Worcestershire sauce (or ½ tsp soy sauce as a substitute)
- 1 packet dry French onion soup mix
Instructions:
1. Prepare the Meat Mixture:
- In a spacious bowl, blend the beaten egg, 1/3 cup of French onion soup, bread crumbs, salt, and pepper. Add the ground beef and mix until all ingredients are just combined. Aim for a uniform mixture but avoid overworking the meat.
2. Form and Brown the Patties:
- Shape the mixture into six evenly sized patties.
- For Skillet on a Gas Stove/Campfire: Over medium heat, place the patties in the skillet and cook for about 3-4 minutes on each side. They should achieve a nice brown color but won’t be cooked through completely at this stage.
- For Campfire Cooking: You can use a grill grate over the campfire for an even cooking process.
3. Prepare the Gravy:
- After browning, carefully drain any excess grease from the skillet.
- Add the remaining French onion soup, onion soup mix, ketchup, and Worcestershire sauce into the skillet. Mix these ingredients well to combine.
- Blend the flour with 1/4 cup of water to create a smooth mixture, then stir it into the skillet. This will thicken your gravy.
4. Simmer the Patties:
- Once the gravy begins to thicken, transfer a portion of it into a separate bowl or measuring cup. Then, carefully return the patties to the skillet.
- Drizzle the reserved gravy over the patties. If using a skillet on a gas stove, cover and simmer on low heat for about 15-20 minutes. For campfire cooking, place the skillet on a cooler part of the campfire and cover, ensuring it receives gentle heat.
- Stir occasionally to prevent sticking and ensure even cooking.
5. Serve and Enjoy:
- Once the patties are thoroughly cooked and the gravy is rich and savory, your Salisbury steak is ready to serve. Enjoy this hearty meal straight from the skillet!
Remember, when cooking over a campfire, control of heat is crucial. You may need to adjust the cooking time based on the intensity of the fire. Enjoy this comforting dish in the great outdoors or at home with equal ease and satisfaction!
Philly Cheesesteak Recipe
 phillycheesecake.jpg
Ingredients:
- 12 oz ribeye, thinly sliced
- 1/2 sweet onion, chopped
- 1/2 green bell pepper, chopped
- 4 hoagie rolls
- 8 slices provolone cheese
- 2 tbsp unsalted butter
- 1 clove garlic, pressed
- 1/2 tsp kosher salt
- 1/2 tsp black pepper
- 1/2 tsp garlic powder
Instructions:
1. Prep and Season the Meat:
- Begin by seasoning the thinly sliced ribeye with kosher salt, garlic powder, and black pepper for a flavorful base.
2. Create Garlic Butter:
- In a small bowl, combine pressed garlic with softened butter, blending well for a garlicky spread.
3. Sauté Onions and Peppers:
- In a Skillet (Gas Stove or Campfire): Heat the garlic butter in a skillet over medium heat. Add the onions and green peppers, sautéing until they are soft and aromatic. Once done, transfer them to a plate.
- For Campfire Cooking: If you’re cooking over a campfire, use a heavy-duty skillet and adjust the skillet’s distance from the flames to manage the heat.
4. Cook the Ribeye:
- In the same skillet, add a bit of olive or avocado oil and then the seasoned ribeye slices. Cook until the meat is well-browned and fully cooked through.
5. Combine Meat with Vegetables:
- Return the onions and peppers to the skillet with the meat. Stir to combine everything evenly.
6. Cheese Topping and Bun Preparation:
- Divide the meat and vegetable mixture into four equal sections within the skillet. Top each section with two slices of provolone cheese. Allow the cheese to melt over the meat.
- Once the cheese has melted, place each hoagie roll, open side down, on top of each cheesy meat section. This helps to warm and slightly crisp the buns.
7. Assemble and Serve:
- Carefully scoop each section into a hoagie roll. You can add mayo if desired.
- Serve these delectable Philly cheesesteaks hot, enjoying the blend of melted cheese, savory meat, and aromatic vegetables tucked into a toasty bun.
Remember, when cooking over a campfire, it’s important to keep an eye on the heat source and adjust the cooking time accordingly. These Philly cheesesteaks are perfect for a satisfying meal in the great outdoors or a casual dinner at home. Enjoy!
Slow Cooker BBQ Chicken Recipe
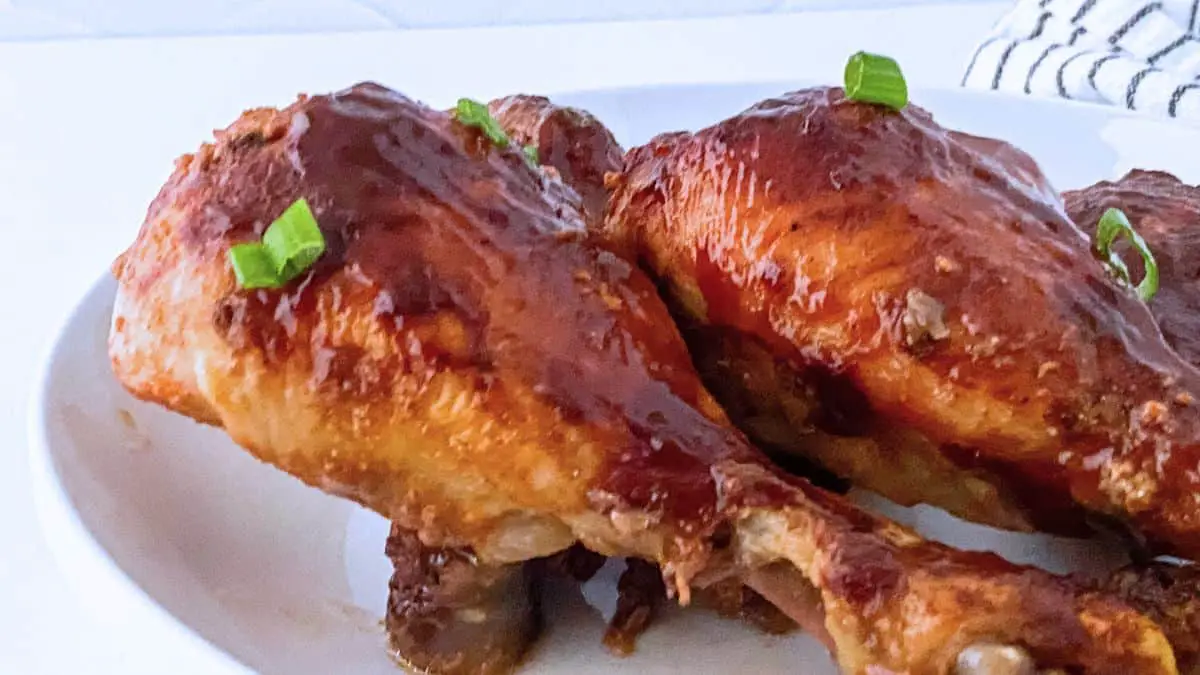
Ingredients:
- 6 chicken legs
- 1 tsp season salt
- 1 tsp garlic powder
- 1 tsp onion powder
- ½ tsp chili powder
- ½ tsp paprika
- 1/3 cup BBQ sauce
Instructions:
1. Prepare the Seasoning Mix:
- In a small bowl, combine season salt, garlic powder, onion powder, chili powder, and paprika. This blend will create a robust and flavorful base for the chicken.
2. Season the Chicken:
- Thoroughly rub the seasoning mix into each chicken leg, ensuring they are evenly coated for maximum flavor.
3. Slow Cooker Cooking:
- Place the seasoned chicken legs into the slow cooker. Generously brush each piece with BBQ sauce, covering them well.
- Cook on HIGH for 4 hours, allowing the chicken to become tender and infused with the BBQ flavor.
4. Final Basting and Broiling:
- After cooking, baste the chicken with additional BBQ sauce for that extra sticky, sweet coating.
- For an optional finishing touch, place the chicken under a broiler for 5 minutes. This will create a delightful caramelized texture.
5. Dutch Oven Campfire Method:
- Preparation: If you’re using a Dutch oven over a campfire, start by seasoning the chicken as above and placing it in the Dutch oven.
- Cooking: Place the Dutch oven over the campfire, ensuring it’s not too close to the flames but in a position where it can accumulate even heat. Cook the chicken for about 1-1.5 hours, turning occasionally. Halfway through the cooking process, brush the chicken with BBQ sauce and cover again.
- Finishing: If you want that broiled effect, remove the lid and place the Dutch oven closer to the flames for the last few minutes, monitoring it closely to prevent burning.
6. Serve and Enjoy:
- Whether cooked in a slow cooker or over a campfire, serve these succulent BBQ chicken legs hot. They make a perfect meal for a cozy night in or a delightful camping dinner.
Enjoy the blend of smoky, sweet, and savory flavors that make this BBQ chicken irresistibly delicious!
Taco Charcuterie Board Recipe
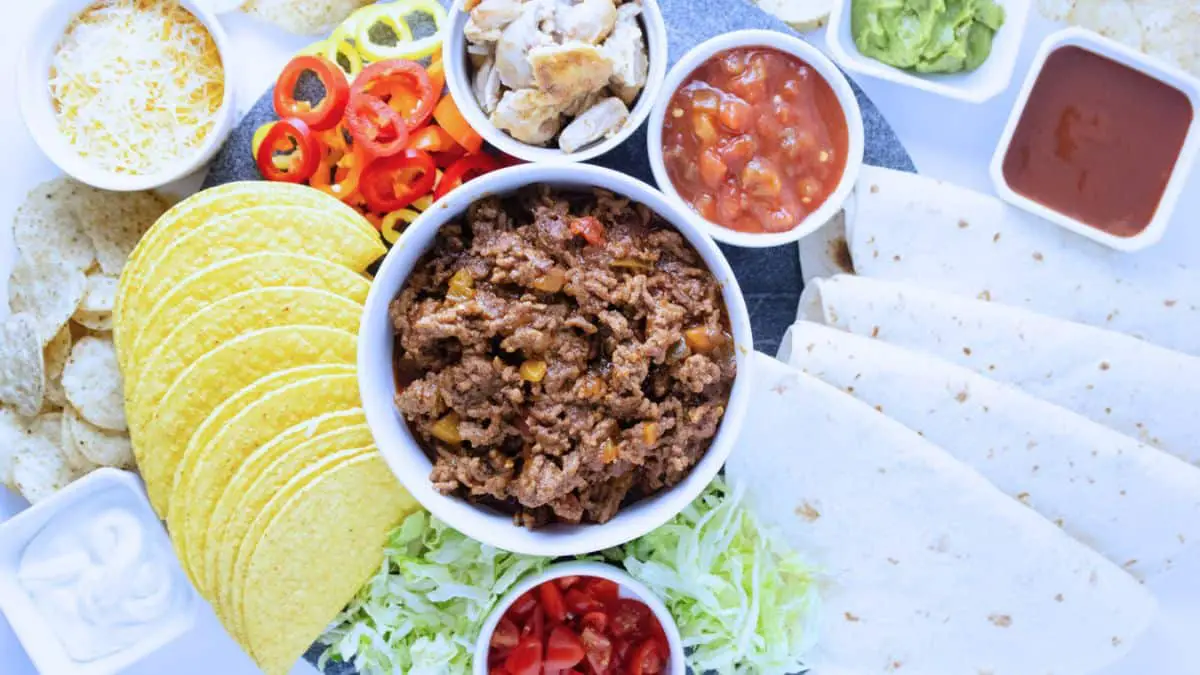
Ingredients:
- 1 lb ground beef
- 1 jar salsa (peach mango preferred)
- 1 packet taco seasoning mix (Taco Bell brand suggested)
- ¼ cup water
- 2 cups cooked chicken, chopped
- 1-2 cups Mexican blend cheese
- 3-5 small colorful peppers, sliced
- 10-12 cherry tomatoes, diced
- 2 cups shredded lettuce
- 1/3 cup guacamole
- 1/3 cup sour cream
- 1/3 cup taco sauce
- 8 hard taco shells
- 8 soft taco shells
Instructions:
For Campfire Cooking with a Dutch Oven:
- Prepare the Ground Beef:
- Over the campfire, heat your Dutch oven. Add the ground beef and cook until browned. If necessary, drain any excess grease.
- Season the Meat:
- Stir in the taco seasoning and ¼ cup of water. Mix until the beef is well-coated with the seasoning. Then, add half of the jar of salsa. Continue cooking, stirring occasionally, until the mixture is well heated.
- Arrange the Charcuterie Board:
- Once the beef is ready, transfer it to a serving dish and place it at the center of your charcuterie board.
- Artfully arrange the taco shells on opposite sides of the board for visual appeal.
- Scatter the colorful toppings like lettuce, tomatoes, cheese, chicken, guacamole, sour cream, and taco sauce around the beef and taco shells.
For Slow Cooker Preparation:
- Cook the Ground Beef:
- In a skillet over medium-high heat, brown the ground beef. Drain if necessary, then transfer it to the slow cooker.
- Add Flavor:
- To the slow cooker, add the taco seasoning, water, and half a jar of salsa to the ground beef. Stir to combine.
- Cook on LOW for 2-3 hours to allow the flavors to meld together.
- Assemble the Charcuterie Board:
- After cooking, place the beef mixture in a serving dish at the center of your charcuterie board.
- Arrange the taco shells and all the toppings (lettuce, tomatoes, cheese, chicken, guacamole, sour cream, and taco sauce) around the beef, creating an enticing display.
Serving Suggestions: Offer your guests a variety of options to customize their tacos. This taco charcuterie board is perfect for gatherings where everyone can build their own taco masterpiece. Enjoy the fun and flavors of a personalized taco experience!
Walking Tacos
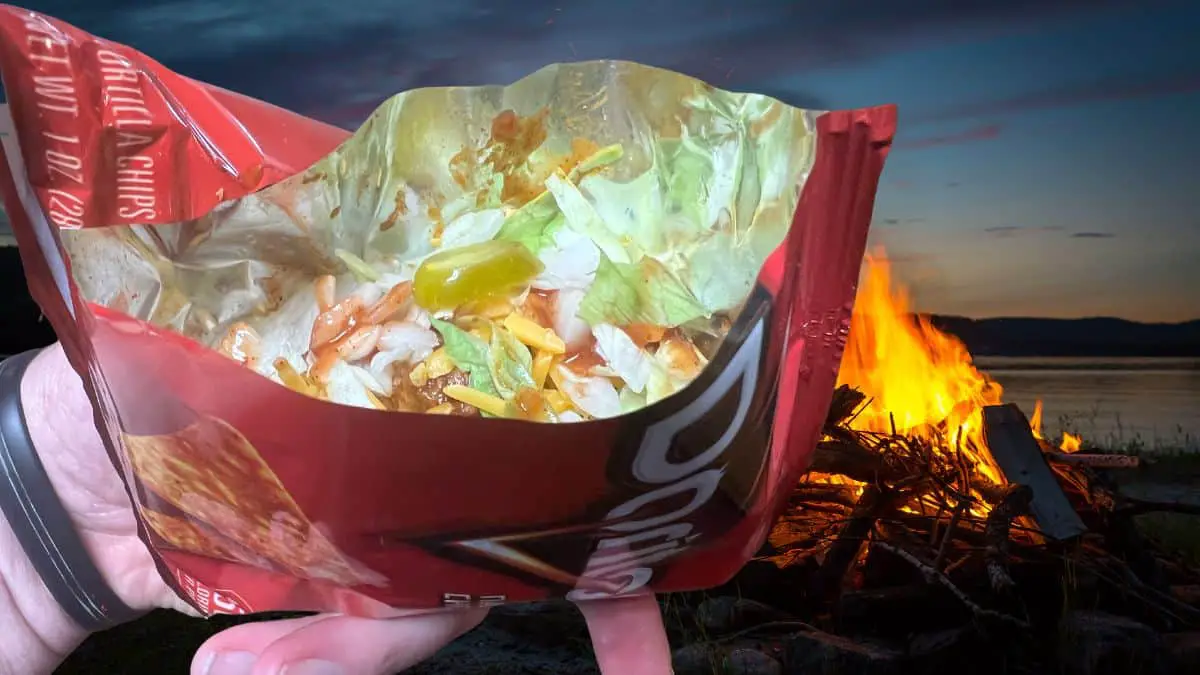
Use the same recipe as the Taco Charcuterie Board. But instead of taco shells use a small bag of chips like Doritos or Fritos. Put the taco toppings including the meat into the bag. That way you don’t need a separate plate.
Chili Pie

If you have leftover chili from our chili recipe and a bag of Fritos then you can make a chili pie. You can also use your favorite pre-made chili such as Wolf Brand and that is the most common recipe.
Otherwise, it’s simple.
Instructions: You heat your chili. Pour some Fritos onto a plate or bowl. Or you can even use a small bag like a walking taco. Add any other toppings that you like including cheese and onions.
Oven Cooked Baby Back Ribs
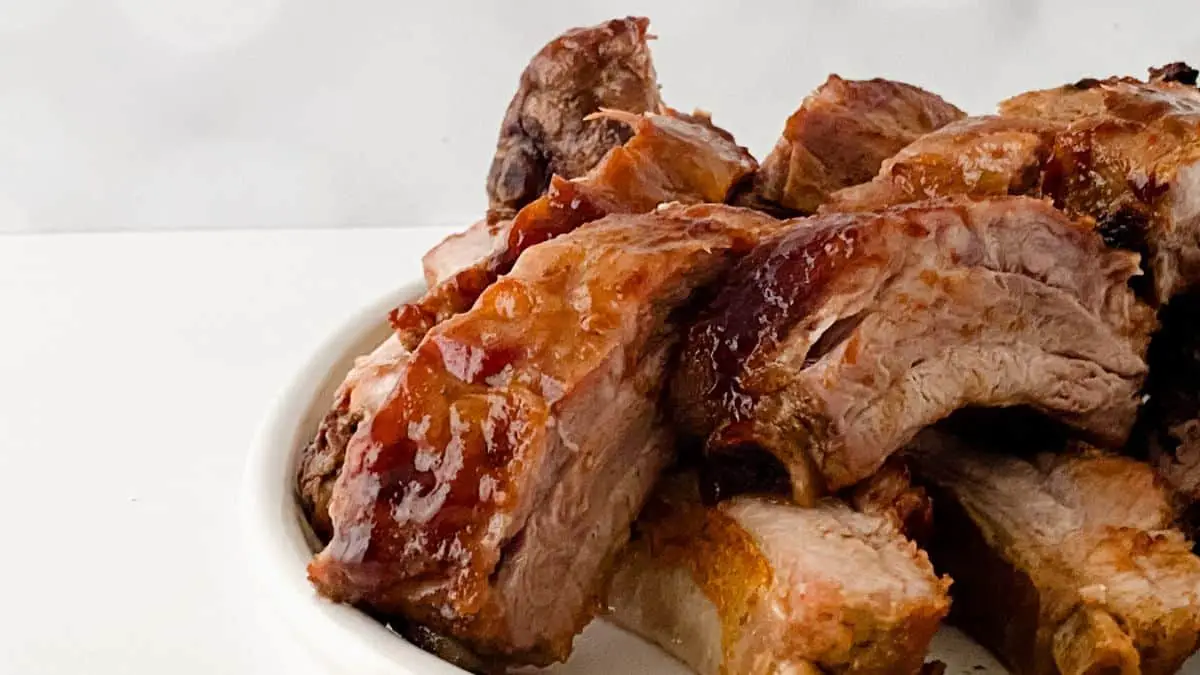
Ingredients:
- 1 slab baby back ribs
- ½ cup yellow mustard
- 2 tsp season salt
- 1 tsp garlic powder
- 1 tsp onion powder
- 1 tsp smoked paprika
- 1 tsp black pepper
- 1 tsp white pepper
- 1 cup brown sugar
- 6 tbsp unsalted butter
- 2 tbsp honey
- 1/2 cup BBQ sauce (optional)
Instructions for Oven Cooking:
-
Preheat Your Oven: Set your oven to 245°F (118°C).
-
Prepare the Ribs: Clean the ribs and remove the membrane on the back for a smooth texture. Pat them dry.
- Season the Ribs:
- Coat both sides of the ribs with yellow mustard. This helps in tenderizing the meat and won’t leave a mustard flavor.
- Sprinkle garlic powder, onion powder, both peppers, and paprika over the ribs. Do not rub the spices in. Then, apply the season salt on top without rubbing.
- Wrap and Cook:
- Tightly wrap the seasoned ribs in aluminum foil and place them in the oven. Cook for 2 hours.
- Add Sweetness:
- After 2 hours, carefully open the foil and add brown sugar, honey, and butter on top of the ribs. Create a tent with the foil so it doesn’t touch the meat.
- Final Cook:
- Return the ribs to the oven for an additional hour.
- Optional BBQ Glaze:
- If you prefer a BBQ glaze, brush the ribs with BBQ sauce, increase the oven temperature to 425°F (220°C), and cook for another 10 minutes until the sauce is sticky and caramelized.
Instructions for Campfire Cooking:
- Campfire Setup:
- Start a campfire and let it burn down to a consistent bed of coals.
- Prepare and Season the Ribs:
- Follow the same preparation and seasoning steps as for oven cooking.
- Wrap and Cook on Campfire:
- Wrap the seasoned ribs tightly in heavy-duty aluminum foil. Place the wrapped ribs over indirect heat (not directly over the flames) and cook for approximately 2-2.5 hours, turning occasionally.
- Add the Sweet Layer:
- Carefully unwrap the ribs and add brown sugar, honey, and slices of butter. Rewrap and continue cooking for about 1 hour more.
- Serving:
- If you have a grill grate, finish the ribs on it for a few minutes on each side for a slight char. Optionally, brush with BBQ sauce in the last few minutes.
Make-Ahead Tip for Camping:
- Precook at Home: Cook the ribs at home following the oven instructions. Let them cool, then wrap and refrigerate.
- Reheat at Campsite: Warm them over the campfire or on a grill until heated through, adding BBQ sauce if desired. This method offers delicious, fall-off-the-bone ribs with minimal campsite effort.
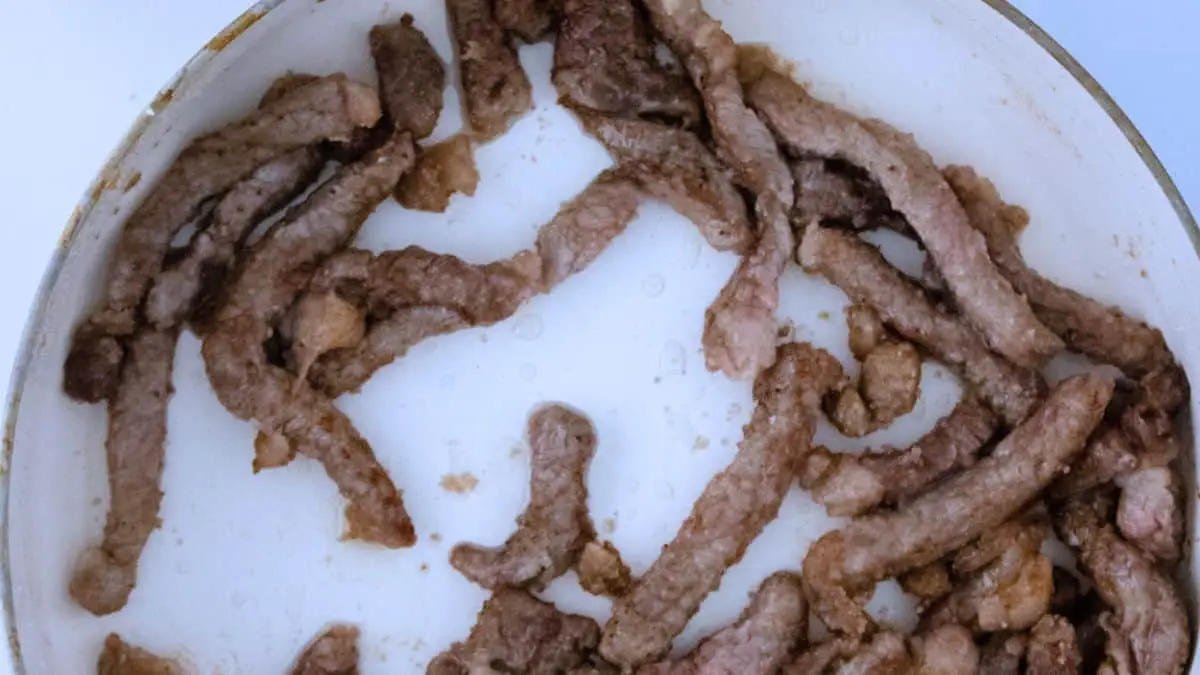
Mongolian Beef Recipe
Ingredients:
- 2 New York Strip Steaks, sliced thin
- 3 tablespoons cornstarch
- 4 tablespoons vegetable oil, divided
- 2 cloves garlic, minced
- 1 tablespoon minced ginger
- 1/4 cup low sodium soy sauce
- 1/4 cup water
- 1/4 cup light brown sugar
- 1 tsp white pepper
- 1/2 tsp salt
- Green onion, chopped, for garnish
Instructions:
1. Prepare the Steak:
- Cut the steaks into thin strips and season them with salt and white pepper.
- Toss the steak strips in cornstarch until they are fully coated.
2. Create the Sauce:
- On a Camping Gas Stove or Campfire: Heat 2 teaspoons of oil in a cast iron skillet over medium-high heat.
- Sauté garlic and ginger until they become fragrant, about 1 minute.
- Mix in soy sauce, water, and brown sugar. Bring the mixture to a boil, then transfer it to a measuring cup or heat-safe dish.
3. Sear the Beef:
- Add the remaining 2 tablespoons of oil to the skillet.
- Cook the coated steak strips, searing them on all sides until they turn brown, about 5 minutes in total.
4. Thicken the Sauce:
- Return the sauce to the pan with the beef. Once it starts boiling, it will begin to thicken.
- Continue cooking for 2-3 minutes, stirring occasionally, until the sauce is thick enough to coat the back of a spoon.
5. Serving:
- Serve the Mongolian beef hot, ideally over steamed rice. Garnish with chopped green onions for an added flavor and visual appeal.
Tips for Campfire Cooking:
- When cooking over a campfire, adjust the skillet’s position to regulate heat.
- If you don’t have a camping gas stove, a well-controlled campfire with a sturdy skillet will work just fine.
- Always have a safe place to set down the hot skillet, like a wooden board or a heat-resistant mat.
Enjoy this delicious Mongolian Beef whether you’re in the comfort of your home or savoring the great outdoors!
Dutch Oven Beef Tips Recipe
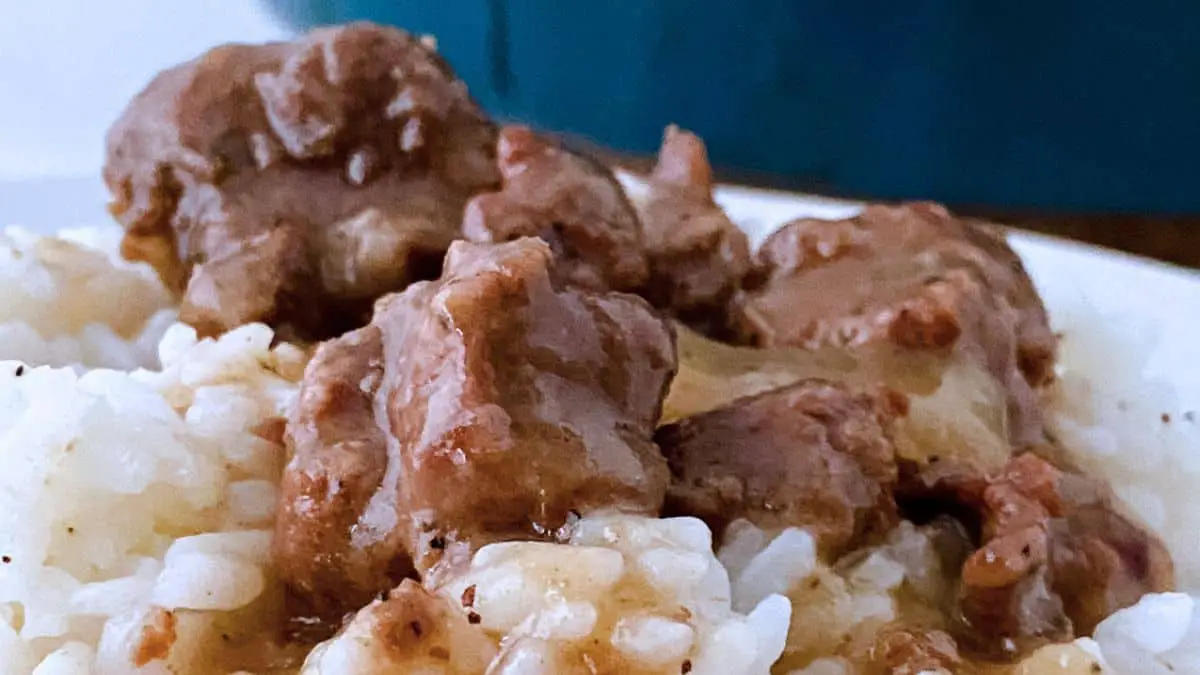
Ingredients:
- 2-3 tbsp olive oil (or vegetable oil)
- 1 pound beef stew meat
- 1 tsp season salt
- 1/2 tsp salt
- 1/2 tsp black pepper
- 1/2 tsp white pepper
- 1/2 tsp garlic powder
- 1/4 tsp onion powder
- 1/2 cup all-purpose flour
- 1/2 cup onion, diced
- 1 tbsp Worcestershire sauce
- 1.5 cups beef broth
- 1 cup water
- 1 tbsp corn starch (optional)
Instructions for Dutch Oven Cooking Over Campfire:
- Season and Flour the Meat:
- In a mixing bowl, combine beef stew meat with salt, black pepper, white pepper, garlic powder, onion powder, and season salt. Mix well to ensure each piece is evenly coated.
- Toss the seasoned meat in all-purpose flour to coat thoroughly.
- Brown the Beef:
- Heat oil in a Dutch oven over the campfire. Once hot, add the floured beef.
- Lower the heat to medium, allowing the beef to sear on all sides. Once browned, remove the beef from the Dutch oven.
- Sauté Onions:
- In the same Dutch oven, add the diced onions. Stir with a wooden spoon, scraping off the brown bits from the bottom of the pot. Sauté until onions are translucent.
- Create the Sauce:
- Add Worcestershire sauce to the onions, mixing well.
- Combine beef broth with water and cornstarch (if using) and add this mixture to the Dutch oven. Stir well.
- Simmer:
- Bring the mixture to a boil, stirring frequently. Once boiling, reduce the heat to a simmer. Cover the Dutch oven and let it cook for about one hour, stirring every 8-10 minutes.
Instructions for Slow Cooker:
- Prepare Meat:
- Follow the same procedure for seasoning and flouring the beef.
- Brown the Beef:
- In a skillet over medium-high heat, sear the beef on all sides, then transfer it to the slow cooker.
- Sauté Onions and Create Sauce:
- Sauté onions in the skillet, then add Worcestershire sauce and the beef broth mixture. Bring it to a simmer before adding it to the slow cooker.
- Slow Cook:
- Cover and cook on LOW for 6-8 hours or on HIGH for 3-4 hours.
Serving Suggestions: Serve these savory beef tips over rice, mashed potatoes, or your favorite steamed vegetables. This dish is a hearty and satisfying meal, perfect for a comforting dinner at home or a fulfilling meal while camping. Enjoy the rich flavors and tender beef in each bite!
Sweet Chili Chicken Egg Rolls Recipe

Ingredients:
- 1-2 tbsp olive oil for cooking
- 1 chicken breast
- 1 tsp garlic powder
- 1 tsp salt
- 1 tsp pepper
- 1 tbsp cornstarch
- 1/2 red bell pepper, diced
- 1/4 cup yellow onion, diced
- 1/4 cup carrots, shredded
- 3-4 tbsp sweet chili sauce, divided
- 8 or 16 egg roll wrappers
- Vegetable oil for frying
- 2 tbsp water
Sauce:
- 1/4 cup sweet chili sauce
- 1/3 cup mayo
Instructions:
1. Prepare the Filling:
- Dice the onion and bell pepper. Slice the chicken breast into strips, then chop them into bite-sized pieces.
- In a skillet, heat olive oil over medium heat.
- Season the chicken with salt, pepper, garlic powder, and cornstarch, then cook in the skillet until golden and cooked through. Set aside.
- In the same skillet, sauté the onion, carrots, and pepper until softened. Return the chicken to the skillet, add 2 tbsp of sweet chili sauce, and cook for 3-4 minutes.
2. Prepare Egg Rolls:
- Clean the skillet and return it to the stove, filled with vegetable oil for frying, and heat over medium-high.
- Lay the egg roll wrappers like a diamond. Place 2 tablespoons of the chicken filling in a line, leaving space on each side.
- Fold the bottom corner over the filling, roll it once, then wet the remaining edges with water. Fold in the sides and roll until the egg roll is sealed.
3. Fry the Egg Rolls:
- Fry the egg rolls in batches until golden brown, turning once one side is golden. Drain them on paper towels.
4. Prepare the Sauce:
- Whisk together mayo and sweet chili sauce to create a dipping sauce.
Cooking Over a Campfire:
- For Frying: Heat the cast iron skillet with vegetable oil over the campfire, carefully managing the heat.
- For Sautéing: Prepare the chicken and vegetables as above using a skillet over the campfire. Adjust the cooking time as needed based on the heat intensity.
Cooking on a Camping Gas Stove:
- Follow the same instructions as above, adjusting the heat as needed on your gas stove.
Make-Ahead Tip:
- These egg rolls can be prepared ahead of your camping trip, fried, and then reheated at the campsite over a grill or in a skillet on a gas stove.
Enjoy these Sweet Chili Chicken Egg Rolls as a savory and delightful treat, perfect for a home-cooked meal or a campsite feast!
Cream of Mushroom Chicken and Pasta Recipe
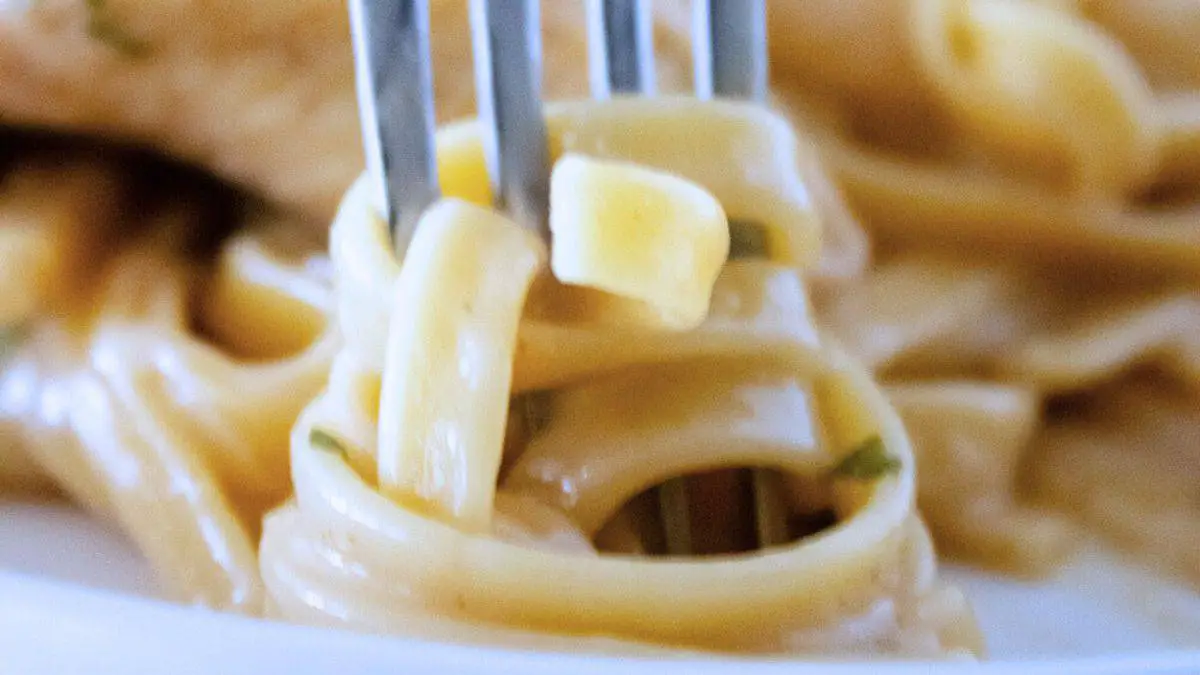
Ingredients:
- 1.5-2 lbs chicken breasts or chicken breast tenderloins
- 2 tbsp olive oil
- 1 can cream of mushroom soup
- 1 can chicken broth
- 1 ½ cup water
- 8 oz fettuccini (or preferred pasta)
- 2 tsp onion powder
- 2 tsp all-purpose seasoning
- 1 tsp kosher salt
- 1 tsp black pepper
- 1 tsp garlic powder
Instructions for Cooking on a Camping Gas Stove:
- Cook the Chicken:
- Heat olive oil in a 12-inch skillet over medium-high heat on your camping stove.
- Season the chicken with onion powder, all-purpose seasoning, kosher salt, black pepper, and garlic powder.
- Add the chicken to the skillet and cook for about 6 minutes, turning once, until each side is nicely browned.
- Remove the chicken from the skillet and set it aside.
- Prepare the Pasta Sauce:
- In the same skillet, combine the cream of mushroom soup, chicken broth, and water. Stir well and bring the mixture to a boil.
- Combine Chicken and Pasta:
- Add the fettuccini (or your preferred pasta) to the skillet.
- Place the browned chicken on top of the pasta.
- Cover the skillet, reduce the heat to medium-low, and let it cook for about 10 minutes. The pasta should be tender, and the sauce thickened. Stir occasionally to prevent sticking.
Instructions for Cooking on a Campfire:
- Prepare the Campfire:
- Ensure your campfire has a steady flame suitable for cooking.
- Brown the Chicken:
- Follow the same steps for seasoning and browning the chicken in a skillet over the campfire.
- Simmer the Pasta and Chicken:
- After removing the chicken, add the soup, broth, and water to the skillet, and place it back over the campfire.
- Add the pasta and chicken, cover with a lid, and cook for about 10-15 minutes, adjusting the skillet as needed to maintain even cooking.
Serving:
- Serve this creamy and comforting dish hot. It’s perfect for a nourishing meal in the great outdoors or a cozy campsite dinner.
Enjoy your Cream of Mushroom Chicken and Pasta, a delicious and satisfying meal that’s perfect for outdoor cooking adventures or a simple yet delightful campfire dinner!
Nashville Hot Chicken Tenders Recipe

Ingredients:
- 8 chicken tenders or 2 breasts cut into strips
- 1 ½ cups all-purpose flour
- 3-5 tbsp cayenne pepper
- 2 tbsp brown sugar (light or dark)
- 1 tsp black pepper
- 1 tsp chili powder
- 1 tsp garlic powder
- 1 tsp salt
- 1 tsp paprika
- 1 cup buttermilk
- Hot sauce (your choice)
- 8-10 cups vegetable oil for frying
For the Glaze/Sauce:
- ¼ cup oil from fried chicken (or 3 tbsp unsalted butter)
- 3 tbsp honey
- 1 tsp paprika
- 1 tsp garlic powder
- 1 tsp salt
- 1 tsp black pepper
Instructions for Cooking on a Camping Gas Stove:
- Marinate the Chicken:
- Marinate chicken tenders in a mixture of buttermilk and hot sauce for at least 30 minutes or up to 4 hours.
- Prepare the Seasoning and Flour Mixture:
- In a bowl, mix cayenne, brown sugar, black pepper, chili powder, garlic powder, salt, and paprika.
- Coat the chicken with ¾ of the seasoning mix, rubbing it well.
- Combine the remaining ¼ seasoning mix with the flour and set aside.
- Frying Process:
- Heat vegetable oil in a large pan over medium-high heat on your camping gas stove.
- Dredge each piece of marinated chicken in the seasoned flour mixture.
- Let the coated chicken rest on a wire rack for 5 minutes before frying.
- Fry the chicken until golden brown on both sides, approximately 8 minutes in total.
- Transfer the cooked chicken to a wire rack to drain excess oil.
- Make the Glaze:
- In a bowl, whisk together oil from fried chicken (or melted butter), honey, paprika, garlic powder, salt, and black pepper until combined.
- Brush the glaze over the hot fried chicken.
Instructions for Making at Home and Reheating at the Campsite:
- Preparation at Home:
- Follow the same steps for marinating, seasoning, and frying the chicken at home.
- Let the chicken cool down after frying and store it properly for transportation to the campsite.
- Reheating at the Campsite:
- On a camping gas stove, reheat the chicken in a skillet until it is hot and crispy.
- Prepare the glaze as instructed and apply it to the reheated chicken.
For Air Fryer Cooking at Home:
- Prepare the Chicken:
- Follow the same marinating and seasoning steps as mentioned above.
- Air Fryer Cooking:
- Preheat your air fryer to 375°F (190°C).
- Place the coated chicken tenders in the air fryer basket in a single layer, ensuring they don’t overlap for even cooking.
- Cook for about 8-10 minutes, flipping halfway through, until the chicken is golden brown and cooked through. The internal temperature should reach 165°F (74°C).
- Once cooked, let the chicken tenders cool, then store them for transportation to your campsite.
For Reheating at the Campsite:
- Heat a Skillet on a Camping Stove:
- Place a skillet over your camping gas stove and heat it to a medium setting.
- Add the air-fried chicken tenders to the skillet.
- Reheat for a few minutes on each side until the chicken is heated through and the exterior is crisp.
- Prepare and Apply the Glaze:
- As before, prepare the glaze by mixing the ingredients in a bowl.
- Once the chicken is reheated, brush each tender with the glaze.
Serving Suggestions:
- Serve your Nashville Hot Chicken Tenders with a side of coleslaw, pickles, or your favorite dipping sauce.
- Enjoy these delicious tenders as a flavorful and convenient meal at your campsite, perfect for those who love a bit of spice in their outdoor dining experience!
Notes:
- Using a wire rack for both resting before frying and draining after frying helps the chicken maintain its crispiness.
- Enjoy these spicy and flavorful Nashville Hot Chicken Tenders, freshly made or reheated, perfect for an adventurous outdoor meal or a comforting campsite treat!
Hearty Campfire Beef and Cheese Pasta
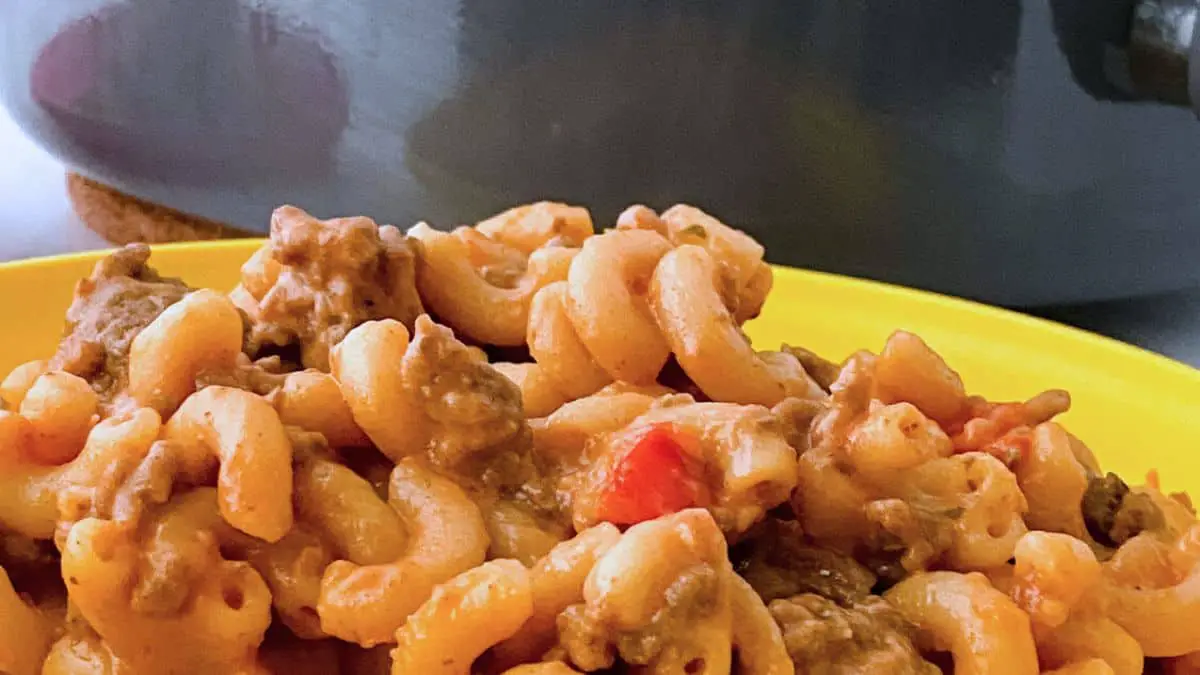
Ingredients:
- 1 pound ground beef
- 1/2 onion, diced
- 1/2 cup tri-color peppers, diced
- 2 cups beef broth
- 2 cups whole milk
- 16 oz pasta (about 3 cups)
- 2 cans (8 oz each) tomato sauce
- 1 tbsp minced garlic
- 1 tsp paprika
- 1 tsp oregano
- 1 tsp parsley flakes
- 1/2 tsp salt
- 1/2 tsp pepper
- 2 cups mild cheddar cheese, shredded
Instructions for Campfire or Gas Stove Cooking:
- Cook the Beef:
- Over your campfire or camping gas stove, heat a skillet. Add the ground beef and diced onion, cooking until the beef is browned and the onions are soft.
- Stir in the minced garlic and cook for another minute.
- Season the Mixture:
- Season the beef with salt, pepper, paprika, and parsley flakes. Stir well to combine the flavors.
- Add Liquids and Pasta:
- Pour in the beef broth, tomato sauce, and whole milk. Stir to mix.
- Add the pasta to the skillet, ensuring it’s submerged in the liquid.
- Simmer the Pasta:
- Bring the mixture to a boil, then reduce the heat to maintain a gentle simmer.
- Cover the skillet with a lid and let it cook for about 12-15 minutes. Stir occasionally to prevent the pasta from sticking to the skillet.
- Add Cheese:
- Once the pasta is cooked and most of the liquid is absorbed, turn off the heat.
- Sprinkle the cheddar cheese over the pasta and gently stir to incorporate.
- Cover the skillet for a few minutes to allow the cheese to melt into the pasta, creating a creamy texture.
- Serve and Enjoy:
- Once the cheese is fully melted and the pasta is creamy, it’s ready to serve.
- Enjoy this comforting and hearty skillet meal under the stars or at your campsite, perfect for refueling after a day of adventure!
This Hearty Campfire Beef and Cheese Pasta combines the ease of one-skillet cooking with the rich flavors of a home-cooked meal, making it a perfect choice for camping trips and outdoor cooking.
Chili Cornmeal Chicken Recipe

Ingredients:
- 1-1/2 pounds boneless chicken breasts
- 1/4 cup cornmeal
- 2 tablespoons chili powder
- 1 teaspoon cumin
- Salt and pepper, to taste
- 2 eggs, beaten
- 2 tablespoons vegetable oil
Instructions for Cooking over a Campfire:
- Prepare the Chicken:
- Flatten the chicken breasts to a quarter-inch thickness using a meat mallet or heavy skillet.
- Mix Dry Ingredients:
- In a bowl, combine cornmeal, chili powder, cumin, salt, and pepper.
- Egg Dipping:
- Beat the eggs in a separate bowl. Dip each chicken breast into the eggs, ensuring they are fully coated.
- Coat with Cornmeal Mixture:
- Dredge the egg-coated chicken in the seasoned cornmeal mixture.
- Cook on Campfire:
- Heat a cast iron skillet over the campfire.
- Add vegetable oil to the skillet.
- Place the chicken in the skillet and cook until each side is golden brown and the internal temperature reaches 165°F.
- Flip for Even Cooking:
- Flip the chicken occasionally for even cooking and to prevent burning.
Instructions for Cooking on a Camping Stove:
- Skillet Preparation:
- Heat the skillet on the camping stove, adding the vegetable oil.
- Follow the Same Breading Process:
- Prepare the chicken as outlined above, dipping in egg and then coating in cornmeal mixture.
- Cooking Process:
- Cook the chicken in the heated skillet, flipping as needed, until both sides are golden and the chicken is cooked through to 165°F.
Enjoy!
- Savor the flavorful Chili Cornmeal Chicken, a perfect meal for outdoor cooking, whether over a lively campfire or on a convenient camping stove. Pair it with your favorite sides for a delicious campsite feast!
Campfire Skillet Lasagna Recipe

Ingredients:
- 1 pound ground beef or Italian sausage
- 1 small onion, diced
- 2 cloves garlic, minced
- 1 can (15 oz) crushed tomatoes
- 1 can (15 oz) tomato sauce
- 1 tsp dried oregano
- 1 tsp dried basil
- Salt and pepper, to taste
- 8 oz no-boil lasagna noodles, broken into pieces
- 2 cups ricotta or cottage cheese
- 2 cups shredded mozzarella cheese
- 1/2 cup grated Parmesan cheese
- Fresh parsley or basil for garnish
Instructions for Cooking over a Campfire:
- Prep the Campfire:
- Prepare your campfire to a medium heat suitable for cooking, ensuring you have a stable grill grate placed over the flames.
- Cook the Meat:
- In a large cast iron skillet, cook the ground beef or sausage over the campfire, stirring frequently until browned. Add onions and garlic, cooking until softened.
- Add Tomatoes and Herbs:
- Stir in crushed tomatoes, tomato sauce, oregano, basil, salt, and pepper. Simmer for a few minutes to blend the flavors.
- Layer the Lasagna:
- Spread half of the meat sauce on the bottom of the skillet. Layer broken lasagna noodles over the sauce. Spread ricotta cheese on top of the noodles, then add a layer of mozzarella.
- Repeat Layers:
- Repeat the layering process with the remaining ingredients, finishing with a layer of mozzarella and Parmesan cheese on top.
- Cover and Cook:
- Cover the skillet with a lid or aluminum foil. Cook over the campfire, rotating occasionally, for 20-25 minutes or until noodles are tender.
- Serve:
- Garnish with fresh parsley or basil before serving. Enjoy your skillet lasagna hot from the campfire!
Instructions for Cooking on a Camping Stove:
- Prepare the Stove:
- Heat the camping stove to a medium setting and place the cast iron skillet on the burner.
- Follow Similar Steps:
- Brown the meat with onions and garlic, add tomato sauce and herbs, then layer the lasagna as described in the campfire instructions.
- Simmer on Stove:
- Cover the skillet and allow the lasagna to cook over the camping stove, making sure to check periodically. The cooking time should be around 20-25 minutes, similar to the campfire method.
- Garnish and Serve:
- Once the noodles are tender and the cheese is melted, your skillet lasagna is ready to be served. Garnish and enjoy!
This Campfire Skillet Lasagna offers a delightful twist to traditional lasagna, perfectly suited for an outdoor culinary adventure!
Tuna Pasta Salad Recipe
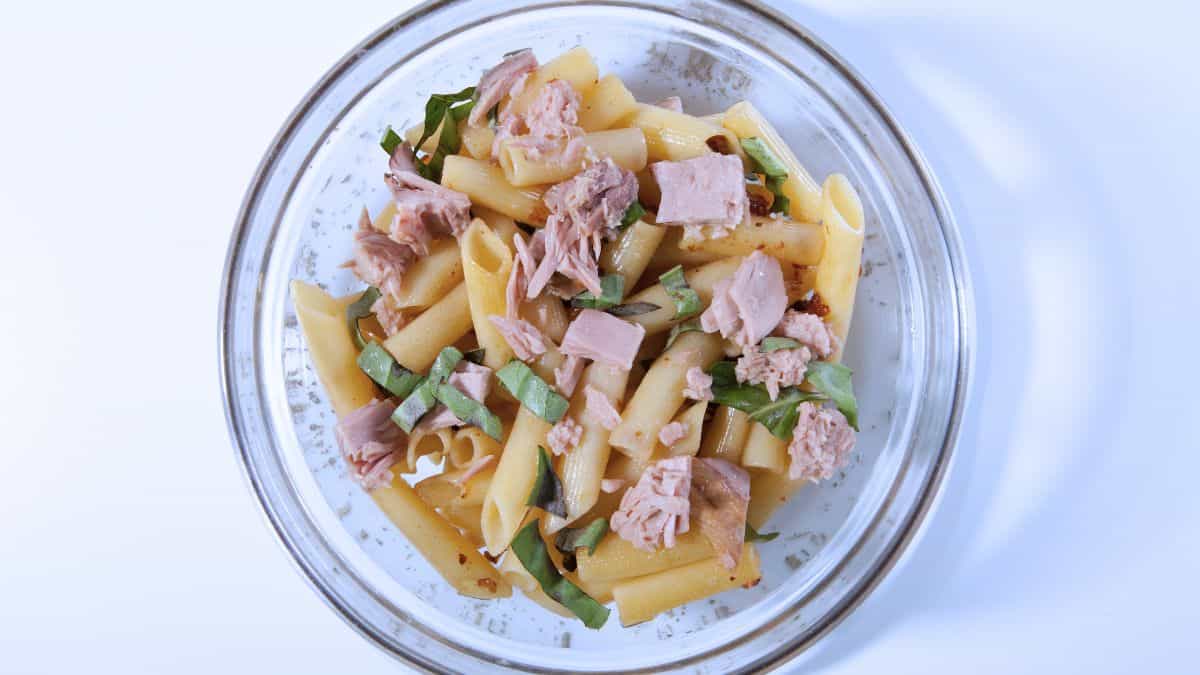
Ingredients:
- 2 cans (6 oz each) tuna, drained
- 12 oz pasta (penne or fusilli works well)
- 1 cup mayonnaise
- 1/4 cup lemon juice
- 1/2 red onion, finely chopped
- 1 red bell pepper, diced
- 1 cup cherry tomatoes, halved
- 1 cucumber, diced
- 1/2 cup black olives, sliced
- 1/4 cup fresh parsley, chopped
- Salt and pepper, to taste
Instructions for Making at Home and Bringing to Camp:
- Cook the Pasta:
- Boil the pasta according to package instructions until al dente. Rinse under cold water to stop the cooking process and let it cool completely.
- Prepare the Dressing:
- In a small bowl, whisk together mayonnaise and lemon juice until smooth. Season with salt and pepper to taste.
- Mix the Salad:
- In a large mixing bowl, flake the drained tuna with a fork.
- Add the cooled pasta, chopped red onion, diced red bell pepper, halved cherry tomatoes, diced cucumber, and sliced black olives to the bowl with tuna.
- Gently toss the ingredients to combine.
- Add Dressing and Herbs:
- Pour the mayonnaise-lemon dressing over the pasta mixture. Stir well until everything is evenly coated.
- Sprinkle with fresh parsley and give it a final mix.
- Refrigerate Before the Trip:
- Cover the bowl with plastic wrap or transfer the salad to an airtight container. Refrigerate until ready to take on your trip.
- Transporting for Campout:
- Keep the salad chilled in a cooler during transportation to maintain freshness.
- Serving at the Campsite:
- Once at your campsite, stir the salad before serving to redistribute the dressing and flavors.
- Serve chilled as a refreshing and hearty meal during your outdoor adventure.
Enjoy!
- This Tuna Pasta Salad is perfect for camping, offering a delicious and easy-to-transport meal option. Its combination of flavors and textures makes it a satisfying choice for any outdoor meal!
Spicy Tuna Sushi Stack Recipe

Ingredients:
- 2 cans (5 oz each) tuna in water, drained
- 2 cups sushi rice, cooked and cooled
- 1/4 cup mayonnaise
- 2 tablespoons Sriracha sauce
- 1 tablespoon soy sauce
- 1 teaspoon sesame oil
- 1/2 cucumber, finely diced
- 1 avocado, finely diced
- 1/2 cup carrots, julienned
- 2 tablespoons rice vinegar
- 1 tablespoon sugar
- Salt, to taste
- Sesame seeds and sliced green onions for garnish
- Soy sauce and wasabi for serving
Instructions for Making at Home and Bringing to Camp:
- Prepare Sushi Rice:
- In a small bowl, mix rice vinegar, sugar, and a pinch of salt. Stir this into the cooked sushi rice until well combined. Let it cool to room temperature.
- Mix Tuna:
- In another bowl, combine the drained tuna, mayonnaise, Sriracha, soy sauce, and sesame oil. Mix well until all ingredients are evenly incorporated.
- Prepare Vegetables:
- Finely dice the cucumber and avocado. Julienne the carrots.
- Assemble Sushi Stacks:
- Use a round mold or a small cup to create the stacks. Start by layering sushi rice, then add a layer of spicy tuna mixture, followed by cucumber, avocado, and carrots.
- Press down gently after each layer to ensure the stack holds its shape. Carefully remove the mold.
- Packing for Camping:
- If preparing ahead for a camping trip, assemble the sushi stacks in airtight containers. Keep them refrigerated until you’re ready to leave.
- Transportation:
- Transport the sushi stacks in a cooler to maintain freshness.
- Serving at the Campsite:
- Once at your campsite, garnish the sushi stacks with sesame seeds and green onions.
- Serve with soy sauce and wasabi on the side.
Enjoy!
- This Spicy Tuna Sushi Stack is a creative and delightful twist on traditional sushi, perfect for adding a gourmet touch to your camping dining experience!
Sriracha Tuna Wrap Recipe
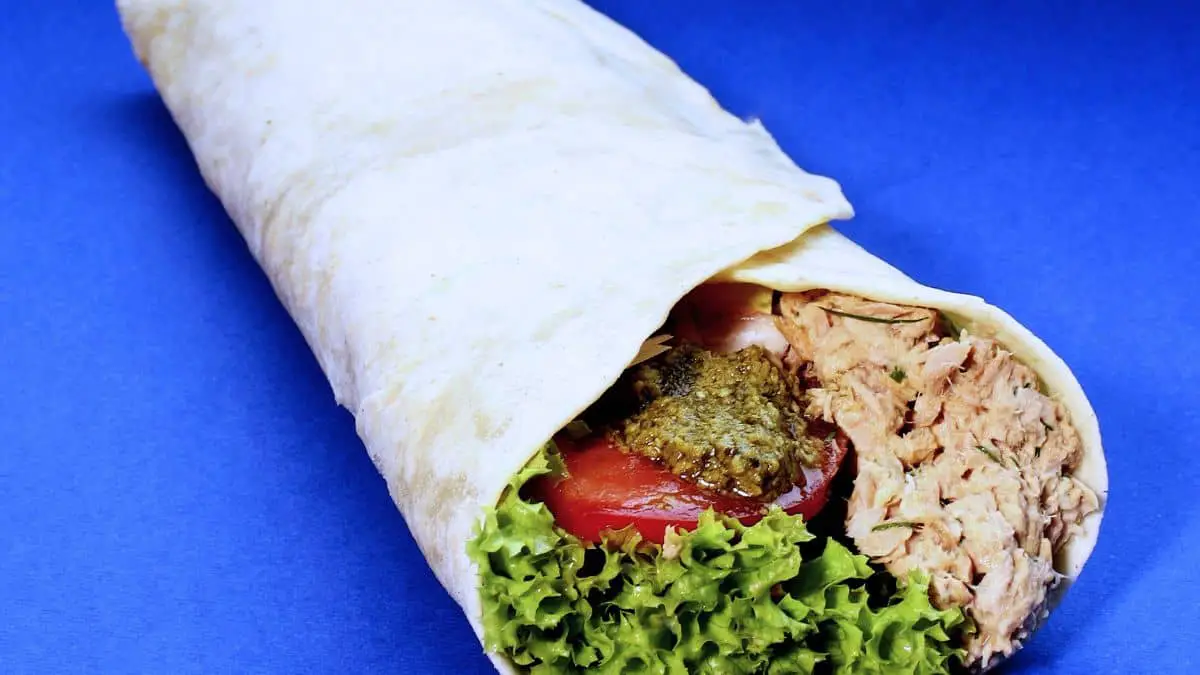
Ingredients:
- 2 cans (5 oz each) tuna in water, drained
- 1/4 cup mayonnaise
- 2 tablespoons Sriracha sauce (adjust to taste)
- 1 tablespoon lime juice
- 1/2 teaspoon garlic powder
- Salt and pepper, to taste
- 4 large flour tortillas
- 1 avocado, sliced
- 1/2 cucumber, thinly sliced
- 1 cup mixed greens or lettuce
- 1/4 red onion, thinly sliced
Instructions for Making at Home or at the Campsite:
- Prepare Tuna Mixture:
- In a medium bowl, combine the drained tuna, mayonnaise, Sriracha sauce, lime juice, and garlic powder.
- Season with salt and pepper according to your taste.
- Stir the mixture well until all ingredients are thoroughly combined.
- Assemble the Wraps:
- Lay out the flour tortillas on a flat surface.
- Spread the spicy tuna mixture evenly over the center of each tortilla.
- Add a layer of avocado slices, cucumber slices, mixed greens, and red onion on top of the tuna.
- Roll the Wraps:
- Carefully roll each tortilla, tucking in the edges as you go, to form a tight wrap.
- If preparing ahead for a camping trip, wrap each tortilla tightly in plastic wrap or aluminum foil to maintain freshness.
- Packaging for Camping:
- Place the wrapped tortillas in a container or cooler to transport to your campsite.
- Serving at the Campsite:
- If already prepared, simply unwrap and enjoy!
- If making at the campsite, assemble the wraps as directed above. No heating is required, making them a convenient and delicious meal option.
Enjoy!
- These Sriracha Tuna Wraps are a perfect blend of spicy and refreshing flavors, ideal for a quick and satisfying meal during your outdoor adventures. Easy to prepare and pack, they are great for camping lunches or dinners.
Bacon Cheeseburger Recipe

Ingredients:
- 1 pound ground beef (80/20 blend works well)
- 4 slices of bacon
- 4 slices of cheddar cheese
- 4 hamburger buns
- Salt and pepper, to taste
- Optional toppings: lettuce, tomato, onion, pickles, ketchup, mustard, and mayonnaise
Instructions for Cooking over a Campfire:
- Prepare the Campfire:
- Get your campfire to a medium heat, suitable for cooking. Place a grill grate over the fire if available.
- Cook the Bacon:
- Place a cast iron skillet over the campfire. Add bacon slices and cook until crispy. Remove and set aside on paper towels to drain.
- Form the Patties:
- While the bacon is cooking, shape the ground beef into four equal-sized patties. Season both sides with salt and pepper.
- Grill the Burgers:
- Cook the patties in the same skillet over the campfire, about 4-5 minutes per side for medium doneness.
- Add Cheese:
- Place a slice of cheese on each patty during the last minute of cooking to melt.
- Toast the Buns:
- Briefly toast the hamburger buns on the grill grate.
Instructions for Cooking on a Camping Stove:
- Heat the Skillet:
- Place the cast iron skillet on the camping stove and heat it over medium-high heat.
- Cook Bacon and Patties:
- Follow the same steps as above for cooking bacon and then the burger patties.
- Cheese and Buns:
- Add cheese to melt on the patties and toast the buns on the skillet as well.
Final Assembly:
- Place each cheese-covered patty on a bun. Add bacon on top.
- Add your desired toppings - lettuce, tomato, onion, pickles, ketchup, mustard, and mayonnaise.
- Top with the other half of the bun.
Enjoy!
- Savor your Bacon Cheeseburger cooked in the great outdoors, whether over a crackling campfire or on a handy camping stove. Perfect for satisfying your burger cravings while camping!
Campfire Tuna Ramen Noodle Foil Packet Recipe
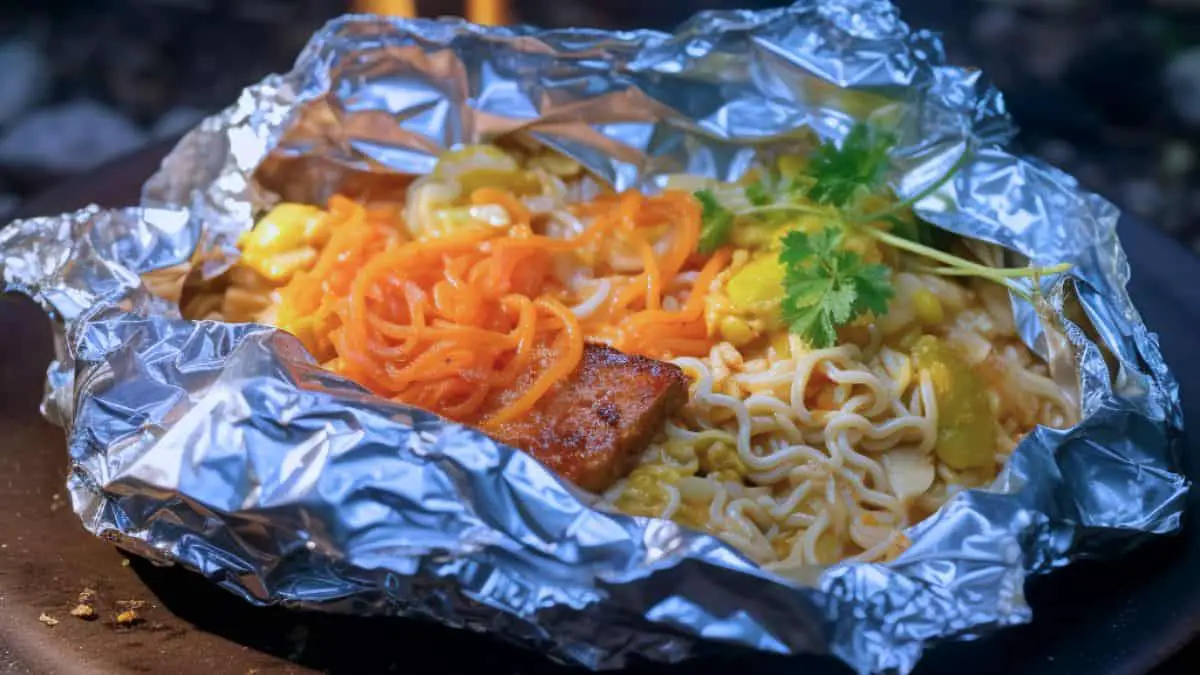
Ingredients:
- 2 packets of instant ramen noodles
- 2 cans (5 oz each) tuna in water, drained
- 2 cups mixed vegetables (like bell peppers, onions, and carrots), thinly sliced
- 4 teaspoons soy sauce
- 2 tablespoons olive oil
- Salt and pepper, to taste
- Optional: dried herbs, chili flakes, or garlic powder for extra flavor
- Aluminum foil for packet creation
Instructions for Cooking over a Campfire:
- Prepare Foil Packets:
- Cut four large pieces of aluminum foil, enough to fold over and seal the ingredients inside. Double layer for extra strength if needed.
- Prep the Noodles:
- Break the ramen noodles into small pieces while still in their packets. Open the packets and set aside the seasoning for use.
- Assemble the Packets:
- On each foil piece, place an equal amount of broken ramen noodles.
- Top noodles with a portion of the sliced mixed vegetables.
- Add half a can of drained tuna on top of the vegetables in each packet.
- Drizzle each with 1 teaspoon of soy sauce and a splash of olive oil. Season with salt, pepper, and any additional desired spices.
- Seal the Packets:
- Carefully bring the edges of the foil together and fold them over, sealing the ingredients inside. Ensure the packet is securely closed to prevent any leaks.
- Cooking on the Campfire:
- Place the foil packets on a grill grate over your campfire. If you don’t have a grate, you can place them directly on the hot coals.
- Cook for about 10-15 minutes, flipping halfway through, until the noodles and vegetables are cooked through.
- Serving:
- Carefully open the foil packets (watch out for hot steam) and give the contents a good mix. If you saved the seasoning packets from the ramen, sprinkle them over now and mix again.
- Eat straight from the foil for an easy and delicious campfire meal!
Enjoy!
- This Campfire Tuna Ramen Noodle Foil Packet is a simple, hearty, and customizable meal, perfect for a night under the stars. Quick to prepare and even quicker to clean up!
Campfire Egg in an Orange Peel Recipe

Ingredients:
- 1 large orange
- 1 egg
- Salt and pepper, to taste
- Optional: shredded cheese, herbs (like chives or parsley), or diced ham
Instructions for Cooking over a Campfire:
- Prepare the Orange:
- Cut the orange in half horizontally. Scoop out the orange segments, leaving the peel halves intact. Enjoy the orange segments as a snack or save them for another use.
- Assemble:
- Place one half of the hollowed-out orange peel on a stable surface. Crack an egg into the orange peel half. Be careful not to break the yolk if you enjoy a runny yolk.
- Add Flavors:
- Season the egg with salt and pepper. If desired, sprinkle with shredded cheese, small pieces of diced ham, or fresh herbs for added flavor.
- Prepare for Cooking:
- Carefully cover the orange peel with the other half, making a ‘ball’ shape. Wrap the whole orange securely in aluminum foil.
- Cooking on the Campfire:
- Place the foil-wrapped orange near the edge of the campfire where the heat is moderate. Avoid direct flames to prevent burning.
- Let it cook for about 10-15 minutes, depending on how hot your fire is and how you like your eggs cooked.
- Check and Serve:
- Carefully remove the foil packet from the fire using tongs or a stick. Unwrap the foil and check if the egg is cooked to your liking.
- If it needs more time, rewrap it and place it back on the fire for a few more minutes.
Enjoy!
- This Campfire Egg in an Orange Peel offers a unique and flavorful twist to your campfire breakfast. The orange peel imparts a subtle citrus flavor to the egg, making it a delightful outdoor meal!
Olives, Cheese, Mayo, Hot Sauce Tuna Wrap

This wrap might sound disgusting. But it is my favorite lunch to eat on a warm day of backpacking.
Ingredients:
- 1 can of tuna drained
- 1 tortilla
- Packets of mayonaise
- Packets of hot sauce
- Package of olives
- Package of your favorite cheese
Instructions
- Assemble everything on the tortilla and enjoy
Sloppy Joes
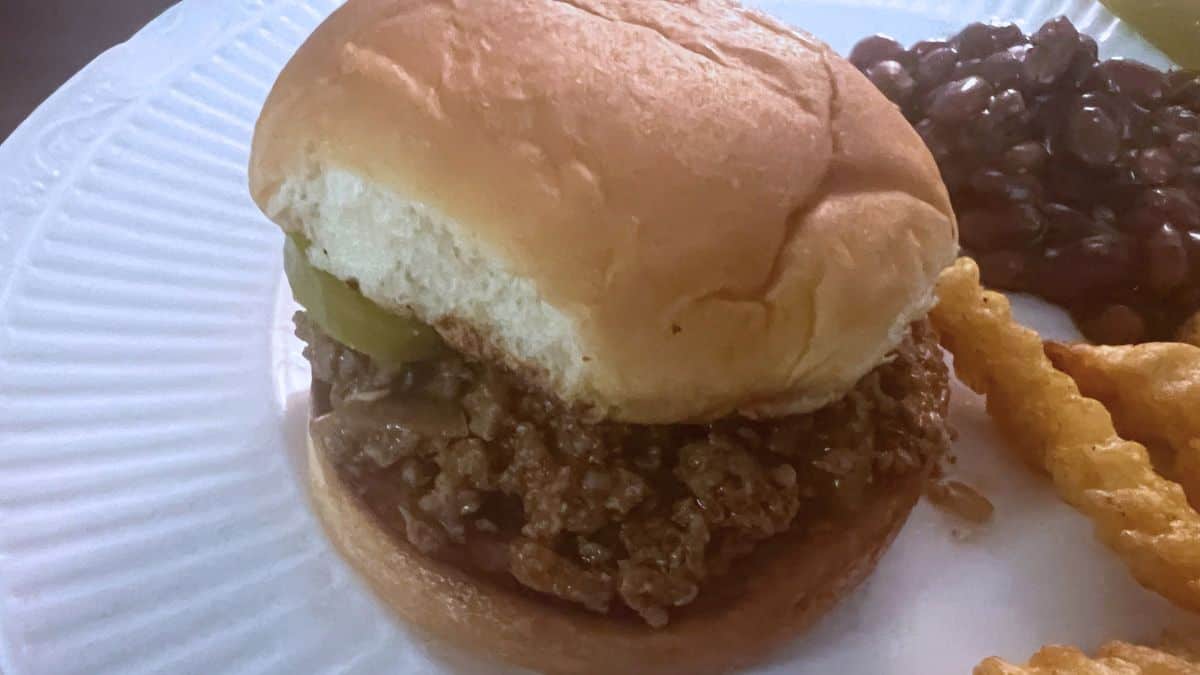
This is my wife’s take on the Sloppy Joe.
Ingredients:
- 1 Medium Onion, finely chopped
- 1 Medium Bell Pepper, diced
- 1 Tablespoon Brown Sugar
- 1 Tablespoon Mustard
- 1 Tablespoon Ketchup
- A Dash of Worcestershire Sauce
- 2 Pounds Ground Beef
- Salt and Pepper, to taste
- Hamburger Buns, for serving
Campfire Cooking Instructions:
- Prepare the Ingredients:
- Start by chopping the onion and bell pepper into small pieces. Keep your brown sugar, mustard, ketchup, and Worcestershire sauce handy.
- Heating the Dutch Oven:
- Place your Dutch oven over the campfire. Ensure the heat is moderate to avoid burning the ingredients.
- Cook the Veggies:
- Add a bit of oil to the Dutch oven. Once heated, add the chopped onions and bell peppers. Sauté them until they become soft and slightly translucent.
- Brown the Beef:
- Add the ground beef to the Dutch oven with the veggies. Cook until the beef is thoroughly browned, breaking it into smaller chunks as it cooks. Season with salt and pepper to taste.
- Mixing in the Flavors:
- Once the beef is browned, stir in the brown sugar, mustard, ketchup, and a dash of Worcestershire sauce. Mix well to combine all the ingredients.
- Simmer:
- Reduce the heat and let the mixture simmer for about 10-15 minutes, allowing the flavors to meld together.
- Serve:
- Spoon the hot Sloppy Joe mixture onto hamburger buns and serve immediately.
Alternative Camping Stove Instructions:
- Cook the Veggies and Beef:
- In a large skillet or pot over the camping stove, follow the same steps to sauté the veggies and brown the beef.
- Add Flavorings and Simmer:
- Add the brown sugar, mustard, ketchup, and Worcestershire sauce as directed, then let it simmer over low heat on the camping stove.
- Serve:
- Once the mixture has thickened to your liking, serve it over hamburger buns.
Classic Beef Stew
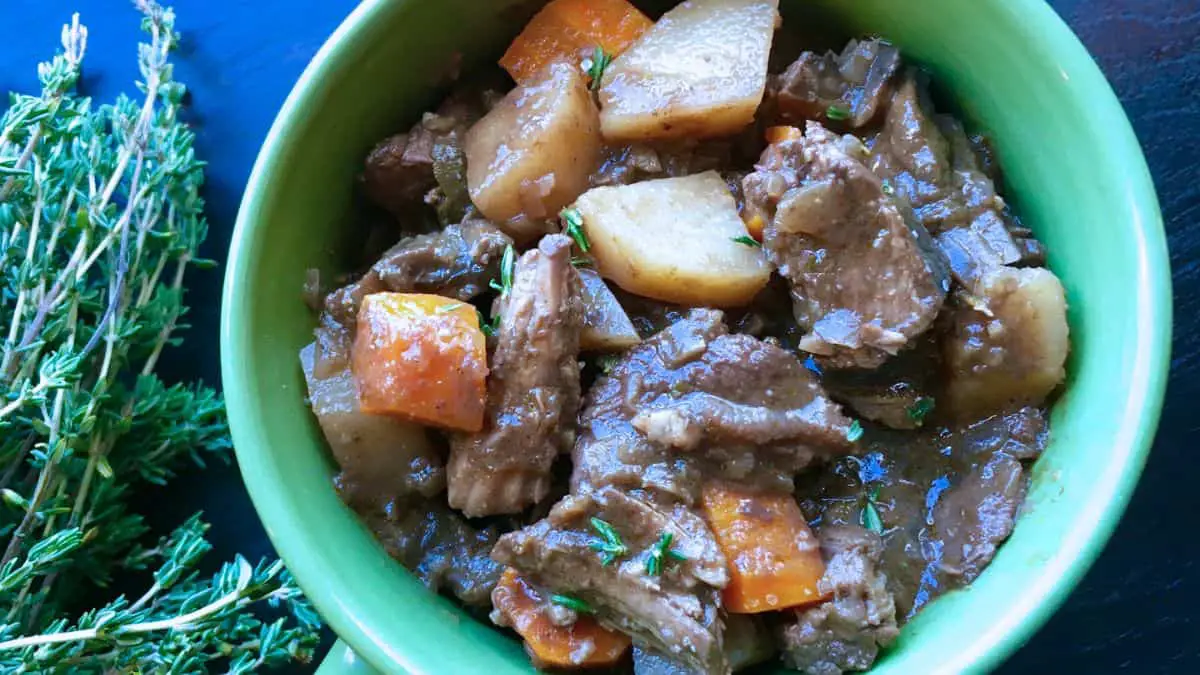
When preparing this stew before a camping trip, you can opt to do the initial steps at home and reheat the stew over a campfire, or complete the cooking process over the fire for an authentic campout experience.
Ingredients:
- 2 tablespoons extra virgin olive oil
- 3-4 cloves fresh garlic, minced
- 8 oz. white mushrooms, sliced
- 2 lbs. beef stew meat, cut into 1” cubes
- Sea salt, to taste
- Black pepper, to taste
- 3-4 cups organic beef stock, divided*
- 1 cup dry red wine
- 1 whole bay leaf
- 3 large carrots, chopped
- 2 large stalks celery, finely diced
- 1 medium yellow onion, diced
- 2 lbs. Russet potatoes, chopped
- 2 teaspoons fresh thyme leaves, rinsed
- 2 teaspoons fresh oregano leaves, rinsed
- 1 tablespoon fresh rosemary leaves, chopped
*Adjust beef stock amount to achieve the desired consistency
Slow Cooker or Dutch Oven Instructions:
-
Prep the Veggies: Clean all vegetables, peel if desired, and chop. Set aside.
-
Brown the Beef and Mushrooms: In a skillet, heat olive oil over medium-high. Add garlic and mushrooms, sautéing until mushrooms are tender. Add beef in batches, season, and sear. Move beef and mushrooms to a separate bowl.
-
Deglaze: Pour 1 cup beef stock and red wine into the skillet, scraping up any bits. Reduce by half.
- Slow Cooker Method:
- Transfer beef and mushrooms to the slow cooker. Pour reduced wine and stock over the beef, then add 2 cups beef stock and bay leaf.
- Cover and cook on low for 7-8 hours or on high for 3-4 hours.
Dutch Oven/Campfire Method:
- Return beef and mushrooms to the Dutch oven. Add reduced wine and stock, additional beef stock, and bay leaf.
- Cover and cook over a campfire at a simmer, managing coals/wood for consistent low heat, for 1-1½ hours until beef is tender.
- Add Remaining Ingredients:
- For both methods, add carrots, celery, onion, potatoes, and herbs mid-cooking. Adjust liquid with more stock if needed.
- Continue cooking until vegetables are tender, about 20-25 minutes for the slow cooker on high or additional time over the campfire.
- Finish and Serve:
- Remove the bay leaf and adjust seasoning.
- Serve hot directly from the slow cooker or Dutch oven.
Enjoy a hearty meal wherever your adventure may be — at home with a slow cooker or out in the wilderness with a campfire and Dutch oven!
Curried Butternut Squash Soup Recipe

Cooking on a Campfire with a Dutch Oven or Camping Gas Stove:
- Prepare Your Ingredients:
- Peel and cube the butternut squash, apple, and pear. Chop the carrots and slice the leek. Gather your spices - cinnamon, allspice, and curry powder.
- Combine Ingredients in Dutch Oven:
- In a large Dutch oven, combine the butternut squash, apple, pear, carrots, and leek. Sprinkle the mixture with curry powder, cinnamon, allspice, salt, and black pepper to taste.
- Add Liquid:
- Pour the vegetable stock over the ingredients. Gently stir to mix everything together.
- Cooking Process:
- For campfire cooking, place the Dutch oven over a grate above the campfire coals. If using a camping gas stove, set the Dutch oven or a large pot on the stove. Bring the mixture to a simmer.
- Cook with the lid on for approximately 1.5 to 2 hours, stirring occasionally, until the vegetables are tender and easily mashed.
- Blend the Soup:
- Once the vegetables are tender, remove from heat and let it cool slightly. Then, use an immersion blender to puree the soup directly in the Dutch oven. If you don’t have an immersion blender, carefully transfer the mixture in batches to a blender or food processor.
- Final Touch:
- Stir in the coconut yogurt until well combined. This will give the soup a creamy texture and a hint of tanginess.
- Serve:
- Ladle the soup into bowls. Garnish each serving with toasted pumpkin seeds and freshly chopped parsley.
- Enjoy:
- Relish your delicious, warming Curried Butternut Squash Soup by the campfire or at your camping site!
Note:
- Adjusting the heat while cooking over a campfire is crucial. Keep an eye on the soup to ensure it doesn’t burn or stick to the bottom of the Dutch oven. Regular stirring will help evenly cook the soup.
Slow Cooker Dutch Oven Chili

Preparation Time: 15 minutes
Cooking Time: 4 hours on high or 8 hours on low
Servings: Varies
Ingredients:
- 1 pound spicy bulk pork sausage, crumbled
- 1 pound sweet bulk pork sausage, crumbled
- ½ cup chicken or vegetable stock, plus additional if needed
- 4 cloves garlic, finely chopped
- 1 medium white onion, finely chopped
- 2 stalks celery, finely chopped
- 2 carrots, peeled and chopped into small pieces
- 2 cans (15 oz. each) white beans, drained and rinsed
- 2 cans (15.5 oz. each) red kidney beans, drained and rinsed
- 2 cans (28 oz. each) tomato puree
- 1 can (6 oz.) tomato paste
- 1 can (28 oz.) petite-cut tomatoes, undrained
- 3 tablespoons chili powder
- 1 tablespoon ground cumin
- 2 teaspoons dried oregano
- 1 teaspoon cayenne pepper
- 1 cup black coffee (or water), if needed
- Salt, to taste
Garnish (optional):
- 8 oz. shredded cheddar cheese
- ¾ cup chopped red onion
- 2 fresh jalapeno peppers, sliced
Instructions:
- Brown Sausage:
- In a large skillet, cook the spicy and sweet pork sausage over medium heat until no longer pink. Once cooked, drain any excess fat and transfer the sausage to your slow cooker crock.
- Prepare Aromatics:
- Using the same skillet, deglaze with chicken or vegetable stock, making sure to scrape up the tasty browned bits from the bottom. Add in garlic and onion and cook until they begin to soften, around 3-4 minutes.
- Add Veggies:
- Incorporate the celery and carrot into the skillet, continuing to cook for an additional 2-3 minutes, then pour the mixture into the slow cooker with the sausage.
- Combine Ingredients:
- To the slow cooker, add the white and red beans, tomato puree, tomato paste, and petite-cut tomatoes. Sprinkle in the chili powder, cumin, oregano, and cayenne pepper.
- Mix and Cook:
- Stir all the ingredients together until well combined. If a thinner chili is preferred, add water or black coffee to achieve the desired consistency. Set your slow cooker to high for 4 hours or low for 8 hours.
- Season and Serve:
- Once cooking is complete, taste and season with salt as needed. Adjust any other seasonings if you wish. Serve hot, garnished with shredded cheese, chopped red onion, and slices of jalapeno pepper.
- Storage:
- Allow any leftovers to cool slightly before freezing or refrigerating within 2 hours of cooking.
Notes:
- Customize the heat by adjusting the amount of cayenne pepper to your taste.
- Leftover chili can be repurposed into a chili mac, chili dogs, or used as a hearty dip.
Optionally - you can buy my favorite chili spice mix:

Vegan Vegetable Soup Recipe
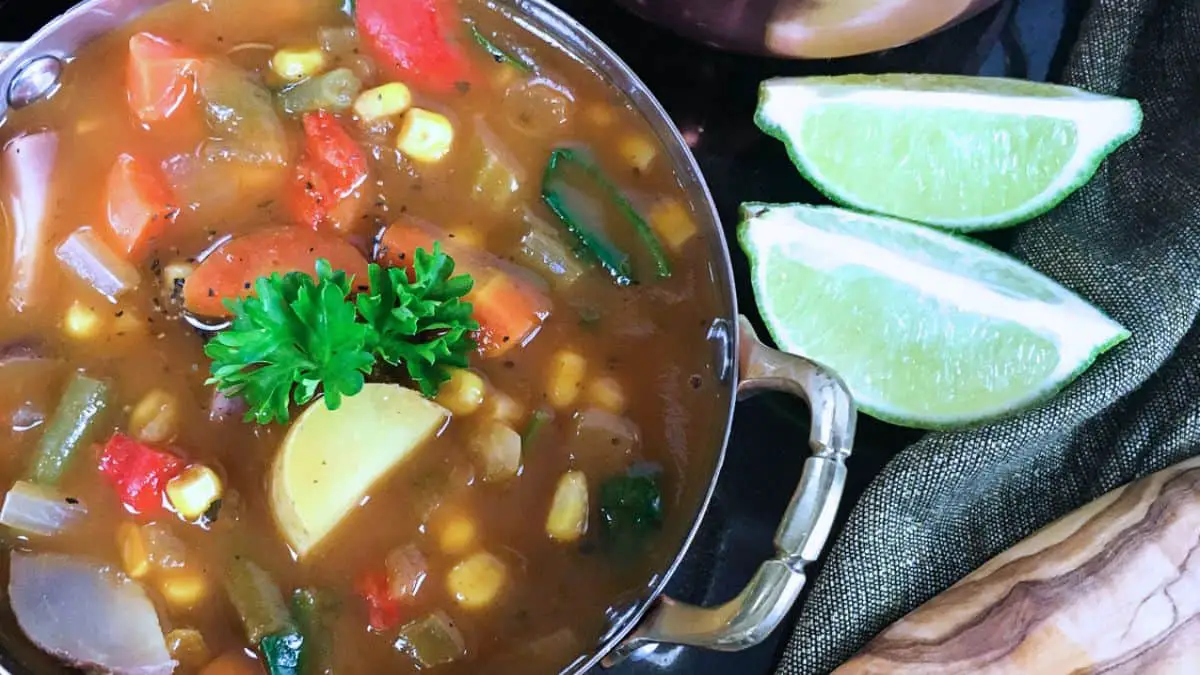
Cooking on a Campfire with a Dutch Oven or Camping Gas Stove:
- Gather and Prepare Ingredients:
- Chop ½ medium white onion, 3 large carrots, 3 celery stalks, and 1 medium red pepper. Cut 1 cup of green beans and ¾ lbs. of tri-color potatoes into bite-sized pieces. If using frozen corn, measure out 1 cup.
- Start Cooking:
- Place a large Dutch oven over the campfire grate or on your camping gas stove. Begin by sautéing the onion, carrots, and celery until they start to soften.
- Add Vegetables and Seasonings:
- Add in the green beans, corn, potatoes, red pepper, 1 tablespoon of Italian seasoning, and 1 teaspoon of garlic powder. Stir to mix the vegetables and spices well.
- Include Liquid Components:
- Pour in 1 cup of tomato puree and 3 cups of vegetable broth. Stir the mixture thoroughly. Season the soup with sea salt and black pepper to taste.
- Cooking Process:
- Cover the Dutch oven with its lid. Allow the soup to simmer for about 1-2 hours, stirring occasionally. The time may vary depending on the heat of your campfire or stove. The soup is ready when the vegetables are tender.
- Final Additions:
- Once the vegetables are cooked, add 2 cups of roughly chopped fresh baby spinach and 3 tablespoons of fresh lime juice to the Dutch oven. Stir and let it simmer for an additional 5 minutes, or until the spinach is wilted.
- Serving the Soup:
- Taste for seasoning and adjust with more salt or pepper if needed. Serve the soup hot, garnished with lime slices and chopped fresh parsley.
- Enjoy Your Meal:
- Savor the hearty and flavorsome Vegan Vegetable Soup amidst the natural beauty of your camping surroundings.
Tip:
- Keep a close eye on the heat if cooking over a campfire to prevent the soup from burning. Adjust the position of the Dutch oven as needed to maintain a steady simmer.
Campfire Dutch Oven Wild Rice and Creamy Mushroom Soup

Ingredients:
- 1 cup multi-color wild rice blend, uncooked*
- 1 small white onion, roughly chopped
- 3 stalks celery, roughly chopped
- 2 large carrots, peeled and chopped
- 3-4 cloves garlic, peeled
- 12 oz. fresh mushrooms, divided
- 1 15-oz. can cannellini beans, undrained**
- 1 whole bay leaf
- 2 tsp garlic powder
- 6-8 cups vegetable stock, divided
- Salt and black pepper, to taste
- ½ cup half and half, tempered
- ¼ cup fresh parsley, finely chopped
Campfire Instructions:
Before you go to the campsite - you will need to puree the cannellini beans until smooth.
- Prepare the Vegetables:
- Over a cutting board, chop the onion, celery, and carrots. Mince the garlic and slice the mushrooms, reserving 8 oz for chopping.
- Cook the Vegetables:
- In the Dutch oven, sauté the onions, celery, carrots, and garlic over the campfire until soft.
- Add Rice and Stock:
- Add the rinsed wild rice blend and 6 cups of the vegetable stock to the Dutch oven.
- Prepare the Mushrooms and Beans:
- Finely chop 8 oz of mushrooms by hand or using a portable food processor.
- Combine Remaining Ingredients:
- Add the chopped mushrooms, sliced mushrooms, pureed beans, bay leaf, and garlic powder to the Dutch oven. Season with salt and pepper.
- Cook the Soup:
- Place the lid on the Dutch oven and cook over the campfire for 60-90 minutes, checking and stirring occasionally until the rice is tender.
- Final Steps:
- Once the rice is cooked, remove the bay leaf. Gradually stir in the tempered half and half and chopped parsley. Adjust thickness with additional vegetable stock if necessary.
- Serve:
- Taste for seasoning and adjust with salt and pepper. Serve hot directly from the Dutch oven.
Slow Cooker Instructions:
- Prepare the Slow Cooker:
- Place the rinsed wild rice, finely minced onion, celery, carrots, garlic, chopped and sliced mushrooms, pureed beans, bay leaf, and garlic powder into a slow cooker.
- Add Stock:
- Pour in 6 cups of vegetable stock. Season with salt and pepper, and stir to combine.
- Cook:
- Cover and cook on high for 3-4 hours or on low for 6-8 hours, until the rice is tender but not mushy.
- Finish the Soup:
- Remove the bay leaf, and carefully stir in the tempered half and half along with the fresh parsley. Add more vegetable stock if needed.
- Serve:
- Adjust the seasoning with more salt and pepper if desired, and serve warm.
Enjoy your creamy and comforting wild rice and mushroom soup, whether you’re cozying up by the campfire or enjoying the convenience of your slow cooker at the campsite!
Campfire Dutch Oven Tuscan Sausage and Potato Soup

Ingredients:
- 4 oz. pancetta, cubed
- 2 lbs. bulk mild sausage
- 2 15-oz. cans cannellini beans*
- 6-7 cups chicken stock, divided
- 1 Tbsp crushed red pepper flakes
- 2-3 cloves fresh garlic, finely minced
- 1 small yellow onion, finely chopped
- 2 lbs. Russet potatoes, peeled and cut into small chunks
- 3” hard Parmesan cheese rind
- Salt and black pepper, to taste
- ½ cup half and half, tempered**
- 3 cups fresh kale, finely chopped
- ½ cup Parmesan cheese, freshly grated
Campfire Instructions:
- Brown the Meats:
- In the Dutch oven over the campfire, cook the pancetta until crisp. Add the sausage, breaking it apart as it browns. Once cooked, drain the excess fat.
- Prepare Beans:
- Puree one can of cannellini beans, undrained. Drain and rinse the second can. You can puree and store in a container ahead of time.
- Combine Ingredients:
- To the sausage and pancetta in the Dutch oven, add the pureed beans, whole beans, 6 cups of chicken stock, red pepper flakes, garlic, onion, potatoes, and the Parmesan rind. Season with salt and pepper.
- Cook the Soup:
- Cover and cook over the campfire, stirring occasionally, for about 60-90 minutes or until the potatoes are soft.
- Add Dairy and Greens:
- Remove the Dutch oven from the heat. Stir in the tempered half and half and chopped kale. If needed, add the remaining chicken stock to reach the desired consistency.
- Finish Cooking:
- Place the Dutch oven back over the campfire, but with less intensity, for about 5-10 minutes or until the kale is wilted and the soup is heated through.
- Serve:
- Remove the Parmesan rind, and sprinkle freshly grated Parmesan cheese over the soup before serving.
Slow Cooker Instructions:
- Brown Meats:
- In a skillet, brown the pancetta and sausage. Once browned, drain and transfer to a 5 or 6-quart slow cooker crock.
- Prepare Beans:
- Puree one can of beans and drain and rinse the other. Add both to the slow cooker.
- Add Other Ingredients:
- Pour in 6 cups of chicken stock, red pepper flakes, onion, potatoes, and the Parmesan rind into the crock. Season with salt and pepper.
- Cook:
- Cover and cook on high for 3-4 hours or on low for 6-7 hours, until the potatoes are tender.
- Finish the Soup:
- Stir in the tempered half and half and kale, adjusting the thickness with additional stock if needed. Cook for another 5-10 minutes or until the kale is wilted and the soup is hot.
- Serve:
- Remove the Parmesan rind, season to taste, and garnish with freshly grated Parmesan cheese.
Enjoy your hearty Tuscan soup under the stars or in the comfort of your campsite with the ease of a slow cooker!
Certainly, here’s the formatted recipe for Sweet Corn Chowder, styled similarly to the Sausage and Potato Soup recipe:
Sweet Corn Chowder for Camping

Ingredients:
- 8 oz. ground bulk Chorizo sausage
- 2 stalks celery, finely chopped
- 2 large carrots, finely chopped
- ½ large white onion, finely chopped
- 4 cloves fresh garlic, finely minced
- 1 jalapeno pepper, finely chopped
- 6 cups organic chicken or vegetable stock
- 2 lbs. Russet potatoes, chopped
- Kernels from 4 ears of sweet corn
- 2 tsp fresh oregano
- 1 bay leaf
- Sea salt, to taste
- Black pepper, to taste
- ½ cup half and half, tempered
- Fresh chives, chopped (optional, for garnish)
Pre-Campout Preparation Instructions:
-
Prep the Veggies: Clean all vegetables and pat dry. Prepare as indicated. Peel potatoes if desired.
-
Brown the Sausage: In a large skillet or Dutch oven, cook the Chorizo sausage over medium-high heat until browned. Remove sausage and drain, leaving 1-2 tablespoons of fat in the skillet.
-
Sauté Vegetables: Over medium heat, add celery, carrots, onion, garlic, and jalapeno to the skillet. Sauté until vegetables are soft.
-
Combine & Cook: Return the sausage to the skillet. Add stock, potatoes, corn kernels, oregano, and bay leaf. Season with salt and pepper. Stir and bring to a simmer.
-
Simmer the Chowder: Reduce heat to medium-low. Cook uncovered for 20 minutes or until potatoes are tender.
-
Blend for Thickness: Remove 3-4 cups of chowder and puree until smooth. Return pureed mixture to the skillet to thicken the soup.
-
Temper the Dairy: Gradually mix a small amount of hot soup into the half and half to temper it, then stir the mixture back into the chowder.
-
Cool & Store: Allow the chowder to cool completely. Transfer to an airtight container and refrigerate if the campout is the following day, or freeze if planning to use at a later time.
Campout Reheating Instructions:
-
Prepare the Fire: If using a campfire, ensure you have a steady fire with a bed of coals for even cooking. For a gas stove, make sure you have an adequate gas supply.
-
Heat the Chowder: Transfer the chowder into a Dutch oven for a campfire or a suitable pot for a gas stove. Gradually heat the soup over the campfire or stove, stirring occasionally to prevent sticking. If frozen, allow extra time for the chowder to thaw before it begins to heat.
-
Serve Hot: Once the chowder is heated through, taste and adjust the seasoning if necessary. Serve hot, garnished with fresh chives if desired.
Enjoy your outdoor meal of Sweet Corn Chowder, warming and comforting, perfect for your camping adventure!
Keto Bacon Cheeseburger Soup with a Crisp Side Salad

Ingredients:
- 4 slices thick-cut bacon, chopped
- 1 lb 80% lean ground beef
- ½ tsp onion powder
- ½ tsp garlic powder
- 2 tsp Italian seasoning
- ½ tsp smoked paprika
- Sea salt & black pepper, to taste
- ½ large head cauliflower, finely chopped
- 3 cups beef broth, organic preferred
- 1/3 cup heavy cream, gently warmed
- 3 cups sharp cheddar cheese, finely grated
- 2 Tbsp fresh parsley, finely chopped
Side Salad:
- 6 cups baby arugula
- 12 grape or cherry tomatoes, halved
- 1 oz Pecorino-Romano cheese, delicately shaved
- 1 Tbsp extra virgin olive oil
- 2 Tbsp fresh lime juice
- Sea salt and black pepper, to taste
Cooking Instructions:
-
Begin by rendering the bacon: In a sizable skillet over medium flame, cook bacon pieces until they reach a golden, crispy texture, about 6-7 minutes. Remove and set aside on a paper towel to drain. Discard excess grease from skillet.
- For campfire cooking: Position a skillet over a grill grate or a pan that’s campfire-compatible to cook the bacon.
- On a camping gas stove: Follow standard stove-top cooking procedures for the bacon.
-
Crumble in the ground beef to the same skillet, and sprinkle with a blend of onion and garlic powders, Italian seasoning, smoked paprika, and a pinch of salt and pepper. Cook the beef, breaking it apart until it’s evenly browned and aromatic, about 5 minutes.
-
Incorporate the cauliflower and broth: Add the finely chopped cauliflower and pour in the beef broth, combining well. Let this mixture simmer under a covered lid on a lower heat setting until the cauliflower becomes tender yet holds its shape, around 7-8 minutes.
- When cooking over a campfire: Ensure the skillet is adequately covered and adjust its distance from the flames to maintain a soft simmer.
-
Assemble the salad in the interim: Toss together baby arugula, halved tomatoes, and thinly shaved Pecorino-Romano in a large salad bowl. Drizzle over with olive oil and lime juice, adding a seasoning of salt and pepper, then toss everything together gently.
-
Finalize the soup: Once the cauliflower is cooked to perfection, pull the skillet from the heat. Gradually incorporate the warmed heavy cream and then the shredded cheddar cheese until it seamlessly melds into the soup, creating a smooth, cheesy consistency. Taste and adjust seasonings as needed.
-
Ready to serve: Ladle the rich and hearty soup into bowls, garnishing with the crispy bacon bits and a sprinkle of fresh parsley. Accompany each bowl with a portion of the vibrant, fresh arugula salad. Sit back and savor this warming, keto-friendly meal, perfect for any outdoor adventure or a cozy night in.
Creamy Golden Gazpacho Soup Recipe
Ingredients:
- 1¼ lbs. yellow tomatoes, roughly chopped
- 2 large cloves garlic, peeled
- 1 large yellow bell pepper, seeded and roughly chopped
- 2 cups whole kernel corn (fresh or frozen)
- 1 tablespoon maple syrup
- 1 teaspoon fresh ginger, finely minced
- ½ teaspoon smoked paprika
- Sea salt and black pepper, to taste
- 2/3 cup coconut milk, plus extra for garnish
- 2 tablespoons fresh chives, finely chopped
Instructions for Pre-Campout Preparation:
- Blend the Ingredients:
- In a high-powered blender, combine the yellow tomatoes, garlic cloves, yellow bell pepper, and corn kernels. Blend until the mixture is smooth and creamy, which should take about 1-2 minutes.
- Cook the Soup:
- Pour the blended mixture into a large pot and set it over medium heat. Mix in the maple syrup, minced ginger, and smoked paprika. Season with salt and black pepper to your liking.
- Stir the mixture frequently as it heats up, ensuring all flavors meld together beautifully.
- Cool and Add Coconut Milk:
- After heating the mixture, remove the pot from the heat. Allow the soup to cool down to room temperature.
- Once cooled, stir in the coconut milk thoroughly. This will give the gazpacho a wonderfully creamy texture.
- Refrigerate:
- Pour the soup into an airtight container. Refrigerate it to chill for at least a few hours, but ideally overnight. This step allows the flavors to intensify and meld together.
Packing for the Campout:
- Before your campout, pack the chilled gazpacho in a cooler. Ensure it stays cold until ready to serve.
Serving at the Campsite:
- Prepare to Serve:
- When ready to enjoy, give the gazpacho a good stir as it may have settled in the cooler.
- Garnish and Enjoy:
- Ladle the creamy gazpacho into bowls. Drizzle a little extra coconut milk on top for a beautiful presentation and sprinkle with fresh chives.
- Serve this refreshing soup chilled for a delightful and nourishing meal while camping.
Enjoy!
- This Creamy Golden Gazpacho Soup is a perfect make-ahead dish for camping, offering a refreshing and gourmet touch to your outdoor dining experience.
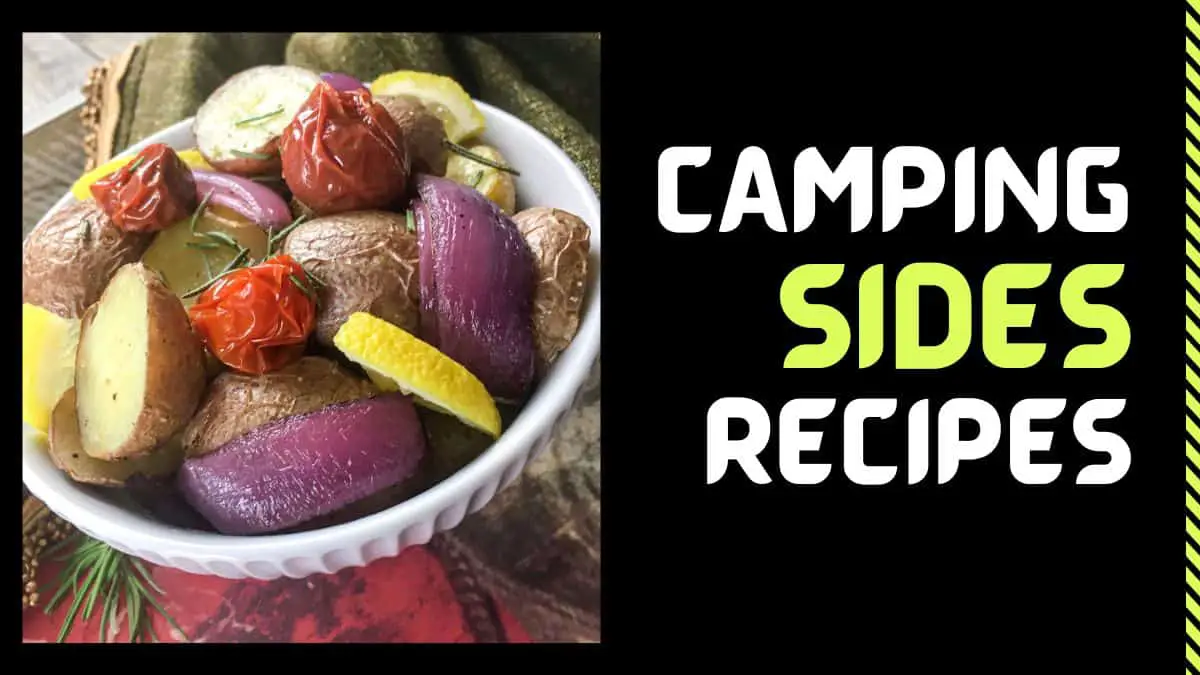
Easy Roasted Rustic Potatoes Recipe
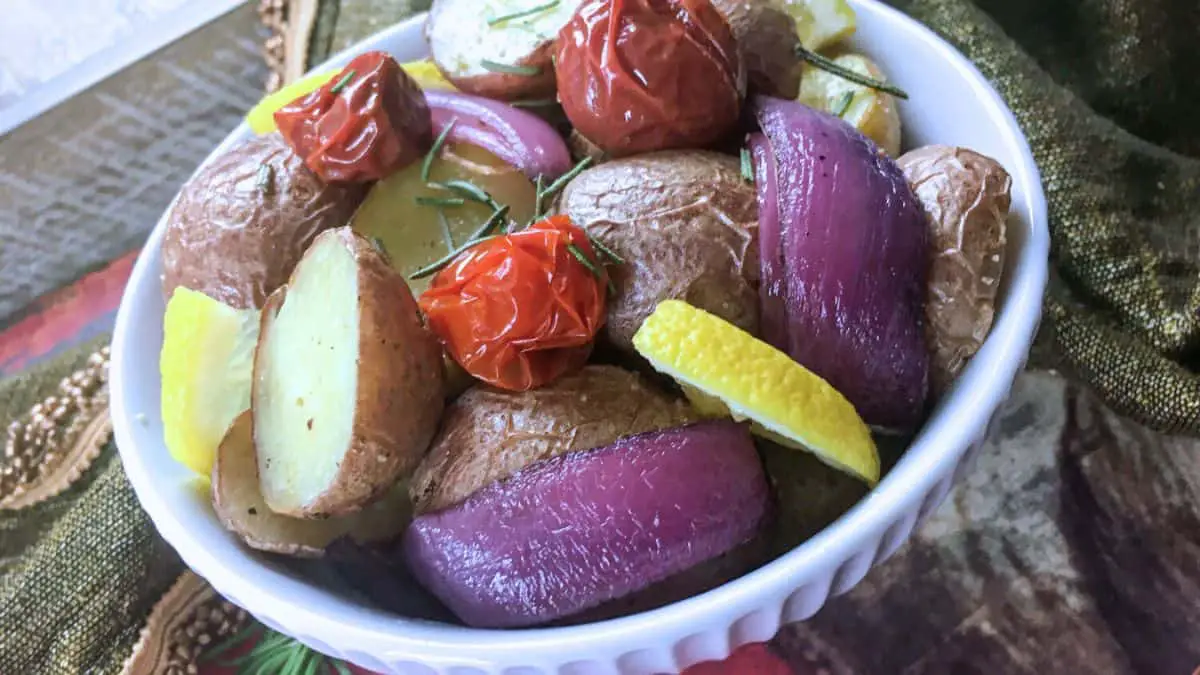
Cooking on a Campfire with a Dutch Oven or Camping Gas Stove:
- Prepare Your Ingredients:
- Slice the red onion into wedges and halve the small red potatoes. If using cherry or grape tomatoes, leave them whole. Finely chop the fresh rosemary leaves.
- Season the Vegetables:
- In a large mixing bowl, combine the red onion, potatoes, and tomatoes. Sprinkle with garlic powder, sea salt, and black pepper to taste. Drizzle with extra virgin olive oil and toss everything together until well coated.
- Prepare for Cooking:
- If using a Dutch oven over a campfire, place it on a grill grate over the coals. For a camping gas stove, set up your stove and place a large skillet on it.
- Cooking the Potatoes:
- Transfer the seasoned vegetables into the Dutch oven or skillet. Spread them out to form a single layer. Tuck the lemon slices and unpeeled garlic cloves in between the vegetables.
- If using a Dutch oven over a campfire, cover with the lid. Cook the vegetables for about 25-30 minutes, stirring occasionally, until they are fork-tender and nicely browned. For a gas stove, cook similarly, but you might need to adjust cooking times based on heat intensity.
- Finishing Touches:
- Once cooked, carefully remove the lemon slices and garlic cloves. If desired, squeeze the roasted garlic out of its skin onto the vegetables.
- Give the vegetables a good stir to coat them in the lemony, garlicky juices.
- Serve and Enjoy:
- Transfer the roasted rustic potatoes to a serving dish. Garnish with additional fresh lemon wedges.
- Enjoy your deliciously hearty campfire meal!
Note:
- The key to perfectly roasted potatoes over a campfire or gas stove is to keep a close eye on them and adjust the heat as necessary to prevent burning. Regular stirring ensures even cooking and browning.
Greek-Style Lemon Potatoes Recipe
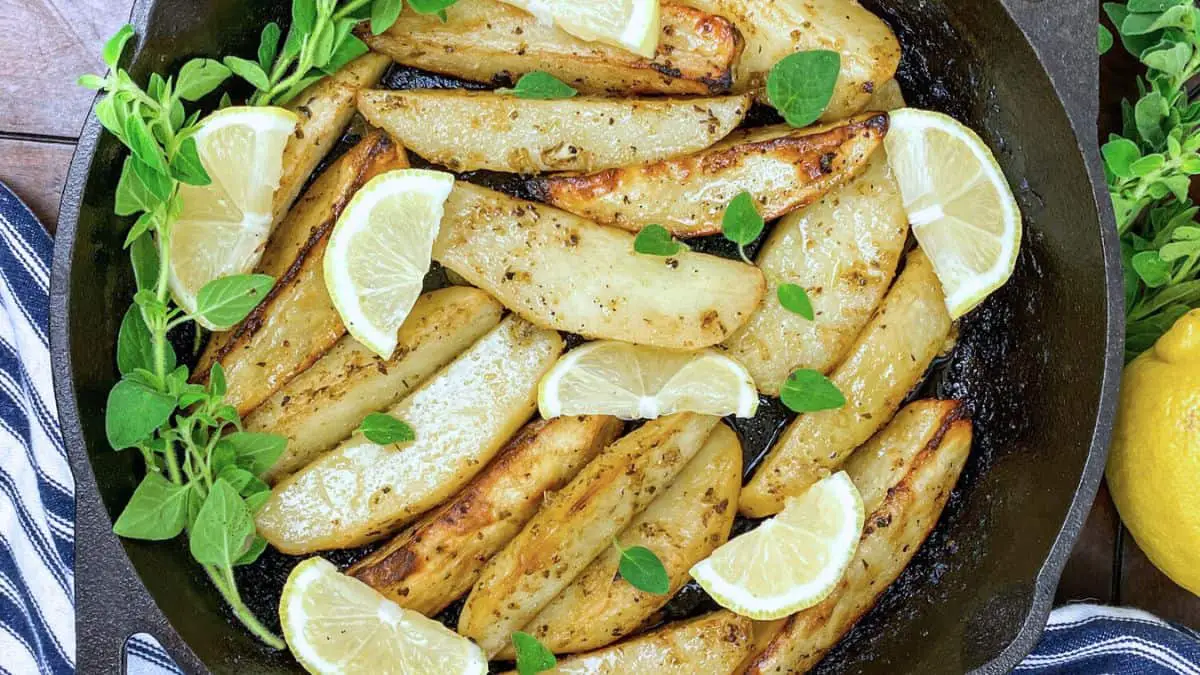
Ingredients:
- 2½ lbs. Russet potatoes, peeled and cut into thin wedges
- 1 teaspoon garlic powder
- Sea salt and black pepper, to taste
- ¾ cup vegetable broth
- ¼ cup extra virgin olive oil
- ½ cup fresh lemon juice
- 2 teaspoons fresh lemon zest, preferably organic
- ½ tablespoon dried oregano
- Optional: Fresh oregano leaves, for garnish
Cooking with a Dutch Oven on a Campfire:
- Prepare the Campfire:
- Start your campfire and let it burn down to a consistent bed of coals. Position a grill grate over the fire, if available.
- Prepare the Potatoes:
- In your Dutch oven, combine the peeled and thinly sliced Russet potatoes, garlic powder, sea salt, black pepper, vegetable broth, olive oil, fresh lemon juice, lemon zest, and dried oregano. Toss gently to coat the potatoes evenly.
- Cooking:
- Place the Dutch oven on the grill grate over the campfire. Cover with the lid.
- Let the potatoes cook for about 20-25 minutes, then carefully lift the lid (using a heatproof glove or oven mitt) and stir the potatoes.
- Continue cooking, covered, for an additional 20-25 minutes, stirring occasionally. The potatoes should become tender and slightly crisped on the edges.
- Serve:
- Once the potatoes are cooked to your liking, carefully remove the Dutch oven from the fire. Garnish with fresh oregano if you have some. Serve the potatoes hot.
Cooking on a Camping Gas Stove:
- Set Up Stove:
- Assemble your camping gas stove and set it to a medium heat setting.
- Cook the Potatoes:
- In a large skillet or if you have a Dutch oven, combine all ingredients as mentioned above.
- Place the skillet or Dutch oven on the gas stove and cover. Allow the potatoes to cook, stirring occasionally, for about 20-25 minutes.
- Check for tenderness and continue cooking if needed until the potatoes are soft and have a slight crisp on the edges.
- Serving:
- Once done, remove from heat. Serve the Greek-style lemon potatoes hot, garnished with fresh herbs if available.
Instructions for Pre-Campout Preparation:
- Preheat and Prep:
- Adjust your oven rack to the center position and preheat it to 400°F.
- Arrange potato wedges in a single layer in a large cast iron skillet or baking dish. Evenly sprinkle with garlic powder, salt, and black pepper.
- Mix Seasoning Liquid:
- In a medium bowl, whisk together vegetable broth, olive oil, lemon juice, lemon zest, and dried oregano until well combined.
- Bake the Potatoes:
- Pour the lemon and herb mixture over the potatoes, ensuring they’re well coated.
- Place the skillet or dish in the oven and bake for 25 minutes. Then, carefully flip the potatoes and return them to the oven for another 25 minutes or until they are tender.
- Crisp the Potatoes:
- After the baking time, carefully remove the skillet and drain any excess liquid (save it for later use). Return the potatoes to the oven for an additional 5 minutes to crisp up the edges. For extra crispiness, broil for 2-3 minutes, but watch closely to avoid burning.
- Cool and Pack:
- Let the potatoes cool down, then pack them in an airtight container. Store them in the refrigerator and take them with you on your camping trip.
Reheating at the Campsite:
- To reheat, simply place the skillet over your campfire or camping stove. Heat the potatoes through, occasionally turning them for even warming. If they seem a bit dry, drizzle some of the reserved lemon and herb liquid over them. Once heated, garnish with fresh oregano leaves if available and serve.
Enjoy!
- These Greek-Style Lemon Potatoes are a perfect make-ahead dish for your camping adventure, offering a zesty and comforting side that pairs well with a variety of main courses.
Cuban Black Beans and Rice Recipe
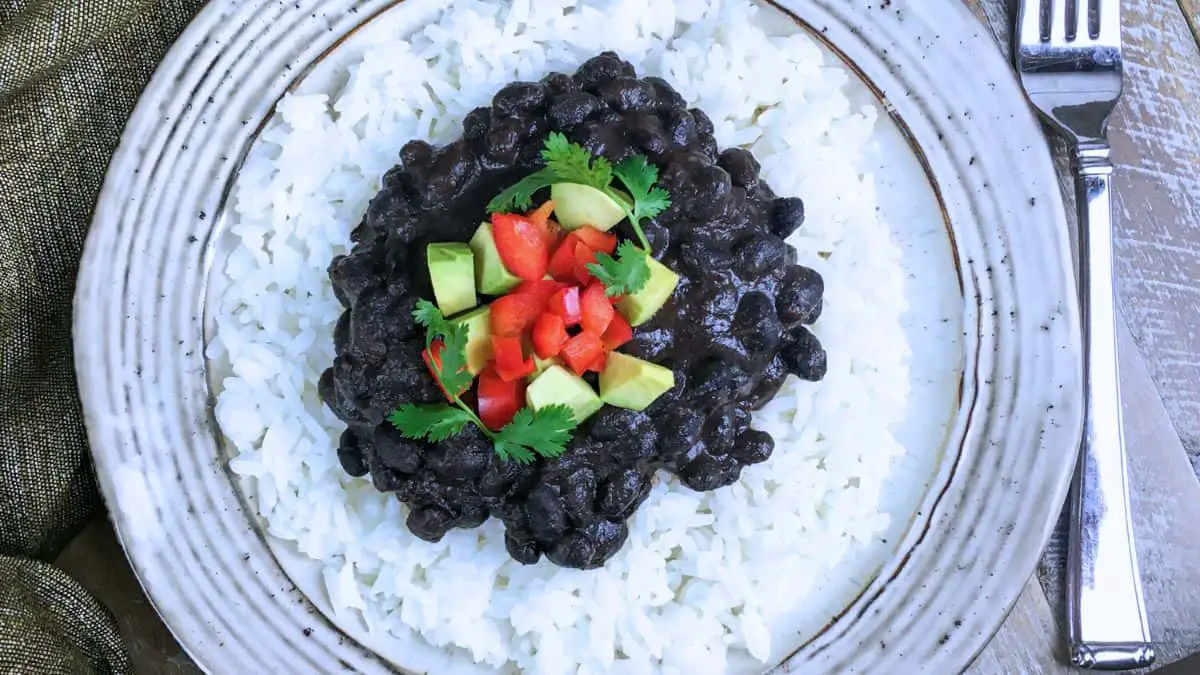
Ingredients:
- 1 cup long-grain white rice
- 2 cups water
- 1 tablespoon olive oil
- 1 large onion, chopped
- 1 bell pepper, any color, diced
- 2 cloves garlic, minced
- 1 can (15 ounces) black beans, drained and rinsed
- 1 teaspoon ground cumin
- 1/2 teaspoon chili powder
- Salt and pepper, to taste
- Fresh cilantro, chopped (for garnish)
- Lime wedges (for serving)
Instructions for Cooking over a Campfire:
- Cook the Rice:
- Place a cast iron Dutch oven over the campfire. Add the rice and water, and bring to a boil. Once boiling, reduce the heat (move the Dutch oven to a cooler part of the fire) and simmer covered for 18-20 minutes, or until the rice is tender and the water is absorbed.
- Sauté Vegetables:
- In the same Dutch oven (or a separate skillet, if preferred), heat the olive oil. Add the chopped onion and bell pepper, and sauté until softened, about 5-7 minutes.
- Add Beans and Spices:
- Stir in the minced garlic, black beans, cumin, and chili powder. Cook for another 2-3 minutes, allowing the flavors to meld together. Season with salt and pepper to taste.
- Combine with Rice:
- If the rice was cooked separately, add it back into the Dutch oven with the beans and vegetable mixture. Stir well to combine.
- Serve:
- Garnish with fresh cilantro and serve with lime wedges on the side.
Instructions for Cooking on a Camping Stove:
- Cook Rice:
- Use a pot or Dutch oven on the camping stove. Follow the same steps as above to cook the rice.
- Prepare Beans and Vegetables:
- After the rice is done, set it aside and use the Dutch oven to sauté the vegetables, garlic, beans, and spices as described above.
- Combine and Serve:
- Mix the rice back into the bean mixture, adjust the seasoning, garnish, and serve as mentioned.
Enjoy!
- This Vegetarian Black Beans and Rice dish is a hearty, flavorful, and easy-to-make meal perfect for camping. Whether cooked over a campfire or on a camping stove, it provides a nutritious and satisfying dining experience in the great outdoors.
Sweet Fun Confetti Dip Recipe

Ingredients:
- 5 oz. cream cheese, softened at room temperature
- 8 tablespoons butter, softened at room temperature
- 1 cup powdered sugar
- 2 teaspoons pure vanilla extract
- 1/4 cup confetti edible sprinkles
- Assorted cookies and fresh fruit of choice, for serving
Instructions for Making at Home and Serving at Campout:
- Cream Base Ingredients:
- In a sizeable mixing bowl, combine the softened cream cheese and butter. Use a whisk or an electric mixer to cream them together until smoothly blended.
- Sweeten and Flavor:
- Gradually incorporate the powdered sugar into the creamed mixture. Add the vanilla extract.
- Continue to beat the mixture until it becomes light and fluffy, which should take about 1 to 2 minutes.
- Add Colorful Sprinkles:
- Gently fold the confetti sprinkles into the mixture, ensuring they are evenly distributed throughout the dip.
- Prepare for Serving:
- Spoon the confetti dip into an attractive serving bowl. Garnish the top with a few extra sprinkles for a festive touch.
- Transporting for Campout:
- If planning to serve this dip at a campout, transfer it to an airtight container and keep it chilled in a cooler during transportation.
- Serving at Campsite:
- At your campsite, place the dip in a serving bowl (if not already in one).
- Arrange an assortment of cookies and freshly sliced fruit around the dip for a delightful and colorful snack.
Enjoy!
- Relish in the playful and tasty Sweet Fun Confetti Dip, a perfect treat to add some sweetness and cheer to your outdoor adventures. It’s an ideal companion for both cookies and fruit, making it a versatile snack for campers of all ages!
Moroccan Zaalouk Dip Recipe

Ingredients:
- 3 tablespoons olive oil
- 1 medium eggplant, peeled and chopped
- 3 medium tomatoes, peeled and chopped
- 2 medium garlic cloves, minced
- 2 teaspoons paprika
- 1 teaspoon ground cumin
- 1/4 cup water (if needed)
- 1/2 cup fresh parsley, chopped
- Juice of 1/2 fresh lemon
- Sea salt and black pepper, to taste
Instructions for Making at Home and Serving at Campout:
- Cook the Vegetables:
- In a medium-sized pot or Dutch oven, heat the olive oil over medium heat.
- Add the chopped eggplant, tomatoes, minced garlic, paprika, and cumin.
- Gently mix and bring the mixture to a simmer.
- Seasoning:
- Season the mixture generously with salt and black pepper, adjusting to your taste preferences.
- Simmer the Dip:
- Cover the pot with a lid and let it simmer. Stir occasionally, ensuring the eggplant and tomatoes soften completely, which should take about 25-30 minutes.
- If the mixture appears too dry while cooking and the tomatoes aren’t releasing enough juice, add water, two tablespoons at a time, up to a total of 1/4 cup.
- Mashing and Final Cooking:
- Once the vegetables are very soft, use a potato masher to coarsely mash the eggplant and tomatoes.
- Mix in the fresh parsley and continue to cook for another 5-10 minutes or until the dip reaches your desired consistency.
- Add Lemon and Serve:
- Stir in the fresh lemon juice right before serving.
- Transfer the Zaalouk to a serving bowl and enjoy it warm with crusty bread or your favorite chips.
- Transporting for Campout:
- If taking the Zaalouk to a campout, allow it to cool, then store in an airtight container. Keep it chilled in a cooler during transportation.
- Serving at the Campsite:
- At your campsite, the dip can be served chilled or slightly reheated on a camping stove if desired.
Enjoy!
- Delight in the rich and flavorful Moroccan Zaalouk Dip, a perfect blend of savory spices and vegetables, ideal for a unique and tasty snack during your outdoor adventures!
Loaded Black Bean Dip Recipe

Ingredients:
- 1 tablespoon extra virgin olive oil
- 2 cans (14-oz each) black beans, rinsed and drained
- 1 tablespoon tomato paste
- 1 teaspoon smoked paprika
- 2 teaspoons ground cumin
- 1/2 teaspoon dried oregano
- 1/2 cup frozen corn, defrosted
- 1 tomato, finely chopped
- 1/2 red onion, finely diced
- 1/2 cup sour cream
- 1/2 cup fresh parsley, chopped
- Tortilla chips, for serving
Instructions for Making at Home and Serving at Campout:
- Cook the Beans:
- In a medium pot, heat the olive oil over medium heat. Add the black beans, tomato paste, smoked paprika, cumin, and oregano.
- Stir the mixture occasionally, cooking until the beans are thoroughly warmed and the spices release their fragrances, about 8-10 minutes.
- Mash the Beans:
- Take the pot off the heat. Mash the beans to your desired consistency using a potato masher. For a smoother texture, you can transfer the mixture to a blender and blend until smooth.
- Assemble the Dip:
- Spread the mashed bean mixture onto a serving dish. Evenly sprinkle the defrosted corn, chopped tomato, diced red onion over the top.
- Dollop sour cream across the dip and garnish with freshly chopped parsley.
- Transporting for Campout:
- If preparing ahead for a campout, allow the dip to cool down. Then, transfer it to an airtight container and keep it chilled in a cooler during transportation.
- Serving at Campsite:
- Once at your campsite, give the dip a good stir. If needed, you can lightly refresh it over a camping stove.
- Serve the dip with a generous amount of tortilla chips for a delightful outdoor snack.
Enjoy!
- Indulge in this loaded black bean dip, a perfect blend of savory flavors and textures, great for sharing around the campfire or as a tasty snack while enjoying the great outdoors!
Best Creamy Tzatziki Dip Recipe
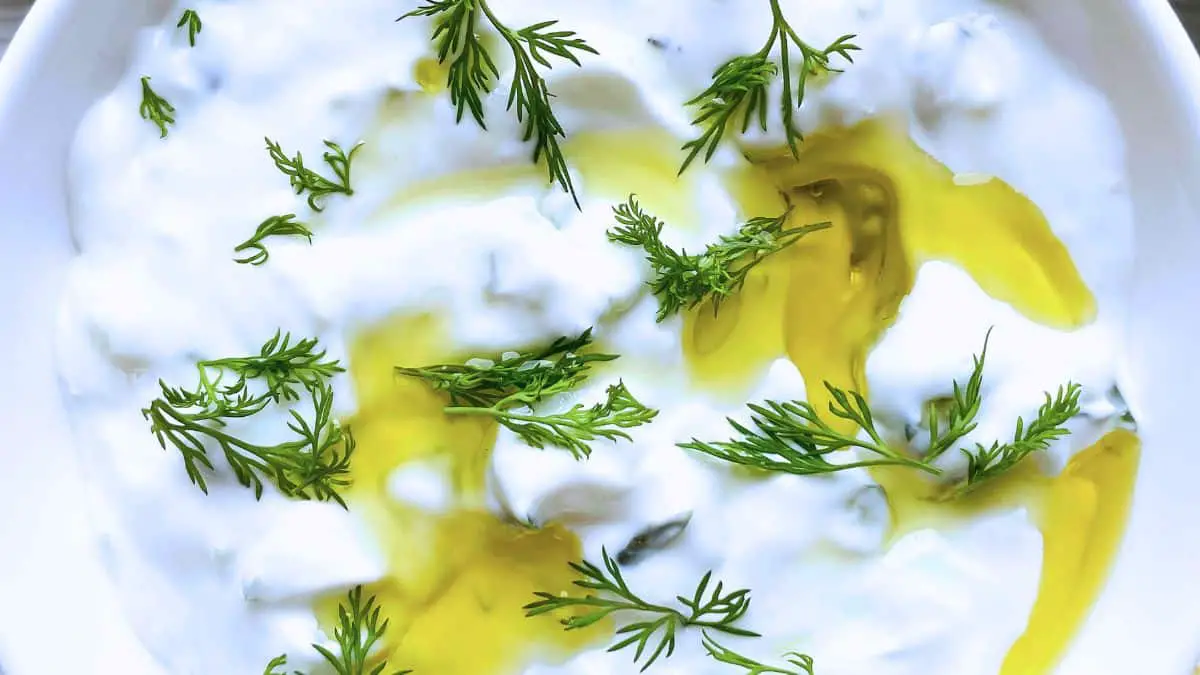
Ingredients:
- 1 English cucumber, finely grated
- 1 cup Greek yogurt
- 1/2 cup sour cream
- 1 tablespoon lemon juice (freshly squeezed preferred)
- 1 tablespoon extra-virgin olive oil
- 2 medium garlic cloves, finely minced
- 1 tablespoon fresh mint or dill, finely chopped (or a combination of both)
- Sea salt and black pepper, to taste
- Fresh pita bread or your favorite chips, for serving
Instructions for Making at Home and Serving at Campout:
- Prepare the Cucumber:
- Lay the grated cucumber on a clean kitchen towel or several layers of paper towels. Squeeze out as much water as possible to ensure the tzatziki isn’t too watery.
- Combine Ingredients:
- In a medium bowl, combine the drained cucumber with Greek yogurt and sour cream.
- Add in the freshly squeezed lemon juice, extra-virgin olive oil, and minced garlic. Mix thoroughly until well combined.
- Season and Chill:
- Season the mixture with sea salt and black pepper according to your taste.
- Add the freshly chopped herbs (mint or dill) and stir them into the dip.
- Cover the bowl with a lid or plastic wrap and refrigerate for at least one hour. This chilling time allows the flavors to meld together beautifully.
- Transporting for Campout:
- If you’re preparing the tzatziki to bring to a campout, keep it chilled in a cooler during transportation.
- Serving at the Campsite:
- Once at the campsite, give the tzatziki a good stir and transfer it to a serving bowl if desired.
- Serve the dip with slices of fresh pita bread or an assortment of your favorite chips. It’s also great with fresh-cut vegetables.
Enjoy Your Dip!
- Savor this creamy, refreshing tzatziki as a delightful appetizer or snack during your outdoor adventures. It’s a perfect complement to a sunny day and great company!
Hot Beer & Cheese Dip Recipe

Ingredients:
- 2 T. Butter
- 2 T. Flour
- 1/2 c. Whole milk
- 1/2 c. Beer
- 2 t. Dijon mustard
- 1/2 t. Smoked paprika
- 2 oz. Cream cheese
- 8 oz. Sharp cheddar cheese, shredded
- Sea salt and black pepper, to taste
- Thinly sliced scallions, for garnish
- Pretzels and crusty bread, for serving
Instructions for Cooking over a Campfire with a Dutch Oven:
- Melt Butter:
- Place your Dutch oven over the campfire. Melt the butter inside over medium heat.
- Create a Roux:
- Add flour to the melted butter. Stir constantly for 1-2 minutes until it forms a thick paste and the raw flour taste cooks out.
- Add Milk and Beer:
- Gradually pour in the milk, continuously stirring to avoid lumps.
- Once the milk has been incorporated and the mixture thickens (about 1-2 minutes), stir in the beer, Dijon mustard, and smoked paprika.
- Cook for another minute, stirring constantly.
- Cheese Time:
- Add the cream cheese and shredded cheddar to the Dutch oven.
- Continue stirring until the cheese melts completely into a smooth mixture.
- Season and Serve:
- Taste and adjust seasoning with salt and black pepper as needed.
- Garnish with thinly sliced scallions.
- Serve hot alongside pretzels or crusty bread for dipping.
Instructions for Cooking on a Camping Gas Stove:
- Start with the Base:
- Heat the butter in a pan over medium heat on your camping stove until melted.
- Follow the same steps to create the roux with flour, then add milk and beer as described above.
- Cheese and Seasoning:
- Mix in the cheeses until they melt and blend into the sauce.
- Season with Dijon mustard, smoked paprika, salt, and pepper.
- Final Touches:
- Once the dip reaches a creamy consistency, transfer it to a serving dish.
- Top with scallions and serve with your choice of dippers.
Enjoy this deliciously warm and comforting Hot Beer & Cheese Dip, perfect for a cozy night around the campfire or a delightful treat on your outdoor adventures!
Taco Tot Casserole Recipe
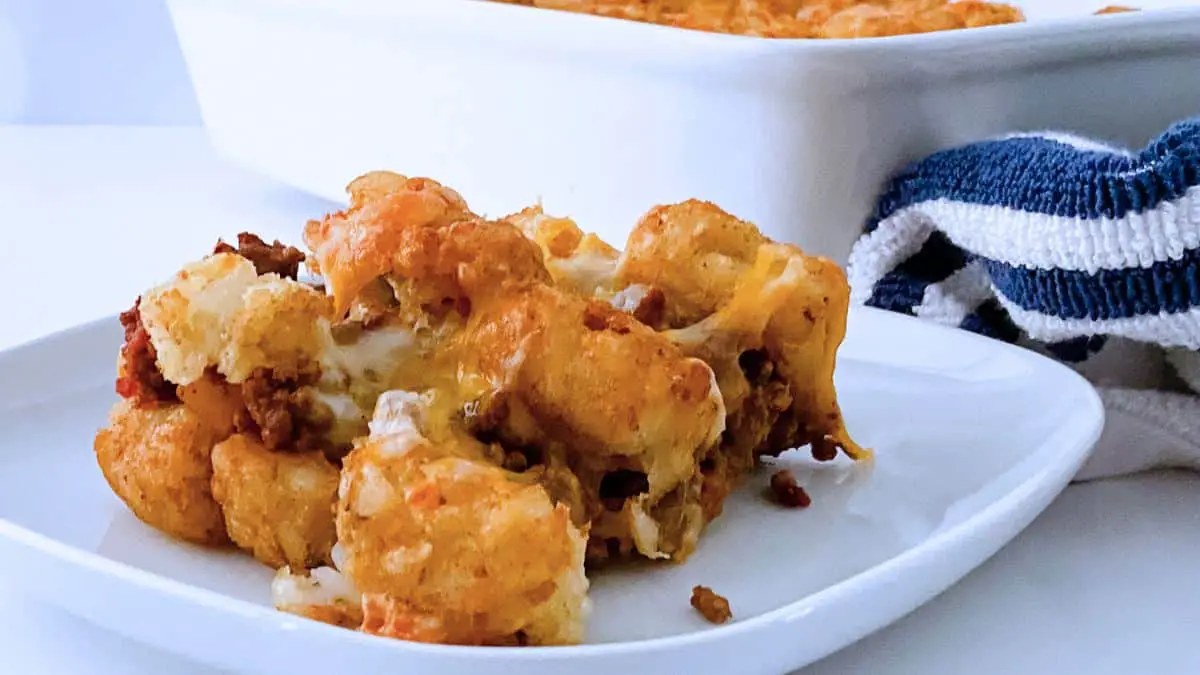
Ingredients:
- 32 oz frozen tater tots
- 1 lb ground beef
- 1 oz packet taco seasoning
- 1/3 cup water
- 1 cup salsa (any kind)
- 2 cups shredded cheese (combination of Cheddar, Colby Jack, and Monterey Jack recommended)
Instructions for Campfire Dutch Oven Cooking:
- Prepare the Tater Tots:
- Place the Dutch oven over the campfire to preheat. Add the frozen tater tots to the Dutch oven and cook for about 10 minutes, stirring occasionally.
- Brown the Beef:
- In a separate skillet over the campfire, brown the ground beef. Once cooked, drain any excess fat.
- Mix in the taco seasoning, water, and salsa with the beef until well combined.
- Layer the Casserole:
- Remove half of the tater tots from the Dutch oven, leaving a layer at the bottom.
- Spread the beef mixture over the tater tots, then sprinkle half of the cheese on top.
- Layer the remaining tater tots over the cheese, and top with the rest of the cheese.
- Bake the Casserole:
- Cover the Dutch oven and cook the casserole over the campfire for 20-25 minutes until the cheese is bubbly and the tater tots are cooked through.
Instructions for Baking at Home:
- Preheat and Bake Tater Tots:
- Preheat your home oven to 425°F (220°C).
- Lightly spray a baking dish with olive oil non-stick spray.
- Add all tater tots to the pan and bake for 10 minutes. Remove and set aside.
- Prepare Beef Mixture:
- Follow the same steps for browning the beef and adding taco seasoning, water, and salsa.
- Assemble and Bake:
- Assemble the casserole in the same layering method as described for the Dutch oven.
- Bake in the preheated oven for 20-25 minutes.
Reheating at the Campsite:
- If you’ve prepared the casserole at home, you can reheat it at the campsite using a camping stove.
- Place the casserole in a skillet or pan, cover, and heat over medium heat until warmed through.
Notes:
- Par-cooking the tater tots helps to ensure they stay crispy beneath the meat and cheese layers.
Enjoy this delicious Taco Tot Casserole, whether freshly baked over a campfire or conveniently reheated at your campsite! It’s a comforting and flavorful meal perfect for outdoor adventures.
Dutch Oven No Knead Bread Recipe

Ingredients:
- 1 ½ cups warm water
- 1 packet active dry yeast (or 2 ¼ tsp if using jar yeast)
- 2 tablespoons salt
- 3 ½ cups bread flour (scooped and leveled)
Instructions for Campfire Cooking:
- Prepare the Dough:
- In a measuring cup, combine warm water, salt, and yeast. Stir until the yeast dissolves.
- Pour the yeast mixture into a large mixing bowl.
- Gradually add the bread flour to the bowl, mixing until a sticky dough forms.
- Cover the bowl and allow the dough to sit in a warm area for about 2.5 hours, or until it doubles in size.
- Preheat the Dutch Oven:
- About 2 hours into the dough’s rising time, start your campfire and let it burn down to a consistent bed of coals.
- Place the Dutch oven on the coals to preheat for about 30 minutes. The ideal temperature is around 450°F (232°C), similar to an oven.
- Shape and Score the Dough:
- Once the dough has risen, transfer it onto a piece of parchment paper.
- Shape the dough into an oval or circle and score the top with a sharp knife.
- Bake the Bread:
- Carefully remove the Dutch oven from the campfire using proper safety gear.
- Lift the dough using the parchment paper and place it inside the Dutch oven.
- Cover the Dutch oven and place it back over the campfire coals. Bake the bread for 30-35 minutes.
- Cooling:
- After baking, carefully remove the Dutch oven from the fire. Take out the bread and place it on a wire rack to cool for at least 10 minutes.
Notes:
- If preparing ahead of time, you can let the dough rise for 2.5 hours, then refrigerate it. When ready to bake, bake it straight from the fridge for about 40 minutes.
- This bread pairs beautifully with various toppings like jam, honey, or butter.
Enjoy this freshly baked no knead bread, perfect for a comforting meal outdoors or as a delightful homemade treat!
Roasted Curried Carrots

Ingredients:
- 2 lbs. fresh carrots, peeled and cut diagonally
- 1 tbsp extra virgin olive oil
- 2 tbsp maple syrup, preferably local
- 1 tbsp curry powder
- 10-12 fresh thyme sprigs
- Sea salt and black pepper, to taste
Directions for Oven Cooking:
- Preheat the Oven:
- Adjust the top oven rack to the center position and heat the oven to 400°F (200°C). Prepare a large, rimmed baking sheet by lining it with parchment paper or a Silpat™ baking mat.
- Season the Carrots:
- In a large mixing bowl, combine the sliced carrots, olive oil, maple syrup, curry powder, and fresh thyme sprigs. Season the mixture with sea salt and black pepper, tossing well to ensure the carrots are evenly coated.
- Roast the Carrots:
- Transfer the seasoned carrots to the prepared baking sheet, spreading them in a single layer for even roasting.
- Roast in the preheated oven for 20-25 minutes, turning the carrots halfway through the cooking time. They should be crisp-tender and nicely browned when done.
- Serve:
- Remove the carrots from the oven and transfer them to a serving bowl or platter. These curried carrots are a delightful side dish to complement a variety of entrees.
Directions for Campfire Cooking:
- Prepare the Carrots:
- Follow the same seasoning instructions as above, coating the carrots in the olive oil, maple syrup, curry powder, thyme, salt, and pepper.
- Cooking Over a Campfire:
- Wrap the seasoned carrots in heavy-duty aluminum foil, making a sealed packet.
- Place the foil packet over indirect heat on the campfire (not directly over the flames) and cook for about 25-30 minutes, turning occasionally, until the carrots are tender.
Reheating at the Campsite:
- If you’ve made these carrots ahead of time and brought them camping, you can easily reheat them on a camping gas stove.
- Simply transfer the carrots to a skillet and reheat over medium heat until warm.
Enjoy these aromatic and flavorful roasted curried carrots, whether freshly made at home or enjoyed as a delicious campsite meal!
Garlic Mashed Potatoes Recipe
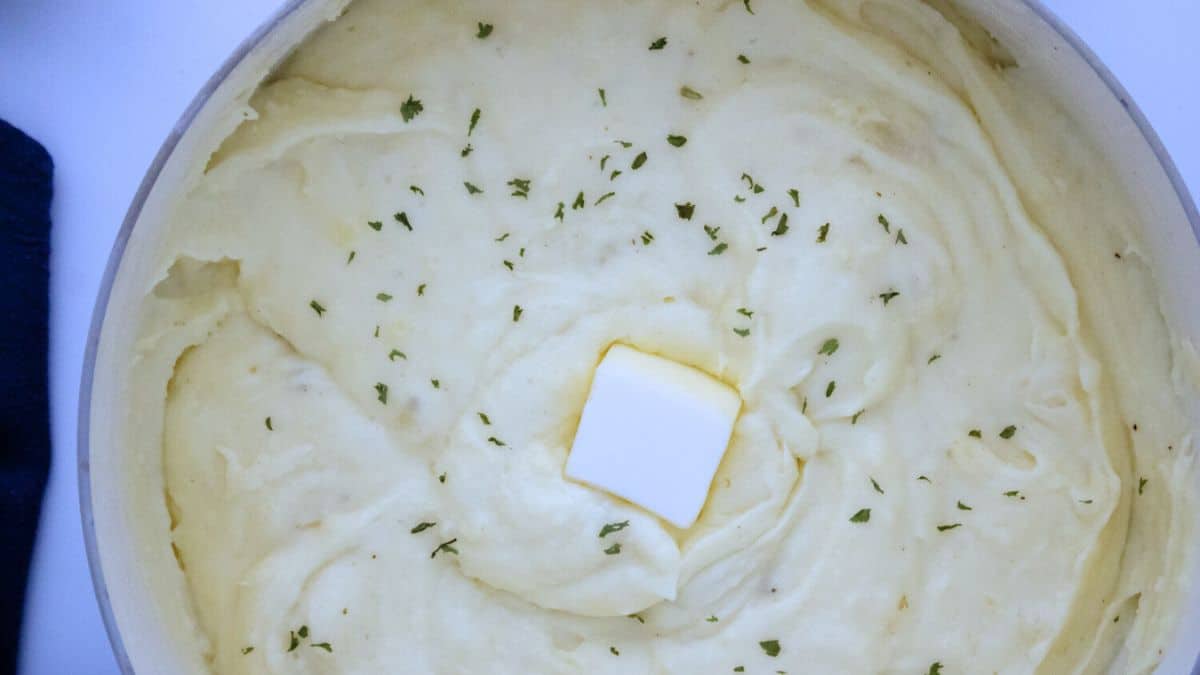
Ingredients:
- 3 pounds Russet or Yukon Gold potatoes
- 1 ½ cups heavy/whipping cream
- ½ cup unsalted butter (1 stick)
- 3-4 whole garlic cloves
- 3 tbsp kosher salt, divided
- 1 tbsp black pepper
Instructions:
For Stovetop Cooking:
- Prep the Cooking Water:
- Fill a large stockpot with water and place it over the stove. Stir in 2 tablespoons of kosher salt and bring the water to a boil.
- Prepare Potatoes and Garlic:
- Peel and uniformly chop the potatoes to ensure even cooking.
- Also, peel and roughly chop the garlic cloves.
- Cook Potatoes and Garlic:
- Add the chopped potatoes and garlic to the boiling water. Let them cook for about 15 minutes, or until they’re fork-tender.
- Heat Cream Mixture:
- In a smaller pot, combine butter, 1 tablespoon salt, heavy whipping cream, and black pepper. Warm this mixture over low heat, just until the butter is melted and the cream is warm.
- Drain and Mash:
- Once the potatoes are tender, drain them, retaining the garlic, and return them to the large pot.
- Gradually add the warm cream mixture to the potatoes, mashing them with a handheld mixer or potato masher.
- Continue to alternate between adding the cream mixture and mashing until you reach your desired consistency.
For Campfire Cooking:
- Boil Potatoes and Garlic:
- Place a large pot of water over the campfire, adding 2 tablespoons of kosher salt.
- After prepping the potatoes and garlic as mentioned, add them to the boiling water. Cook until tender, which might take a bit longer on a campfire.
- Prepare Cream Mixture:
- In a smaller pot or pan, gently heat the butter, remaining salt, cream, and pepper. Use a side area of the campfire where the heat is lower to avoid burning the cream.
- Mash and Combine:
- Drain the cooked potatoes and garlic, then return them to the pot.
- Mash the potatoes while gradually incorporating the heated cream mixture until creamy and smooth.
Make-Ahead Tip:
- You can prepare these garlic mashed potatoes at home following the stovetop instructions. Once cooled, transfer them to a container. Reheat them over the campfire or on a camping stove, stirring regularly to maintain the creamy texture.
Enjoy these garlic mashed potatoes, a classic comfort food, whether you’re dining at home or enjoying the great outdoors!
Onion Bombs Recipe
Equipment:
- Large mixing bowl
- Whisk or fork
- Medium-sized pot or Dutch oven for frying
- Slotted spoon or frying spider
- Paper towels for draining
- Plate for serving
Ingredients:
- 1/2 cup all-purpose flour
- 1/4 cup cornstarch
- 1 teaspoon baking powder
- 1/4 teaspoon salt
- 1/4 teaspoon cayenne pepper
- 1 egg
- 1/4 cup milk
- 1/2 cup shredded cheddar cheese
- Oil for frying (enough to fill pot 2-3 inches deep)
Instructions:
- Combine Dry Ingredients:
- In your large mixing bowl, sift together the flour, cornstarch, baking powder, salt, and cayenne pepper.
- Mix Wet Ingredients:
- In a separate bowl, crack the egg and add the milk. Whisk together until fully combined.
- Create the Batter:
- Pour the wet ingredients into the bowl with the dry ingredients.
- Stir the mixture until it’s well combined and there are no lumps.
- Gently fold in the shredded cheddar cheese. The batter should be thick but still pourable.
- Prepare to Fry:
- Fill your pot or Dutch oven with 2-3 inches of oil.
- Heat the oil over medium heat until it reaches 350°F (175°C) or when a small drop of batter sizzles and browns within a minute.
- Fry the Onion Bombs:
- Once the oil is hot, carefully spoon tablespoon-sized balls of batter into the oil.
- Fry the bombs for about 2-3 minutes per side, or until they turn golden brown and puff up.
- Drain and Serve:
- Use a slotted spoon to remove the onion bombs from the oil and drain them on paper towels.
- Serve the onion bombs warm, accompanied by your favorite dipping sauce like ranch dressing or spicy ketchup.
Notes:
- Be sure not to crowd the pot; fry in batches if necessary to allow even cooking.
- Adjust the cayenne pepper according to your heat preference.
- Always exercise caution when frying with hot oil to prevent splatters.
- Use a cooking thermometer to ensure the oil is at the correct temperature for frying.
Enjoy your delicious and cheesy Onion Bombs as a perfect snack or appetizer!
Mexican Street BBQ Corn Recipe

Equipment:
- BBQ Grill
- Basting brush
- Tongs
- Serving dish
Ingredients:
- 3 ears of corn, husks removed
- 1/4 cup butter, melted
- 4-5 tablespoons mayonnaise
- 1/4 teaspoon smoked paprika
- 2-3 tablespoons cotija cheese, grated
- 2 tablespoons fresh cilantro, chopped
- 2 lime wedges
Instructions:
- Grill the Corn:
- Preheat your BBQ grill for 1-2 minutes to a medium-high heat.
- Place the ears of corn directly on the grill.
- Use a basting brush to coat the corn with melted butter.
- Grill the corn for about 10-15 minutes, turning them frequently to ensure even charring. Continue to brush with melted butter every 2 minutes.
- Butter and Mayo Application:
- Once the corn is slightly charred on all sides, use tongs to transfer them onto your serving dish.
- Brush the hot charred ears of corn with an additional layer of melted butter.
- Coat each ear of corn evenly with mayonnaise.
- Season:
- Sprinkle smoked paprika over the mayo-coated corn for a smoky flavor.
- Add Cheese and Herbs:
- Generously sprinkle grated cotija cheese over the corn while it’s still hot so the cheese melts slightly.
- Garnish with freshly chopped cilantro for an herby freshness.
- Finish with Lime:
- Serve each ear of corn with a lime wedge. Encourage guests to squeeze the lime over their corn just before eating for a zesty finish.
Notes:
- You can substitute cotija cheese with Parmesan or any other crumbly cheese if cotija is not available.
- Adjust the amount of mayonnaise and smoked paprika according to your taste.
- For an extra kick, you can add a sprinkle of chili powder or cayenne pepper along with the paprika.
- Enjoy your Mexican Street BBQ Corn hot and fresh off the grill for the best flavor experience!
This classic Mexican street food treat is perfect for outdoor gatherings, BBQs, and adds a festive flair to any meal.
Cilantro-Lime Rice
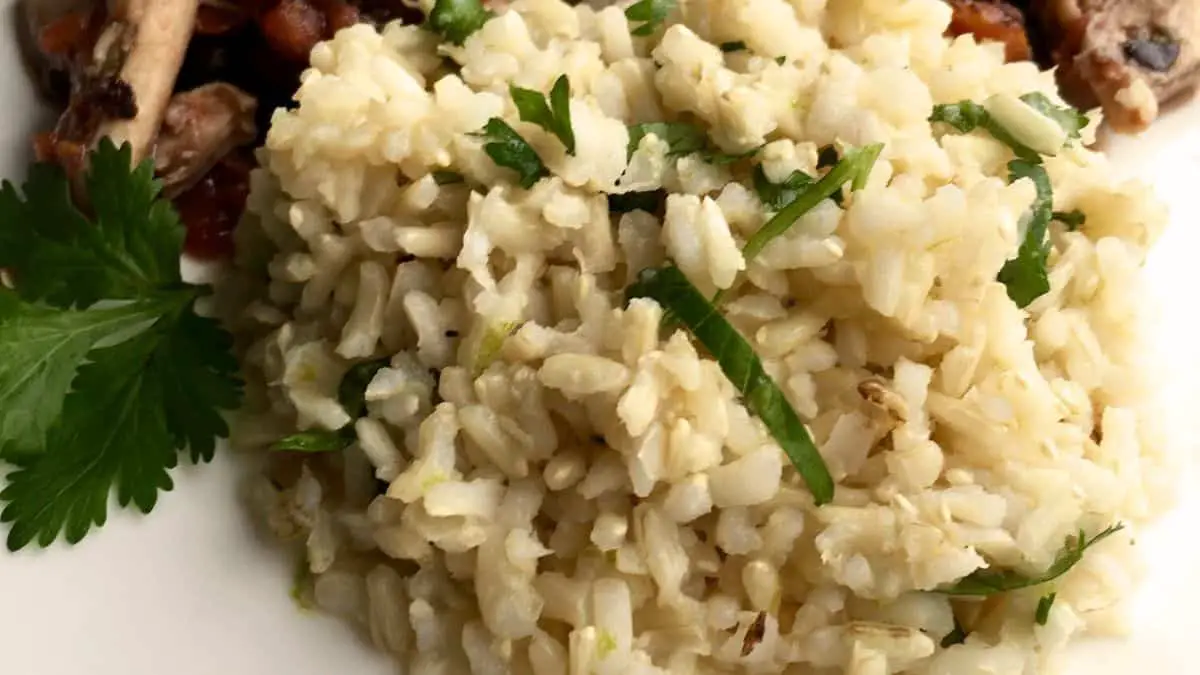
Ingredients:
- 3 cups cooked rice (white, brown, or jasmine)
- 3 tablespoons fresh lime juice
- 2 teaspoons lime zest
- 3 tablespoons fresh cilantro, chopped
- Salt and black pepper, to taste
Instructions:
- Cook Rice:
- Begin by preparing your rice according to the package instructions. Choose white, brown, or jasmine rice as preferred.
- Add Flavor:
- Once the rice is cooked, use a fork to fluff it up in the pot. While the rice is still warm, add in the fresh lime juice and lime zest.
- Mix in Herbs:
- Stir the chopped fresh cilantro into the rice until everything is well combined.
- Season:
- Taste the rice and, as needed, season with salt and black pepper. Adjust the quantities to suit your flavor preferences.
- Serve:
- Serve the cilantro-lime rice immediately while it’s warm and fragrant as a flavorful side dish.
Notes:
- For a richer taste, you can stir in a tablespoon of melted butter before adding the lime juice and zest.
- If you want to keep the rice warm for guests, transfer it to a serving dish and cover it until ready to serve.
- This rice pairs wonderfully with a variety of dishes, especially those with Mexican or tropical themes.
- Remember, the key to perfect cilantro-lime rice is in the freshness of the lime juice and cilantro, so it’s best to prepare these ingredients just before cooking.
Campfire Crispy Cheesy Cast Iron Hash Browns
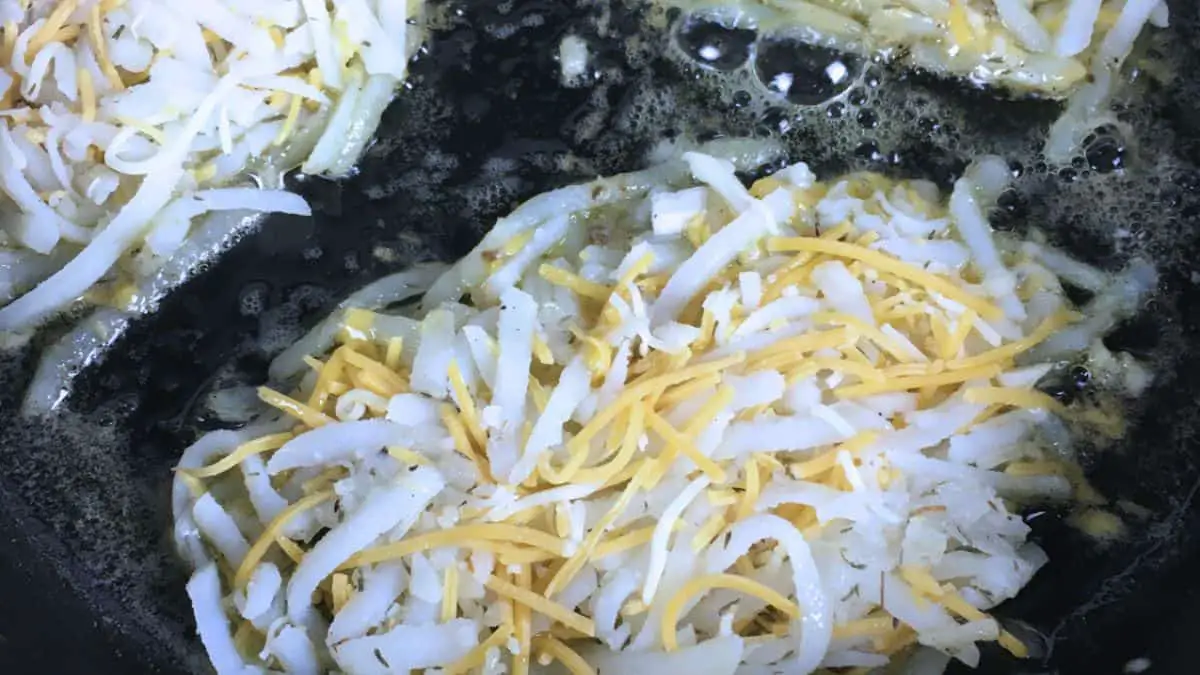
Prep Time: 10 minutes
Cook Time: 15-20 minutes
Serves: 4
Ingredients:
- 3 cups shredded potatoes, water squeezed out and patted dry
- ½ cup shredded white onion, water squeezed out and patted dry
- 1 cup cheddar jack cheese, finely shredded
- ½ teaspoon garlic powder
- ½ teaspoon dried rosemary (or 1½ teaspoons fresh, finely chopped)
- Sea salt and black pepper, to taste
- 2 tablespoons extra virgin olive oil (+ more if needed)
- 2 tablespoons unsalted butter
Directions for Campfire Cooking:
- Combine Ingredients:
- In a large mixing bowl, toss together the shredded potatoes, onion, cheddar jack cheese, garlic powder, rosemary, sea salt, and black pepper until well mixed.
- Prep the Skillet:
- Place your cast iron skillet over the campfire or camp stove at medium heat. Add the olive oil and butter, allowing the butter to melt and swirl the skillet to coat the bottom evenly.
- Cook the Hash Browns:
- Once the skillet is hot, spoon in portions of the potato mixture, pressing down to form patties. Fry until the bottoms are golden brown and crispy, about 4-5 minutes.
- Carefully flip each hash brown patty and cook for an additional 4-5 minutes, or until the other side is equally crispy and browned.
- Repeat:
- Transfer the cooked hash browns to a plate and keep warm, perhaps tented with foil. Continue with the remaining mixture, adding more olive oil to the skillet if needed.
- Serve:
- Once all hash browns are cooked and crispy, plate them up and serve hot with your favorite sides.
Enjoy your crispy, cheesy hash browns by the campfire, a perfect accompaniment to a hearty outdoor breakfast or as a satisfying meal on their own!
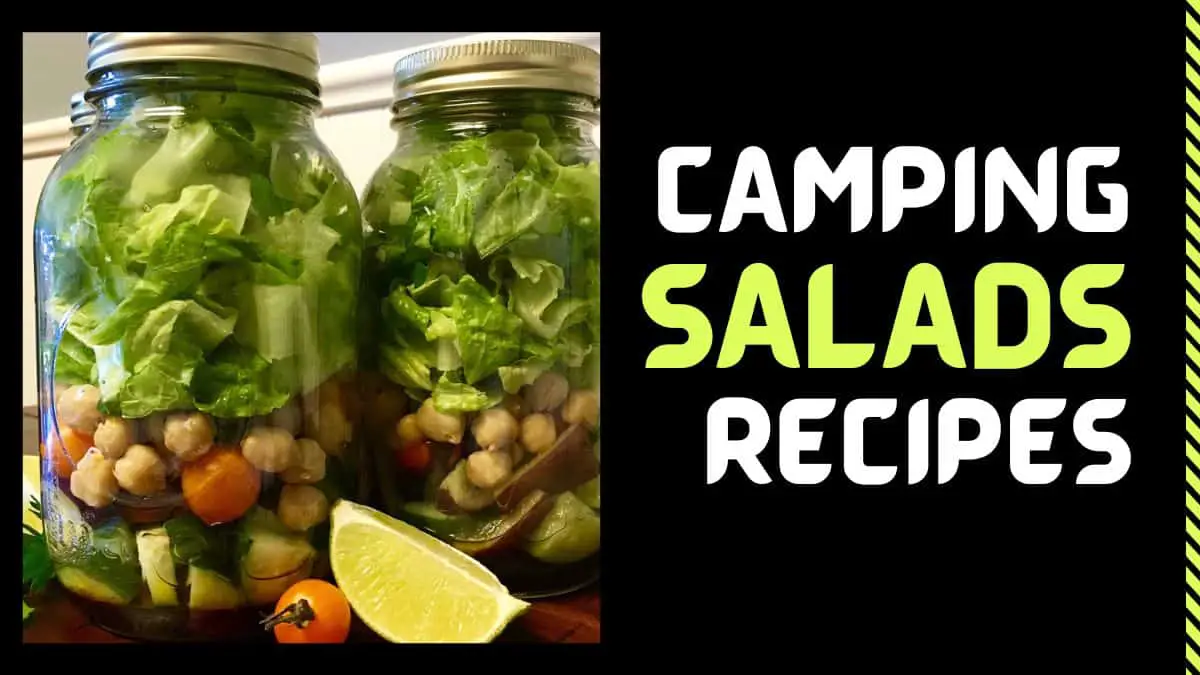
Keto Shrimp and Avocado Salad with Arugula
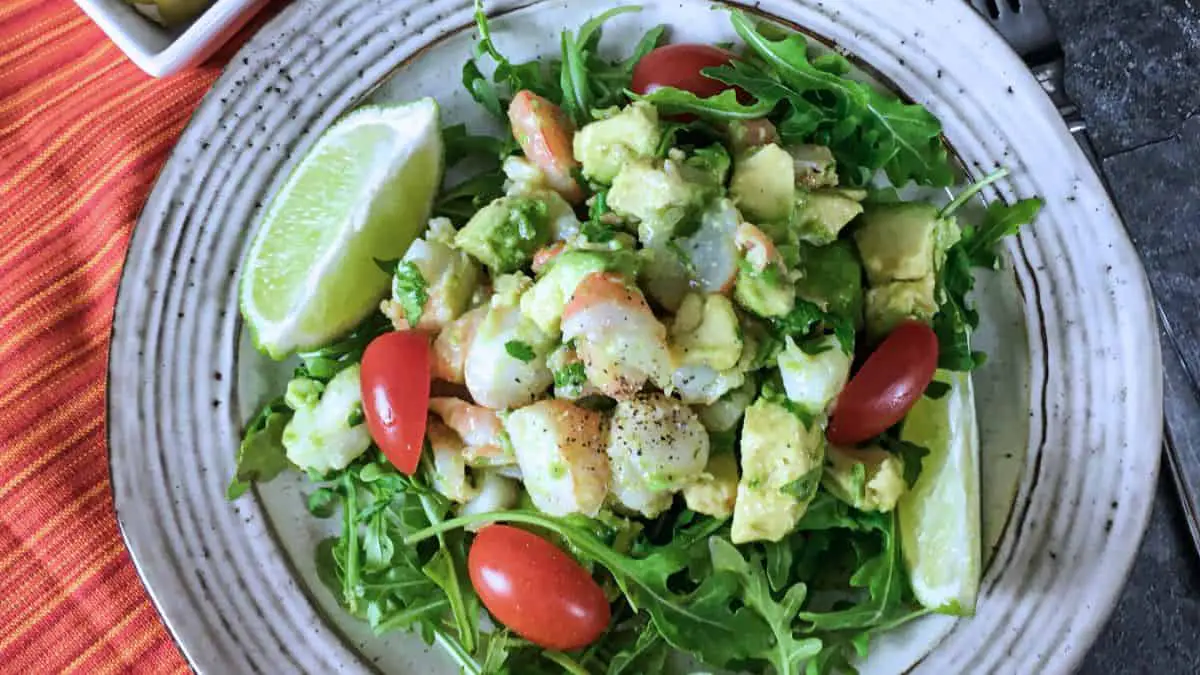
Ingredients:
- 2 Tbsp unsalted butter
- 2 cloves garlic, minced
- 1 lb shrimp, peeled and deveined
- ½ tsp ground cumin
- Sea salt and black pepper, to taste
- 1 large avocado, diced
- 3 Tbsp extra virgin olive oil
- 1½ Tbsp fresh lime juice
- 2 Tbsp fresh cilantro, chopped
- 4 cups baby arugula
- 8 grape tomatoes, halved
- 24 large green olives, halved
- 3 oz walnuts, chopped
- 1 large lime, cut into 8 wedges
Directions:
1. Prepare the Shrimp:
- Over Campfire: Place a skillet over the open flames. Melt the butter and sauté garlic for about a minute, stirring to avoid burning.
- On Camping Gas Stove: Melt butter in the skillet over medium heat. Sauté garlic until fragrant, about one minute.
After sautéing garlic, add shrimp sprinkled with cumin and season with salt and pepper. Cook until the shrimp are pink and curled, about 2-3 minutes. Remove from heat.
2. Mix Shrimp with Avocado: Once shrimp cool a bit, chop coarsely. In a mixing bowl, combine shrimp, avocado, olive oil, lime juice, and cilantro. Season with salt and pepper, and toss gently to blend flavors without breaking the avocado pieces.
3. Assemble the Salad: Arrange baby arugula on plates or in meal prep containers. Top with the shrimp and avocado mixture, distributing evenly.
4. Add Final Touches: Garnish each serving with halved grape tomatoes, green olives, and chopped walnuts for a variety of textures and flavors.
5. Serve with Lime Wedges: Place lime wedges alongside each serving. These can be squeezed over the salad for an added zesty flavor.
6. Ready to Enjoy or Store: This delicious Keto-friendly salad is perfect for immediate enjoyment or can be stored in the fridge for a quick and healthy meal later. Its blend of creamy, crunchy, and citrusy elements makes it a delightful choice for any meal.
Keto Cobb Salad with Romaine, Crispy Bacon, Avocado, and Homemade Ranch Dressing
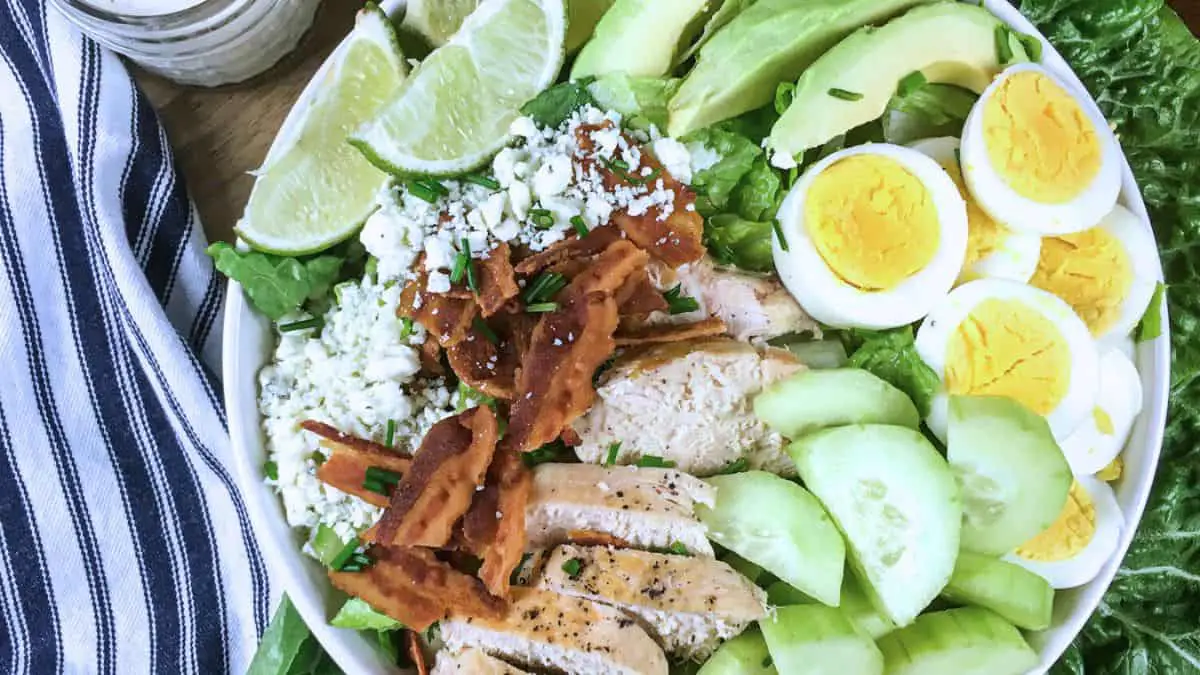
Ranch Dressing Ingredients:
- ½ cup Avocado mayonnaise (or regular mayonnaise)
- ¼ cup Greek yogurt
- 1½ tbsp fresh chives, chopped
- 1 tbsp fresh dill, chopped
- 1 tbsp fresh parsley, chopped
- ¼ tsp smoked paprika
- ½ tsp garlic powder
- ½ tsp onion powder
- Pinch of cayenne pepper
- Sea salt and black pepper, to taste
- 1 tsp Worcestershire sauce
- ¼ cup buttermilk
Salad Ingredients:
- 1 large head Romaine lettuce, washed and chopped
- 4 strips thick-cut bacon
- 4 hard-boiled eggs, sliced
- ¾ lb rotisserie chicken breast, sliced
- 1 large avocado, sliced
- 1 medium cucumber, peeled and sliced into half-rounds
- 3 oz blue cheese, crumbled
- 1 tbsp fresh chives, for garnish
- 1 large lime, cut into 8 wedges
Preparation Instructions:
-
Craft the Ranch Dressing: In a bowl, merge avocado mayonnaise, Greek yogurt, chives, dill, parsley, smoked paprika, garlic and onion powder, a dash of cayenne, salt, black pepper, Worcestershire sauce, and buttermilk. Whisk vigorously until you obtain a smooth, cohesive dressing. Adjust seasonings to your liking, then refrigerate the dressing to allow flavors to meld.
-
Prepare the Bacon:
- Over a Campfire: Grill the bacon on a cast iron skillet over the campfire until it reaches desired crispiness, turning occasionally.
- Using a Camping Gas Stove: Cook the bacon in a skillet over medium heat until crispy, then set aside on a paper towel to drain.
-
Assemble the Salad: Lay a foundation of chopped Romaine lettuce in each bowl. On top of this verdant bed, artistically arrange slices of bacon, hard-boiled eggs, chicken breast, avocado, and cucumber. Crumble the blue cheese evenly across each salad.
-
Garnishing Touch: Sprinkle fresh chives over each salad for an added layer of flavor and a pop of color.
-
Serve with Zest: Offer the creamy ranch dressing on the side for guests to add as they please. Accompany each serving with a wedge of lime for a refreshing, citrusy twist.
-
Enjoy Your Creation: Savor this harmonious blend of crispy bacon, tender chicken, creamy avocado, and zesty homemade ranch dressing. This Keto-friendly salad is not only satisfying but also a visual and flavorful delight, perfect for a hearty lunch or dinner.
Keto Chicken Salad with Spinach, Blue Cheese, and Walnuts
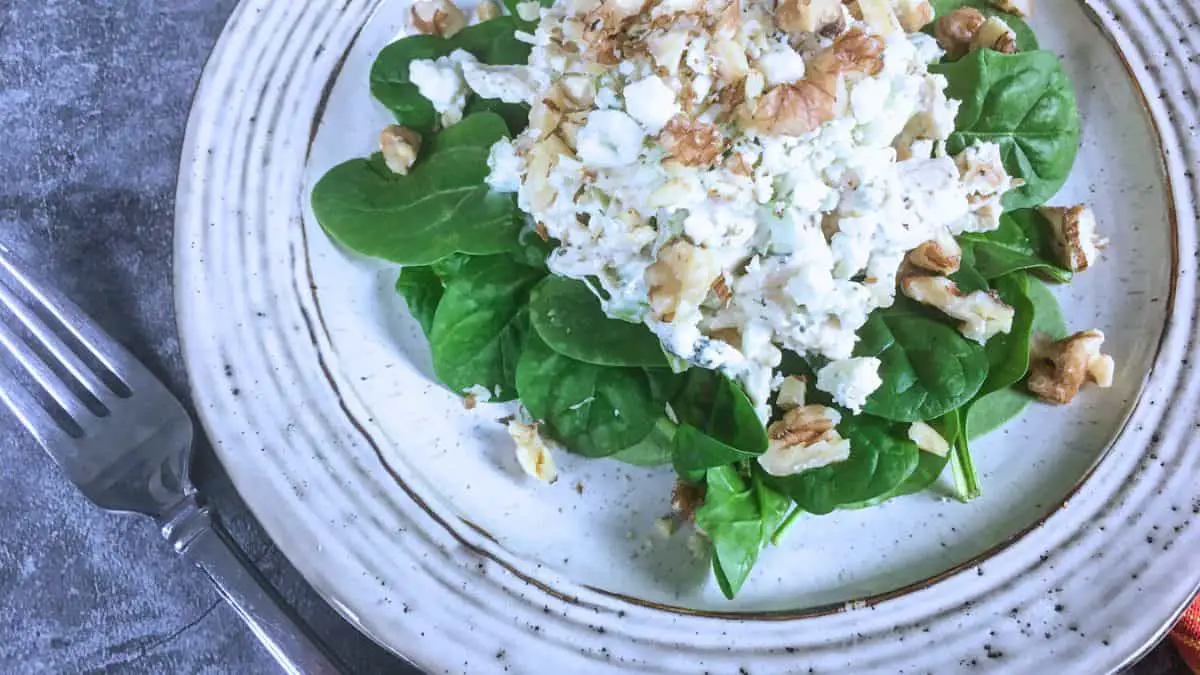
Ingredients:
- ½ cup mayonnaise
- 1 tsp Dijon mustard
- ¾ tsp dried dill
- Sea salt and black pepper, to taste
- ¾ lb rotisserie chicken breast, shredded
- 2 medium celery stalks, finely diced
- 3 cups baby spinach
- 3 oz blue cheese, crumbled
- ½ cup walnuts, coarsely chopped
Preparation Instructions:
-
Initiate the dressing: In a large mixing bowl, whisk together the mayonnaise, Dijon mustard, and dried dill. Infuse this creamy base with a desirable seasoning of salt and black pepper, ensuring a well-blended mixture.
-
Incorporate the chicken and celery: Gently fold the shredded rotisserie chicken and the finely diced celery into the bowl, ensuring each piece is evenly coated with the herby, creamy dressing.
-
Assemble the salad: Lay a bed of fresh baby spinach on each of the four chilled serving plates. Evenly distribute the dressed chicken and celery mixture atop the spinach leaves, ensuring a balanced portion on each plate.
- For a campfire twist: If you’re near a campfire, lightly toast the walnuts on a pan over the fire for added crunch and warmth.
- On a camping gas stove: Use a small skillet to lightly toast the walnuts until they are warm and fragrant, being cautious not to burn them.
-
Garnish and serve: Sprinkle a generous amount of crumbled blue cheese and the toasted walnuts over each salad. The warmth of the nuts will slightly soften the cheese, melding the flavors beautifully.
-
Ready to enjoy: Serve these plates immediately, offering a wholesome and keto-friendly meal that combines the hearty flavors of chicken and blue cheese with the freshness of spinach and the crunch of walnuts. This dish is perfect for a nutritious lunch or a light dinner, especially after a day of outdoor adventures.
Asian Cabbage Salad with Warm Spicy Peanut Dressing
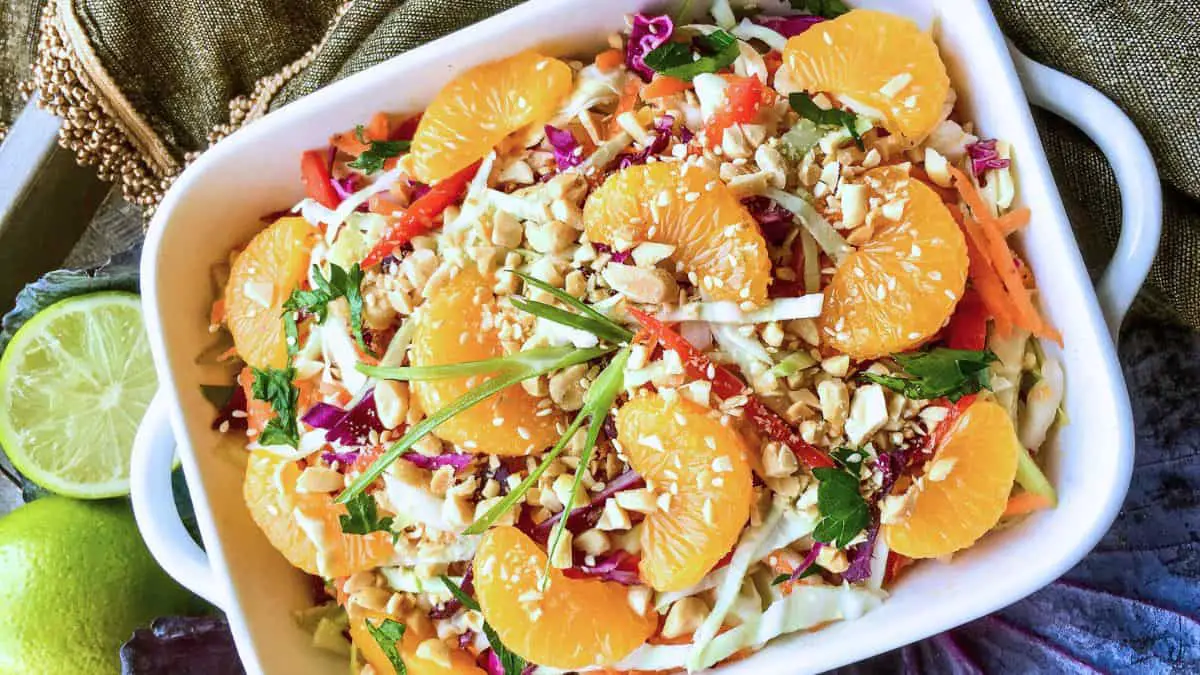
Servings: 4-6
Spicy Peanut Dressing Ingredients:
- ½ cup all-natural peanut butter
- 3 tablespoons rice vinegar
- 1 tablespoon sesame oil
- 2 teaspoons sriracha sauce
- Sea salt, to taste
- Black pepper, to taste
- 3 tablespoons tamari or coconut aminos
- 1½ tablespoons maple syrup
- 2 tablespoons fresh lime juice
- 1 tablespoon fresh ginger, finely minced
- 1-2 cloves garlic, finely minced
- ¼ cup liquid from Mandarin oranges
Salad Ingredients:
- 4 cups green cabbage, shredded
- 2 cups red cabbage, shredded
- 2 large carrots, shredded
- 1 medium red bell pepper, sliced thin
- 2 green onions (green parts only), sliced
- ¼ cup fresh cilantro leaves, chopped
- Sea salt, to taste
- Black pepper, to taste
- ¼ cup toasted peanuts, chopped
- 1 10-ounce can sugar-free Mandarin oranges (packed in juice), drained
- 1 tablespoon white sesame seeds
Directions:
- Prepare Dressing:
- In a skillet, combine peanut butter, vinegar, sesame oil, sriracha sauce, salt, and black pepper.
- Warm over medium heat, stirring until peanut butter melts and ingredients integrate, about 2-3 minutes.
- Combine Dressing Flavors:
- Lower heat to simmer. Whisk in tamari, maple syrup, lime juice, ginger, garlic, and Mandarin orange liquid until smooth.
- Simmer gently, stirring occasionally, until warmed, around 2 minutes, then remove from heat and keep warm.
- Toss Salad:
- In a large bowl, toss together green cabbage, red cabbage, carrots, bell pepper, green onions, and cilantro.
- Season with salt and pepper. Drizzle with a bit of the warm dressing and toss to coat evenly.
- Garnish and Serve:
- Present the tossed salad on a serving platter. Sprinkle with toasted peanuts, Mandarin orange segments, and sesame seeds.
- Offer remaining dressing on the side for guests to add to their preference.
Serve this vibrant, crunchy Asian Cabbage Salad with its enticing warm spicy peanut dressing for a refreshing yet hearty side or main dish!
Mason Jar Salads for Camping
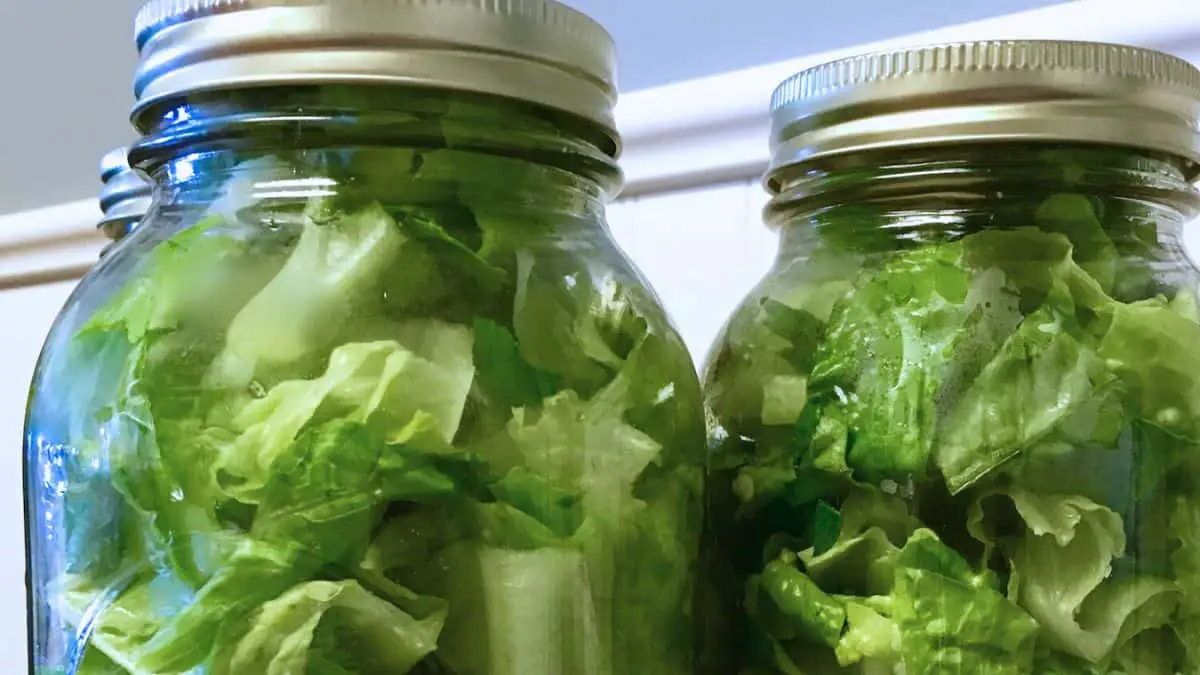
Special Equipment:
- 6 quart-sized mason jars
Basic Balsamic Dressing Ingredients:
- 2/3 cup extra virgin olive oil
- 1/3 cup good balsamic vinegar
- 2 tablespoons Dijon mustard
- 2 teaspoons fresh oregano leaves
- 3 tablespoons fresh lime juice
- 1 tablespoon honey
- Sea salt, to taste
- Black pepper, to taste
Salad Ingredients:
- 2 medium English cucumbers, chopped
- 2 large bell peppers, seeded and chopped
- 1 15-ounce can chickpeas, rinsed and drained
- 1 cup cherry or grape tomatoes, halved
- 2 heads Romaine lettuce, chopped
- ½ cup fresh parsley leaves, chopped
- ½ cup fresh basil leaves, chopped
Pre-Campout Preparation Instructions:
-
Prepare the Dressing: In a bowl, combine olive oil, balsamic vinegar, mustard, lime juice, and honey. Whisk well. Add oregano, salt, and pepper. Adjust to taste and set aside.
-
Prep the Veggies: Wash all vegetables, dry thoroughly, and chop as described. Mix Romaine lettuce with parsley and basil in a separate bowl.
-
Assemble the Salads: Pour an equal portion of dressing into each mason jar. Begin layering with cucumbers, then bell peppers, chickpeas, and tomatoes. Finish with the lettuce-herb mix. Seal jars tightly with lids.
-
Store for the Campout: Place the mason jar salads in the refrigerator. They can be stored for 4-5 days.
Campout Serving Instructions:
-
Chill Until Serving: Keep the salads chilled in a cooler during your camping trip.
-
Enjoy Fresh: When ready to eat, shake the jar to distribute the dressing, then pour into a bowl, or eat right from the jar if preferred.
Your mason jar salads are ready to provide a fresh, healthy, and convenient meal option while enjoying the great outdoors!

Scott’s Bacon And Eggs
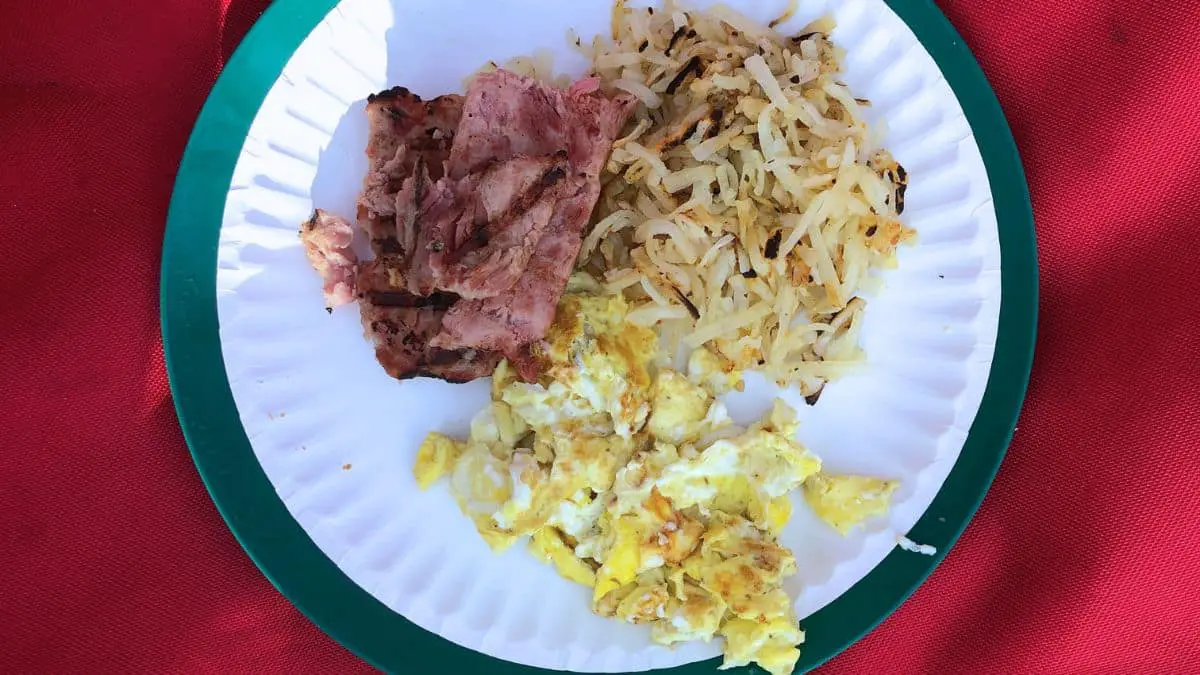
This is the most common breakfast I eat on my campouts with my friend Scott. He’s our camp cook. It’s a simple and hearty breakfast.
Ingredients:
- 1 package of bacon
- 1 carton of eggs
- Salt and Pepper
- Butter
Campfire Cooking Instructions:
- Heat your skillet:
- Place your skillet over the campfire, ensuring the heat is moderate.
- Heat the bacon:
- Heat your bacon up in the skillet to your preferred level of doneness.
- Preparing the eggs:
- Melt some butter in the skillet if you need more grease and prepare the eggs your favorite style.
- Serving:
- Serve the eggs and bacon together.
If you want to cook over a camping stove, it’s the same process.
Banana Oats Pancakes Recipe

Ingredients:
- 2 medium ripe bananas (best with lots of brown spots)
- 2 eggs
- 1/2 cup milk
- 1 teaspoon vanilla extract
- 1 ½ cups old-fashioned rolled oats (gluten-free if needed)
- 2 teaspoons baking powder
- ½ teaspoon ground cinnamon
- ¼ teaspoon salt
- Olive oil (for cooking)
Instructions for Making Batter Ahead:
- Blend the Batter:
- In a blender, combine bananas, eggs, milk, vanilla extract, rolled oats, baking powder, cinnamon, and salt.
- Blend on high until the mixture is completely smooth.
- Allow the batter to rest in the blender while you prepare your cooking surface.
Instructions for Cooking on a Campfire Griddle:
- Heat the Griddle:
- Set up your griddle over the campfire, letting it warm up to a medium heat.
- Lightly coat the griddle with olive oil spray.
- Cook the Pancakes:
- Pour 1/3 cup of batter onto the griddle for each pancake.
- Cook for 2-4 minutes, until bubbles form on the surface and the edges start to brown.
- Flip the pancakes and cook for an additional 2-3 minutes.
- Repeat with the remaining batter, ensuring to spray the griddle between batches.
- Cool the griddle with cold water as needed to prevent overheating.
Instructions for Cooking on a Camping Stove with a Griddle:
- Prepare the Stove:
- Place your griddle on the camping stove and heat to medium.
- Spray the griddle lightly with olive oil.
- Cooking Process:
- Follow the same method as for the campfire griddle, pouring, flipping, and cooking the pancakes.
- Adjust the stove’s heat as necessary to maintain even cooking.
Serving Suggestions:
- Serve these delicious and healthy Banana Oats Pancakes with your favorite toppings, like fresh fruits, honey, or maple syrup.
Enjoy these easy and nutritious Banana Oats Pancakes on your camping adventure, freshly cooked over a campfire or on a camping stove, for a perfect start to your outdoor mornings!
Breakfast Potatoes Recipe
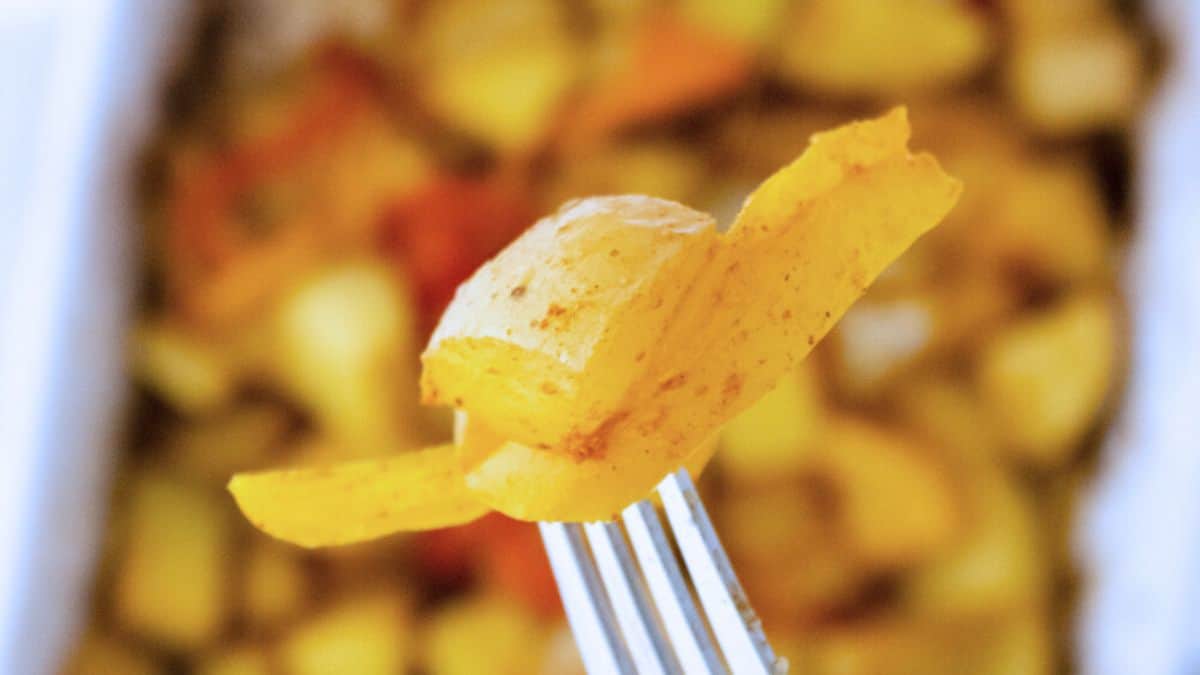
Ingredients:
- 5-6 gold, red, or russet potatoes
- 1/2 onion, sliced
- 1 cup bell pepper (any color), chopped
- 3-4 tbsp olive oil
- 2 tsp season salt
- 1 tsp kosher salt
- 1 tsp black pepper
- 1 tsp paprika
- 1/2 tsp onion powder
- 1/2 tsp garlic powder
Instructions for Dutch Oven Campfire Cooking:
- Prepare Potatoes and Vegetables:
- Thoroughly wash the potatoes and pat them dry. Cut them into halves, then cube them into 1-inch pieces.
- Place the cubed potatoes in a Dutch oven, along with the sliced onions and chopped peppers.
- Season the Mixture:
- Evenly pour olive oil over the vegetables.
- Add season salt, kosher salt, black pepper, paprika, onion powder, and garlic powder.
- Mix well with your hands, ensuring all pieces are evenly coated.
- Cooking Process:
- Cover the Dutch oven with its lid or aluminum foil.
- Place the Dutch oven over the campfire, ensuring it receives even heat but not directly over open flames.
- Cook for about 40 minutes. Then uncover and continue cooking for an additional 5-10 minutes to achieve the desired level of doneness.
Instructions for Slow Cooker Cooking:
- Potato and Vegetable Preparation:
- Follow the same steps for preparing and seasoning the potatoes, onions, and peppers.
- Slow Cooker Method:
- Transfer the seasoned potatoes, onions, and peppers to the slow cooker.
- Cover and cook on HIGH for 2 hours or on LOW for 4 hours.
Additional Notes:
- To add more flavor and heartiness, consider including smoked sausage in the mixture.
- Whether cooked over a campfire or in a slow cooker, these breakfast potatoes are a versatile and satisfying side dish for any meal.
Enjoy these delectable and easy-to-make breakfast potatoes, perfect for starting your day with a hearty meal, whether you’re camping or at home!
Hot Cakes Pancakes Recipe

Ingredients:
- 2 large eggs
- ¼ cup granulated sugar
- ¼ cup unsalted butter, melted
- 1 tsp vanilla extract
- 1 tbsp olive oil
- 2 cups whole milk
- 2 ½ cups all-purpose flour, leveled
- 3 tsp baking powder
- ½ tsp salt
- Non-stick cooking spray
Instructions for Making Batter Ahead of Time:
- Prepare the Batter:
- In a mixing bowl, whisk together eggs, sugar, and melted butter until combined.
- Stir in vanilla extract, olive oil, and milk until the mixture is uniform.
- Gradually add in flour, baking powder, and salt, blending together until the batter forms. It should be thick but free of lumps.
- Store the batter in an airtight container and refrigerate if preparing ahead of your camping trip.
Instructions for Cooking on a Campfire Griddle:
- Heat the Griddle:
- Over a campfire, place a griddle and let it heat up to a medium-low temperature.
- Spray the griddle with non-stick cooking spray.
- Cook the Pancakes:
- Spoon 1/3 cup of pancake batter onto the griddle for each pancake.
- Cook for about 2 minutes or until bubbles appear on the surface, then flip the pancake.
- Cook for an additional 1-1.5 minutes on the other side.
- Repeat with the remaining batter, adjusting the heat as necessary to prevent burning.
Instructions for Cooking on a Camping Stove with a Griddle:
- Prepare the Stove:
- Set up your camping stove and place a griddle over it, setting the heat to medium-low.
- Lightly spray the griddle with non-stick cooking spray.
- Cooking Process:
- Follow the same process as above for cooking the pancakes on the griddle over your camping stove.
Notes:
- For uniformly round pancakes, cook one at a time.
- Vegetable oil can be used as an alternative to olive oil.
- If the griddle begins to burn, cool it down with a rinse of cold water.
- A medium-low fire is ideal to cook the pancakes evenly and prevent raw batter in the center.
Enjoy these delightful Hot Cakes Pancakes, freshly cooked over a campfire or on a camping stove, perfect for a hearty start to your adventurous days outdoors!
Toasted Instant Oatmeal

Equipment:
- Skillet or saucepan
- Stove or campfire
- Spoon or spatula for stirring
- Bowl for serving
Ingredients:
- 1 packet of instant oatmeal (or 1/2 cup if from a larger container)
- Water (amount as directed on oatmeal package)
- Optional: Butter or oil for toasting
- Optional toppings: brown sugar, cinnamon, nuts, dried fruit
Instructions:
- Prepare the Skillet:
- Place your skillet or saucepan over medium heat on your stove or set it up on a grate over your campfire.
- Toast the Oatmeal:
- If desired, add a small pat of butter or a drizzle of oil to the skillet to aid in toasting and prevent sticking.
- Pour the instant oatmeal into the skillet. Toast the oats, stirring frequently with a spoon or spatula, until they are golden brown and fragrant. This usually takes about 2-3 minutes.
- Boil Water:
- While the oatmeal is toasting, heat up the water separately in a kettle or another pot until it’s hot and steaming. If you have limited resources, you can remove the toasted oatmeal and use the same skillet to heat the water.
- Combine Oatmeal and Water:
- Transfer the toasted oatmeal to a bowl. Carefully pour the hot water over the oatmeal, using the amount specified on the package directions.
- Finish Preparation:
- Stir the oatmeal and water together until well combined. Let it sit for a minute or two to thicken to your desired consistency.
- Add Toppings:
- Sprinkle with your favorite toppings, such as brown sugar, cinnamon, nuts, or dried fruit.
- Serve:
- Once the oatmeal is at the perfect consistency for your taste, it’s ready to enjoy!
Notes:
- Toasting the oatmeal before adding water will give it a nuttier flavor and a more interesting texture.
- Be attentive while toasting the oats to prevent burning. They can go from toasted to burnt quite quickly.
- Adjust the sweetness and flavor to your liking with your choice of toppings.
Enjoy your warm and toasty bowl of instant oatmeal – perfect for a cozy breakfast in the great outdoors or at home!
Slow Cooker Dutch Oven Apple Cinnamon Steel Cut Oats
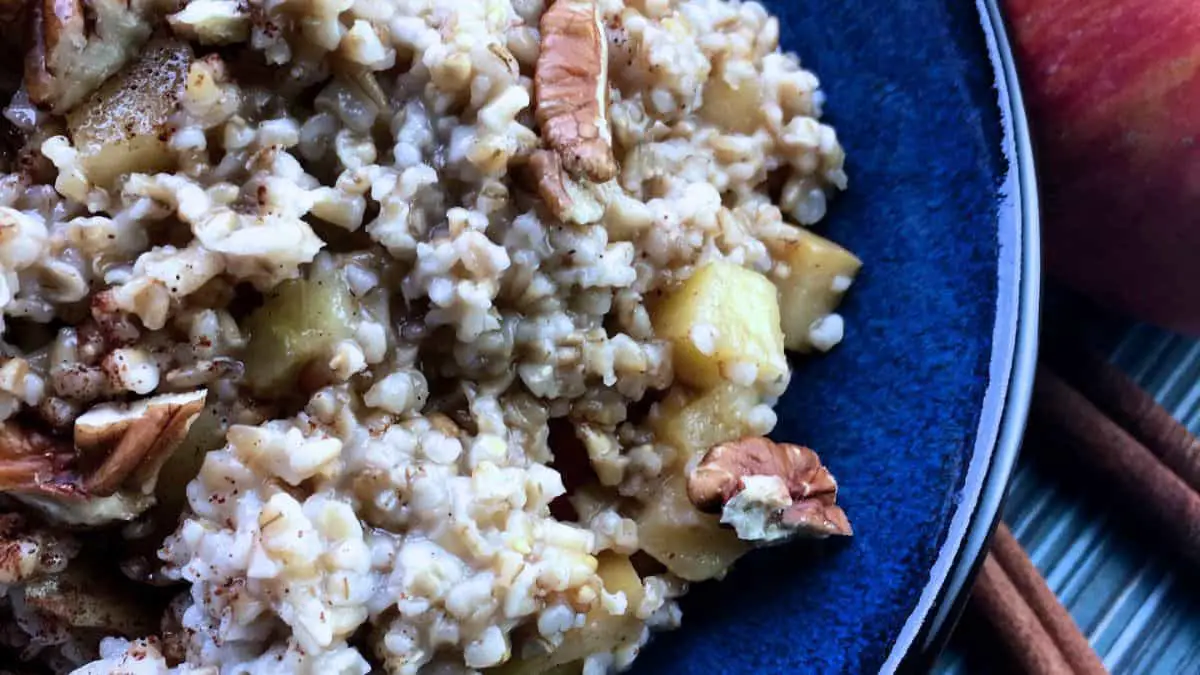
Preparation Time: 10 minutes
Cooking Time: 6-8 hours on low
Servings: 4
Important Tips:
- Use steel cut oats only to ensure proper cooking and texture.
- Grease or line your slow cooker to prevent sticking.
Ingredients:
- 1 cup steel cut oats
- 3 cups water
- 1 cup fresh apple cider
- 2 medium apples, cored and diced (for cooking)
- 1½ tablespoons honey, preferably local
- 1 teaspoon ground cinnamon
- ½ teaspoon ground nutmeg
- ½ teaspoon ground allspice
- ½ teaspoon salt, to taste
To Serve:
- 1 medium apple, cored and diced (for topping)
- ½ cup pecans, chopped
- Real maple syrup (optional)
Instructions:
- Prepare Slow Cooker:
- Grease the sides of your slow cooker crock thoroughly or line it to prevent sticking.
- Combine Ingredients:
- Place steel cut oats, water, apple cider, diced apples (for cooking), honey, cinnamon, nutmeg, allspice, and salt into the prepared crock. Stir well to integrate all the ingredients.
- Cook:
- Secure the lid on the slow cooker and set it to cook on low. Let it simmer for 6-8 hours. As slow cookers vary, begin checking for doneness at the 5-hour mark and adjust the time as needed.
- Final Touches:
- Once the oats are cooked to your liking, allow the oatmeal to cool slightly for a more pleasant temperature.
- Serve:
- Ladle the warm oats into bowls. Top each serving with freshly diced apple, chopped pecans, and a drizzle of real maple syrup if desired for added sweetness.
Note:
- This hearty breakfast is perfect for chilly mornings and can be refrigerated for quick reheats throughout the week. If the oatmeal thickens after cooling, simply add a little milk or water when reheating to reach your desired consistency.
Campfire Dutch Oven Spicy Buffalo Chicken Dip

Prep Time: 15 minutes
Cook Time: 60-90 minutes over campfire
Serves: A party-sized crowd
Ingredients:
- 2 lbs. boneless, skinless chicken breasts
- Salt and black pepper, to taste
- ½ cup chicken broth, preferably organic
- 3 stalks celery, very finely chopped (pre-chopped before the campout)
- 2 8-oz. packages cream cheese, softened (pre-softened before the campout)
- ¾ cup Frank’s hot sauce
- 1 small jalapeno pepper, finely minced (pre-minced before the campout)
- 6 oz. crumbled blue cheese, divided
- 1 cup Mozzarella cheese, finely shredded
- 3 green onions, tops sliced (optional, pre-sliced before the campout)
- 1 small jalapeno, sliced (optional, pre-sliced before the campout)
To Serve:
- Celery stalks
- Carrot sticks
Campfire Instructions:
- Prepare Chicken:
- Season chicken breasts with salt and black pepper.
- Layer Ingredients in Dutch Oven:
- Place the seasoned chicken in the Dutch oven. Add the chicken broth, finely chopped celery, softened cream cheese, hot sauce, minced jalapeno, and half of the crumbled blue cheese.
- Cooking:
- Place the Dutch oven over the campfire. Cook for about 1 to 1.5 hours, or until the chicken is fully cooked and shreds easily with a fork. Check periodically and stir gently to prevent sticking or burning.
- Shred Chicken:
- About 30 minutes before serving, shred the chicken using two forks directly in the Dutch oven.
- Add Cheese:
- Stir in the shredded Mozzarella cheese until well combined. Cover the Dutch oven and continue to cook until the cheese is completely melted.
- Garnish:
- Garnish the dip with the remaining blue cheese, sliced green onions, and jalapeno slices if using.
- Serve:
- Serve the warm dip directly from the Dutch oven with celery stalks and carrot sticks for dipping.
Slow Cooker Instructions:
- Combine Ingredients in Slow Cooker:
- Place the seasoned chicken, chicken broth, pre-chopped celery, pre-softened cream cheese, hot sauce, pre-minced jalapeno, and 4 oz. of blue cheese into the slow cooker.
- Cook:
- Cover and set to cook on high for 3-4 hours or on low for 6-7 hours.
- Shred and Add Cheese:
- Near the end, shred the chicken and stir in the shredded Mozzarella cheese. Cover and let it melt.
- Garnish and Serve:
- Once the cheese is melted, garnish as desired and serve with celery and carrot sticks.
Whether you’re around a campfire or taking advantage of a slow cooker at your campsite, this spicy Buffalo chicken dip is sure to be a crowd-pleaser! Remember to do any blending, pureeing, or softening of the cream cheese before heading out if you’re unable to do so at your campsite.

Simple Dutch Oven Donuts

Ingredients:
- 1 Can of Premade Biscuits
- 2 Cups Vegetable Oil (for frying)
- ½ Cup Granulated Sugar
- 2 tsp Ground Cinnamon
Campfire Cooking Instructions:
- Prepare the Dutch Oven:
- Place your Dutch oven over the campfire, ensuring the heat is moderate. Pour in the vegetable oil to a depth of about 2 inches. Allow it to heat up until it reaches around 350°F. You can test the oil by dropping a small piece of biscuit dough; it should sizzle and float.
- Donut Preparation:
- Open the can of premade biscuits. Lay them out on a flat surface and use a small round cutter or bottle cap to punch out a hole in the center of each biscuit, forming the classic donut shape.
- Frying the Donuts:
- Carefully place the biscuits into the hot oil. Fry them for about 2 minutes on each side or until golden brown. Work in batches to avoid overcrowding the Dutch oven.
- Mixing Sugar and Cinnamon:
- In a separate bowl, combine granulated sugar and cinnamon.
- Coating the Donuts:
- Once the donuts are fried, transfer them to a paper towel-lined plate to drain excess oil. While still warm, toss them in the sugar-cinnamon mixture until evenly coated.
- Serving:
- Serve these delightful donuts warm, perhaps with a cup of coffee or hot chocolate on the side.
Alternative Camping Stove Instructions:
- Heat the Oil:
- Pour vegetable oil into a deep skillet or pot and heat it over the camping stove to about 350°F.
- Follow Steps 2-6 Above:
- Prepare and fry the donuts as described, then coat with the cinnamon-sugar mix.
Enjoy your Simple Dutch Oven Donuts, a perfect treat to sweeten your camping adventures!
Sweet & Savory Spiced Pecans
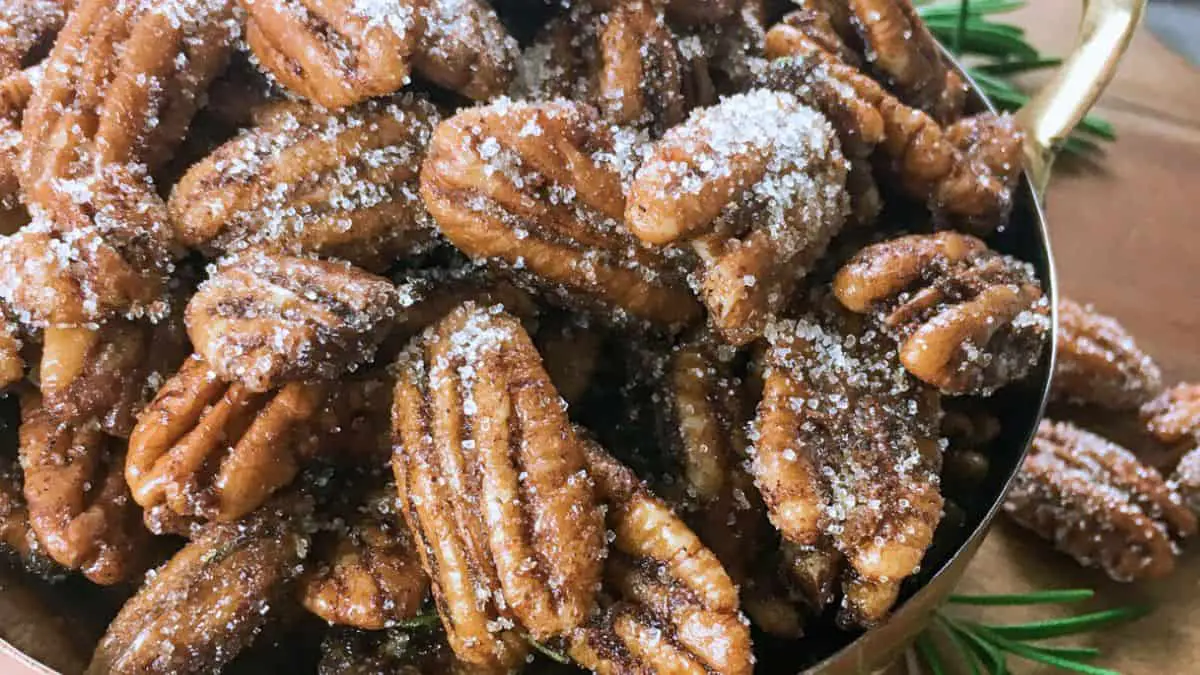
Ingredients:
- Fresh Rosemary Leaves: 1 Tbsp (finely chopped)
- Ground Cinnamon: 2 tsp
- Ground Cardamom: 1 tsp
- Allspice: ¾ tsp
- Ground Cloves: ½ tsp
- Cayenne Pepper: ¼ tsp
- Fine Sea Salt: ½ tsp
- Black Pepper: ¼ tsp
- Coconut Oil: ¼ cup
- Real Maple Syrup: ½ cup
- Whole Pecans: 4 cups
- Raw Cane or Large Grain Sugar: ¼ cup (for dusting)
Campfire or Home Oven Cooking:
Preparation:
- Spice Blend Creation:
- In a bowl, mix together rosemary, cinnamon, cardamom, allspice, cloves, cayenne, salt, and pepper. This blend brings a melody of flavors that will coat the pecans.
- Syrup Mixture:
- Heat coconut oil in a pan until melted, then stir in maple syrup. Warm this mixture for about a minute to infuse the flavors.
- Pecan Coating:
- Toss the pecans in a large mixing bowl. Drizzle the warm syrup over them, followed by a generous sprinkling of your homemade spice blend. Mix well to ensure each pecan is joyfully coated.
Cooking:
- In the Oven:
- If at home, preheat your oven to 350°F. Spread the pecans on a parchment-lined baking sheet, giving them space to breathe and roast evenly.
- Bake for 30 minutes, stirring midway, to ensure even toasting.
- Over the Campfire:
- In a Dutch oven, spread the pecans in a single layer. Position the Dutch oven over a gentle campfire, and let the pecans roast, stirring now and then, for about 30 minutes. The goal is to achieve a light toastiness and an aromatic bliss.
Finishing Touches:
- Sugar Dusting:
- Once slightly cooled, dust the pecans with raw cane sugar, giving them a final toss to ensure a delicate sweetness on every piece.
- Serving & Storage:
- Serve warm as a delightful snack or let them cool completely before storing in an airtight container. These pecans will be a hit, whether you’re by the campfire or enjoying a quiet evening at home.
Delight in these uniquely prepared Sweet & Savory Spiced Pecans, perfect for any outdoor adventure or a cozy evening treat!
Cake Mix Chocolate Chip Cookie Bars

Ingredients:
- 1 Box Yellow Cake Mix (13.25 ounces)
- 2 Large Eggs
- ½ Cup Vegetable Oil
- ⅓ Cup Water
- ¾ Cup Chocolate Chips + Extra for topping
Items Needed:
- 9x13 Baking Pan
- Larger Mixing Bowl
- Measuring Cups (both liquid and solid)
- Rubber Spatula
- Nonstick Cooking Spray
- Mixer (hand or stand mixer)
Directions:
1. Prepare the Baking Pan:
- For Oven Baking (At Home): Preheat your oven to 350°F (175°C). Coat a 9x13 baking pan evenly with nonstick cooking spray.
- For Campfire Baking: Line the baking pan with aluminum foil, extending over edges for easy removal. Coat with nonstick spray.
- For Gas Stove Baking: Follow campfire preparation for the baking pan.
2. Mix the Batter:
- In a large bowl, blend the cake mix, eggs, vegetable oil, and water until smooth. A mixer makes this easier, but a spoon and some elbow grease work too.
3. Add Chocolate Chips:
- Gently fold in ¾ cup of chocolate chips using a rubber spatula. Be careful not to overmix here.
4. Transfer the Batter to the Pan:
- Pour the batter into your prepared pan, smoothing it out evenly.
5. Add Extra Chocolate Chips:
- Sprinkle additional chocolate chips over the top for a chocolaty finish.
6. Baking:
- Oven: Bake for about 24 minutes. The bars should be slightly gooey in the middle.
- Campfire/Gas Stove: Cover the pan with aluminum foil and place over indirect heat, checking occasionally. The cooking time will vary based on heat intensity.
7. Cooling and Slicing:
- Allow the bars to cool in the pan for 20-30 minutes before slicing. This rest period helps them set properly.
Tips for Perfect Cookie Bars:
- Avoid Overmixing: Once chocolate chips are added, gently fold them in. Overmixing can affect the texture.
- Pan Size Matters: A smaller pan yields thicker bars; adjust temperature and baking time accordingly.
- Check Cake Mix Size: This recipe is adaptable to slightly larger cake mix sizes as well.
- Chocolate Chip Caution: Too many chips can make the bars too gooey and difficult to handle.
- Patience Pays Off: Let the bars cool and set before slicing to avoid a gooey mess.
- Enjoy the Texture: These bars are meant to be softer than traditional cookies.
Baking At Home Tip:
- For a convenient treat, bake these bars at home before your trip. Simply follow the conventional oven instructions. Once cooled, slice and store them in an airtight container. They’re a perfect grab-and-go snack for outdoor adventures!
No Mess S’Mores
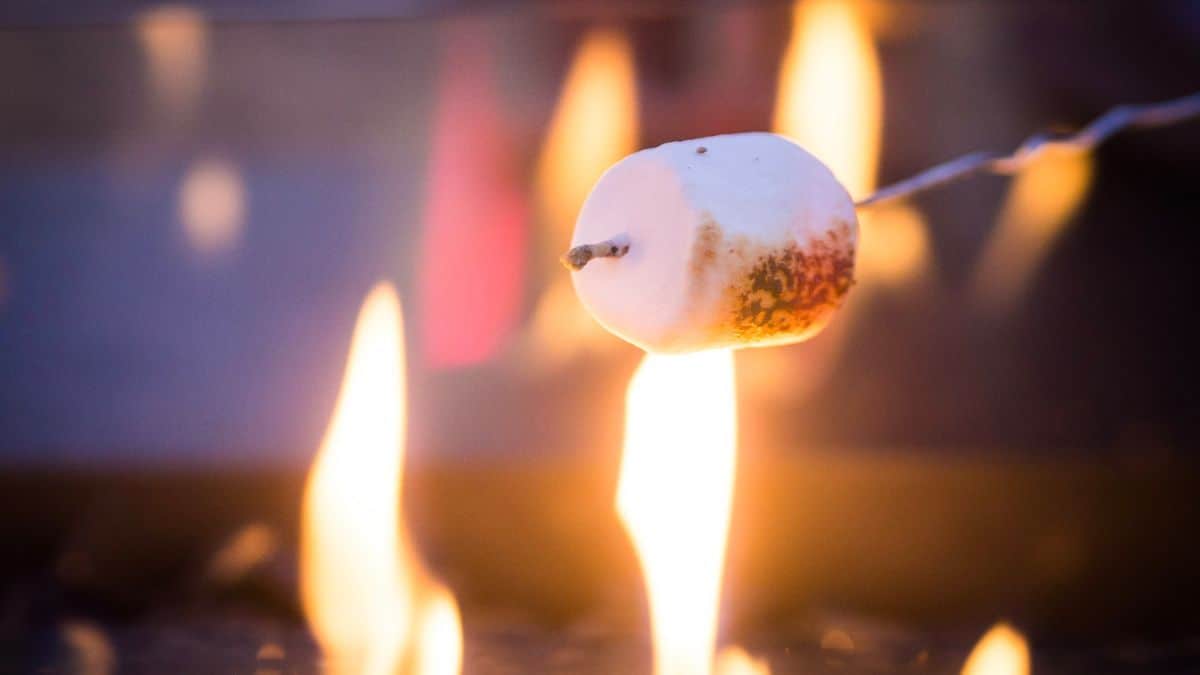
Equipment:
- Roasting stick or skewer
- Campfire or portable camping stove with flame
Ingredients:
- 1 large marshmallow
- 2 fudge-striped cookies
Instructions:
- Prepare Your Roasting Setup:
- If using a campfire, ensure it has burned down to a point where you have a good bed of coals with low flames, ideal for roasting. For a camping stove, ignite the burner to a low setting.
- Roast the Marshmallow:
- Place the marshmallow on the roasting stick or skewer.
- Hold it above the heat source and roast, turning frequently, until it reaches your preferred level of doneness. Some like a light golden brown while others prefer a charred exterior.
- Assemble the S’Mores:
- Carefully remove the roasted marshmallow from the skewer and sandwich it between the two fudge-striped cookies. The chocolate side of the cookies should face inward, towards the marshmallow, to melt slightly and stick to it.
- Enjoy Your No Mess S’Mores:
- Allow it to cool for a moment, as the marshmallow will be very hot. Once it’s safe to eat, enjoy your mess-free s’more!
Notes:
- Be cautious when roasting the marshmallow, as the sugar can catch fire easily if held too close to the flame.
- It’s handy to have a plate or napkin nearby in case the marshmallow sticks to the skewer.
- Always supervise children while roasting marshmallows over an open flame.
Enjoy this twist on a classic camping treat, perfect for satisfying your sweet tooth without the sticky fingers!
Campfire Popcorn
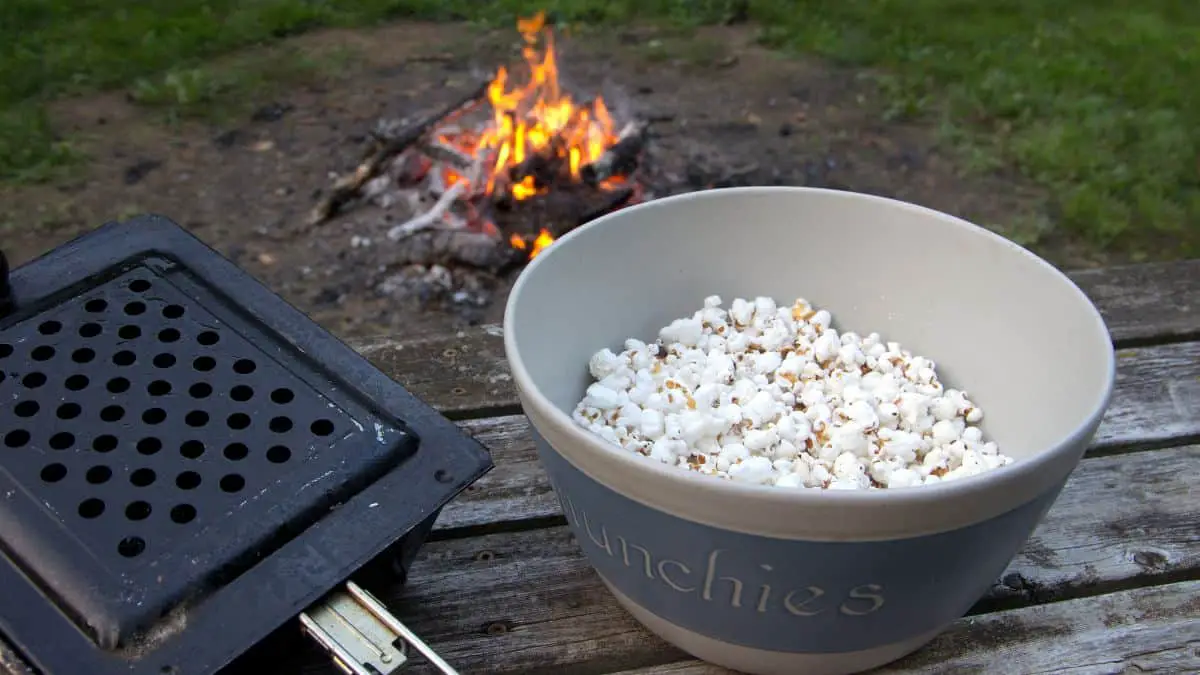
Equipment:
- Pot or Dutch oven with lid
- Campfire or grill
- Long-handled spoon or stirrer
Ingredients:
- Popcorn kernels
- Olive oil
- Salt
Instructions:
- Prepare the Campfire:
- Get your campfire to a stable heat with a good bed of coals.
- Heat the Pot:
- Place your pot or Dutch oven on the campfire grate to heat up.
- Add Oil and Popcorn:
- Pour a small amount of olive oil into the pot—just enough to lightly coat the bottom.
- Add the popcorn kernels to the pot and use the long-handled spoon to stir, ensuring the kernels are coated with the oil.
- Pop the Corn:
- Place the lid on the pot. Allow the popcorn to cook over the campfire, shaking the pot occasionally to prevent the kernels from burning and to promote even popping.
- Listen for the Pops:
- As the kernels begin to pop, keep a close ear. Once the popping sound slows down and there’s a couple of seconds between pops, it’s time to remove the pot from the heat.
- Season and Serve:
- Carefully remove the lid away from your face to avoid steam burns. Season the popcorn with salt to taste and give it a good stir to distribute the seasoning.
- Enjoy:
- Serve the popcorn straight from the pot or pour it into individual bowls or paper bags.
Notes:
- Be careful when removing the pot from the fire, as it will be very hot.
- For different flavors, consider adding garlic powder, Parmesan cheese, or your favorite popcorn seasoning mix along with the salt.
- To avoid burning, never leave the pot unattended while on the fire.
This campfire popcorn is a delightful snack to enjoy under the stars!
No Bake Chocolate Peanut Butter Cookies Recipe
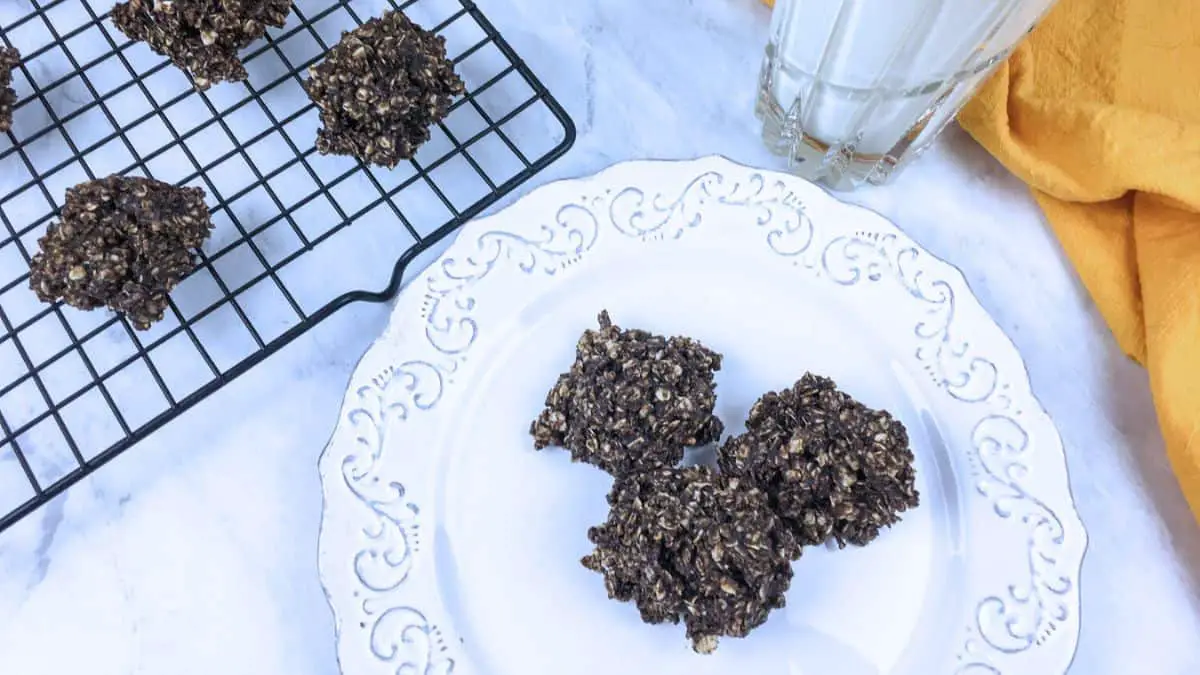
Preparing at Home or at Your Campsite:
- Prepare for Shaping Cookies:
- Lay out a large sheet of parchment paper or a reusable baking mat on a flat surface, such as a table or a tray. This will be used to place your cookies.
- Mixing Ingredients:
- In a large bowl, combine the creamy peanut butter, coconut oil, maple syrup, and vanilla extract. If you’re at home, you can gently heat this mixture in the microwave for about a minute on 50% power, then stir until smooth. If you’re at a campsite, you can place the bowl over a pot of warm water (double boiler style) and stir until the ingredients are well-combined and slightly melted.
- Adding Cocoa and Oats:
- Mix in the dark unsweetened cocoa powder and salt. Once incorporated, gradually add the quick cook oats, stirring continuously, until all oats are well-coated with the peanut butter mixture.
- Forming Cookies:
- Using a spoon or a small ice cream scoop, drop rounded tablespoons of the mixture onto your prepared parchment paper or baking mat. Flatten slightly into a cookie shape.
- Chilling the Cookies:
- If at home, place the baking sheet in the freezer for about 30 minutes to allow the cookies to set. At a campsite, you can place them in a cool box or a portable fridge.
- Serving:
- Once set, serve the cookies immediately. They can be a bit soft and may lose their shape if left out for too long, especially in warm weather.
- Storage:
- Store any leftover cookies in a container in the refrigerator or a cool box to maintain their shape and freshness.
Enjoy!
- These No Bake Chocolate Peanut Butter Cookies are a delightfully easy treat perfect for satisfying your sweet tooth, whether you’re at home or enjoying the great outdoors on a camping trip. They require no oven, making them ideal for a quick and convenient dessert option!
Campfire Cherry Dump Cake in a Dutch Oven
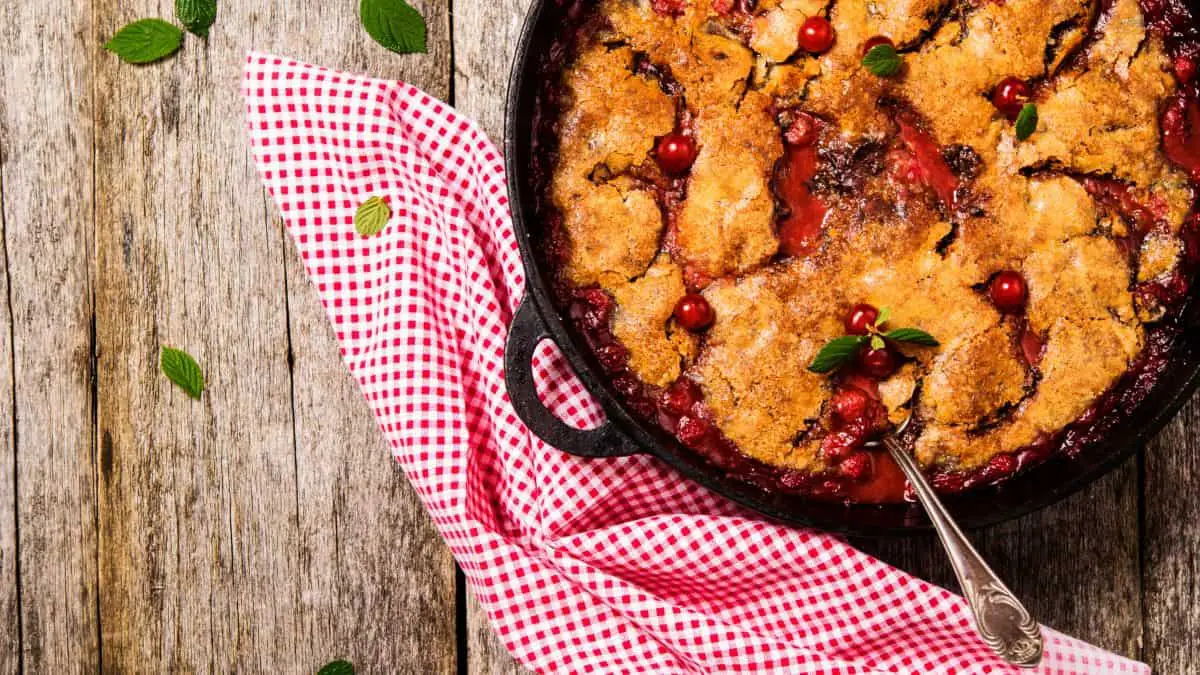
Equipment:
- Dutch oven
- Charcoal briquettes or campfire coals
- Can opener
- Spoon or spatula
- Aluminum foil (optional for easier cleanup)
Ingredients:
- 1 box yellow cake mix
- 3 (21-ounce) cans cherry pie filling
- 1 stick butter (1/2 cup), melted
- ¼ cup packed light brown sugar
Instructions:
- Prepare the Coals:
- Begin by igniting your charcoal briquettes or getting your campfire going until you have hot coals. You’ll need enough coals to provide a consistent heat source both under and on top of the Dutch oven.
- Assemble the Dump Cake:
- Lightly coat the inside of the Dutch oven with cooking spray, or line it with aluminum foil for easier cleanup.
- Pour the cherry pie filling into the Dutch oven and spread it out evenly.
- Sprinkle the dry yellow cake mix over the top of the cherry filling, distributing it as evenly as you can.
- Drizzle the melted butter over the top of the cake mix, trying to cover all the dry areas.
- Finally, sprinkle the brown sugar evenly across the surface.
- Bake the Dump Cake:
- Place the lid on the Dutch oven. Arrange a layer of hot coals on the ground and place the Dutch oven on top. Then, shovel additional hot coals on the lid of the Dutch oven.
- The cake should bake for about 45-55 minutes, but start checking at around 30 minutes. You want the top to be golden brown and the filling bubbly.
- To achieve an even baking temperature, rotate the Dutch oven and the lid occasionally (every 15 minutes or so), but avoid peeking inside too often as this can release heat.
- Serve:
- Once the cake is golden brown on top, carefully remove the Dutch oven from the coals. Let it sit for a few minutes to cool down a bit.
- Serve warm, scooping portions directly from the Dutch oven.
Notes:
- The actual cooking time can vary based on the heat of your coals and the ambient outdoor conditions, so use the color and bubbliness as a guide.
- For a crispy top, allow the Dutch oven to sit directly on a bed of coals and heap more on the lid.
- Don’t forget to handle the Dutch oven with protective gloves or mitts, as it will be very hot.
- Enjoy with a scoop of vanilla ice cream on top if desired!
Campfire Cream Cheese Pancakes with Fresh Berries

Ingredients:
- 8 oz. cream cheese, softened and cut into cubes
- 6 large eggs
- ½ teaspoon ground cinnamon
- 1 teaspoon real vanilla extract
- 3 tablespoons extra virgin olive oil, divided
- 1 cup fresh blueberries
- 1 cup fresh strawberries, sliced
- 2 tablespoons powdered monk fruit (optional)
- Real maple syrup, to serve
Directions for Campfire Cooking:
- Prepare the Pancake Batter:
- Using a high-powered battery-operated blender or mixing thoroughly by hand, combine cream cheese, eggs, cinnamon, and vanilla extract until the mixture is completely smooth.
- Heat the Griddle or Skillet:
- Place a cast iron griddle or skillet over medium heat on your camp stove or over the campfire grate. Once hot, lightly coat with ½ tablespoon of olive oil using a heat-resistant brush or spatula.
- Cook the Pancakes:
- For each pancake, pour about 2-3 tablespoons of batter onto the griddle, spacing them out to prevent merging. Cook until the edges firm up and start to brown, about 3-4 minutes.
- Gently flip each pancake using a flexible, heat-proof spatula, and cook for an additional 1-2 minutes, or until the bottom is golden brown. Move the cooked pancakes to a plate and cover to keep warm. Repeat with the remaining batter, adding olive oil as needed.
- Serve with Berries:
- Arrange the pancakes on plates, topping them with fresh blueberries and sliced strawberries. If using, dust with powdered monk fruit sweetener.
- Drizzle with real maple syrup just before serving for added sweetness.
Enjoy these delicate cream cheese pancakes surrounded by nature’s scenery! They’re a delightful way to start your morning in the great outdoors.
Blueberry Almond Granola

Ingredients:
- 3 tablespoons coconut oil, melted
- 3 tablespoons pure maple syrup
- 1 teaspoon pure vanilla extract
- 1¼ cups rolled oats
- ¼ cup slivered almonds
- ¼ cup sunflower seeds
- ¼ cup dried dates, pitted and chopped
- 1 teaspoon ground cinnamon
- ¼ teaspoon salt
- 1¼ cups fresh blueberries, divided
- Coconut yogurt, for serving
Directions:
- Preparation:
- Preheat your oven to 375°F (190°C).
- Line a large, rimmed baking sheet with parchment paper or a Silpat® baking mat.
- Mix Wet Ingredients:
- In a sizable mixing bowl, combine the melted coconut oil, maple syrup, and vanilla extract.
- Combine Dry Ingredients:
- To the wet mixture, add oats, slivered almonds, sunflower seeds, chopped dates, cinnamon, and salt.
- Stir until these ingredients are well-coated with the oil mixture.
- Incorporate Blueberries:
- Fold in one cup of the blueberries gently to avoid crushing them.
- Bake Granola:
- Transfer the mixture onto the prepared baking sheet, spreading it into a thin, even layer.
- Bake in the preheated oven for 10 minutes, then stir and continue baking for another 10 minutes.
- If needed, bake for an additional 5 minutes or until the oats are a nice golden brown. Be careful not to overbake to prevent bitterness.
- Cool and Serve:
- Remove the granola from the oven and let it cool completely on the baking sheet to crisp up.
- Once cooled, serve the granola with a dollop of coconut yogurt and a sprinkle of the remaining fresh blueberries.
Enjoy your homemade Blueberry Almond Granola as a delicious breakfast or a crunchy snack!
This granola is great for camping, as it can be made ahead of time and stored in an airtight container. Serve with coconut yogurt for a delightful breakfast, or munch on it as is for a tasty trail snack!
Keto Avocado Cheddar Breakfast Sandwiches

Make-Ahead Directions:
-
Begin by warming your oven to 325ºF (163ºC). Prepare two sizable baking trays with parchment or a non-stick baking mat and put aside.
-
Whip the egg whites with an electric mixer in a bowl until they form firm peaks, indicating they’re ready to hold their shape. Temporarily set this aside.
-
In a different bowl, blend together the cream cheese with four egg yolks and a sprinkle of garlic powder (keep the remaining yolks for another recipe). Season with a pinch of sea salt and freshly cracked black pepper, then integrate thoroughly.
-
With care, fold the stiff egg whites into the cream cheese blend, doing so gently to maintain the airiness. Aim for a fully combined mixture without stirring too much.
-
Onto your prepared sheets, dollop roughly a quarter cup of the fluffy mix to craft eight even circles, smoothing them into half-inch layers and allowing a gap between each.
-
Cook in the preheated oven until the egg discs adopt a golden hue and solidify in the middle, which should take around 15-20 minutes.
-
Post baking, optional trimming can be done for shape. Add a slice of cheddar to half of the rounds and just melt it back in the oven for about 2 minutes.
-
Layer the melty cheese rounds with avocado, tomato, and a halved strip of bacon, capping them with the remaining egg circles. These can be cooled and stored for your camping trip.
To Eat Cold:
- Simply construct the sandwiches following the steps above, let them cool, and store them in an airtight container. They can be enjoyed cold as a refreshing and satisfying keto-friendly breakfast while camping.
Reheating Over a Campfire:
- Wrap each sandwich securely in aluminum foil.
- Place the foil-wrapped sandwiches on a grate over your campfire, not in direct flames but near enough to get the heat.
- Turn the sandwiches every couple of minutes, heating them through for about 10-15 minutes, depending on the fire’s intensity.
Reheating Over a Gas Stove:
- Keep the sandwiches wrapped in foil.
- Place a frying pan or skillet over the gas stove and turn to a moderate heat.
- Put the foil-wrapped sandwiches in the pan, flipping them occasionally, for about 5-8 minutes until they are warmed to your preference.
Making the Sandwiches at the Campsite Using Foil Packets:
- Follow the make-ahead directions up to step 7, but instead of melting the cheese in the oven, place the cheese atop the egg rounds within individual foil packets.
- Add avocado, tomato, and bacon as per your taste.
- Seal the foil packets and store them in your cooler.
- When ready to cook, place the foil packets on a grill over the campfire or on a camp stove, heating them through until the cheese is melted and the sandwich is warm, typically for about 10-15 minutes on a campfire or 5-8 minutes on a stove.
Enjoy your Keto Avocado Cheddar Breakfast Sandwiches as a delicious start to your camping day, whether fresh and chilled or warmed by the fire’s glow!
Keto Avocado Cheddar Breakfast Wraps

Make-Ahead Directions for Camping:
-
In a sizable mixing bowl, whisk together the eggs, half & half, and garlic powder. Drizzle in the olive oil and season the blend with sea salt and black pepper until the mixture is homogenous.
-
Heat a small amount of butter in a non-stick pan over a medium flame until it’s just melted. Pour in a portion of the egg mixture, tilting the pan to spread it out into a thin layer.
-
Lower the heat slightly, and let the egg cook gently under a lid until it firms up, which should take a few minutes. Be careful not to let it overcook or brown too much.
-
Once set, move the cooked egg wrap to a plate and carry on with the rest of the egg mixture until you have a stack of wraps.
-
Cook the bacon in a separate pan until it’s reached the desired crispness, then transfer it onto paper towels to absorb excess oil.
-
In the bacon-infused pan, quickly sauté the spinach with a touch of seasoning until it just begins to wilt.
-
Assemble the wraps by layering spinach, crispy bacon, and avocado slices onto each egg base. Introduce a splash of hot sauce for a bit of kick. Fold them up neatly.
To Enjoy Cold:
- Assemble the wraps as directed above and store them in your cooler. They’re great enjoyed cold, perfect for an on-the-go camping breakfast.
Reheating Over a Campfire:
- Wrap each individual breakfast wrap in aluminum foil.
- Place the foil packets near the outer edges of the campfire where they can heat through without burning, turning them occasionally.
- Allow about 10 minutes for the wraps to heat up, depending on the intensity of your campfire’s heat.
Reheating Over a Gas Stove:
- Keep the wraps wrapped in foil.
- Use a pan over low to medium heat on your gas stove.
- Place the foil packets in the pan, rotating them occasionally for even warming, for about 5 minutes or until they are thoroughly heated.
Preparation at the Campsite Using Foil Packets:
- Prepare the egg mixture as instructed above, but instead of cooking them in a pan, pour the batter into individual foil packets and fold to seal.
- Cook the bacon in a pan over the camp stove or campfire and prepare the spinach in the remaining bacon fat.
- Open the foil packets and assemble the wraps by adding the spinach, bacon, and avocado slices on top of the cooked egg.
- Drizzle with hot sauce and fold the egg over the filling, then reseal the foil packet.
- Warm each foil packet over the campfire or on a camp stove for a few minutes to meld the flavors and enjoy a hot breakfast wrap right at your campsite.
These Keto Avocado Cheddar Breakfast Wraps are not only delicious but also convenient for any camping trip, offering versatility whether you choose to savor them cold or warm them up for a toasty morning meal.